Loading ...
Loading ...
Loading ...
©
2024 DJI All Rights Reserved.
21
DJI Modify
User Manual
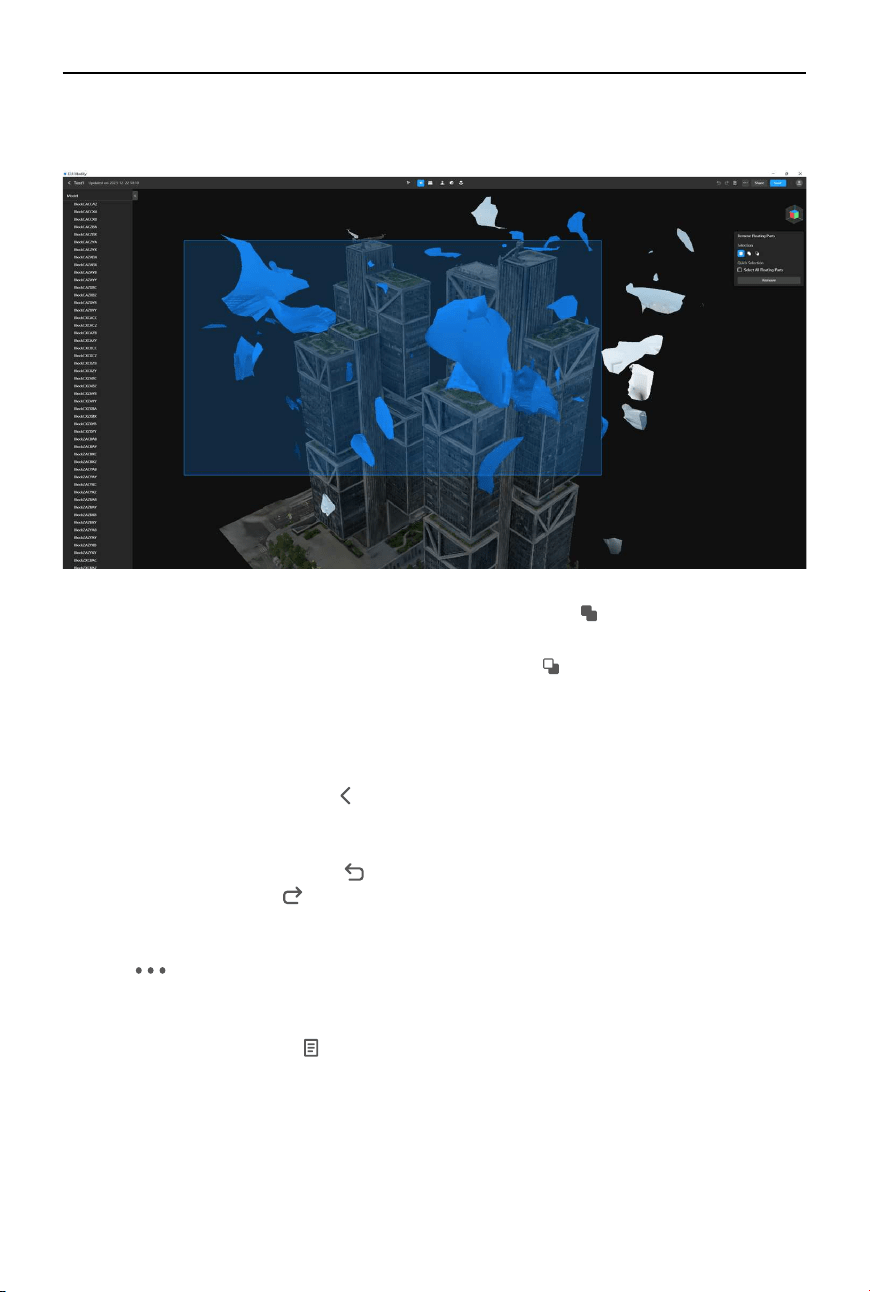
3. Left-click on a recognized oating part to select it. Alternatively, left-click and drag to draw a
selection area and select all oating parts within the area.
4. To add additional oating parts to the current selection, click or press the Shift key and
drag to draw a selection area.
5. To subtract oating parts from the current selection, click
or press the Alt key and drag to
draw a selection area.
6. To delete the currently selected floating parts, click Remove or press the Delete or
Backspace key on the keyboard.
7. Click Save in the top right corner or press Ctrl + S on the keyboard to save the current edits.
Additionally, when users click
in the top left corner to return to the home screen, DJI
Modify will also automatically save the current changes. After saving, the model will show
the updated state with the oating parts removed.
8. To undo a previous action, click
in the action bar or press Ctrl + Z on the keyboard. After
undoing, users can click in the action bar or press Ctrl + Shift + Z on the keyboard to redo
the action if needed.
9. Users need to render the model to synchronize the modications to the high-quality model.
Click
in the top right corner and select Render. DJI Modify will synchronize the edits to
the high-quality model and generate a new B3DM model.
10. Once the model has been rendered, it cannot be undone. Users can start over by restoring
to a previous version. Click
to open the version history, select “Before Rendering” or “Initial
Version” from the list, and restore the selected version. After restoration, users can re-edit
the model.
Loading ...
Loading ...
Loading ...