Loading ...
Loading ...
Loading ...
20
©
2024 DJI All Rights Reserved.
DJI Modify User Manual
Rotation Tool
When entering the model editing screen, the rotation tool will be in the default viewing
state. Red represents the X-axis plane of the model, green represents the Y-axis plane,
and blue represents the Z-axis plane. Clicking on any plane will transition the model
display to the corresponding plane.
Move the mouse cursor to the position of the rotation tool, and the cursor will change into a
small hand icon. In this state, left-click and drag the mouse rotate the rotation tool, and the
model will rotate accordingly. When rotating the rotation tool by dragging it, the initially selected
plane will be highlighted.
Toolbar
The toolbar at the top of the window includes the following tools from left to right.
View
Users can use the view tool in the toolbar to browse or switch views of the model.
1. When entering the model editing screen, it will default to the view tool. Alternatively, users
can click
to enable the view tool.
2. When browsing a model, users can adjust the viewing angle by pressing down on the scroll
wheel and moving the mouse, move the model by clicking the right mouse button and
dragging, and zoom in and out by scrolling the scroll wheel.
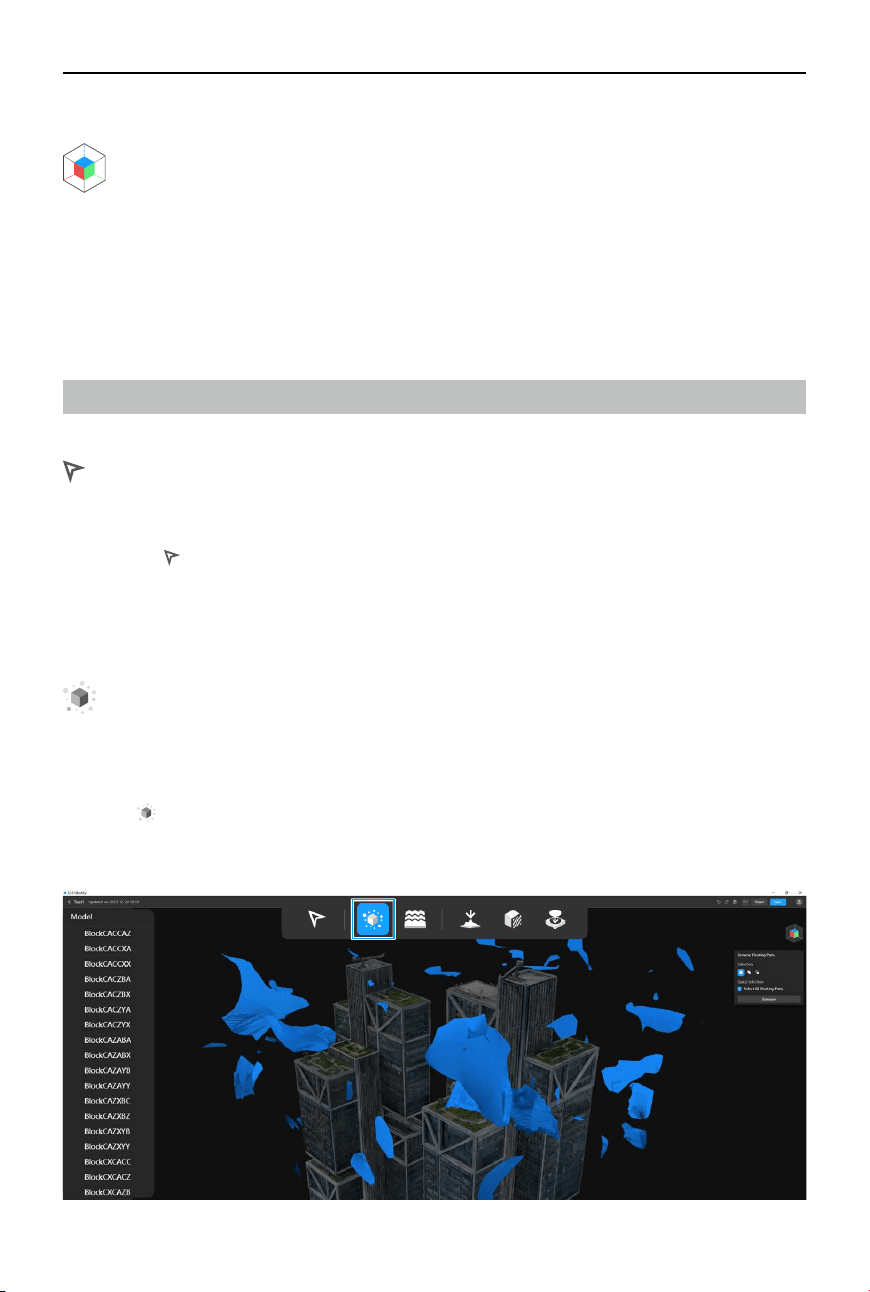
Removing Floating Parts
The removing oating parts tool helps clean up and rene the model by removing fragments or
objects that are not connected or attached to the main body of the model.
1. Open a project and enter the model editing screen.
2. Click
to enable the removing oating parts tool. DJI Modify will automatically select all
recognized oating parts in the model and highlight them in blue, while the non-oating
parts of the model will be displayed in gray.
Loading ...
Loading ...
Loading ...