Loading ...
Loading ...
Loading ...
1Keep this unit and your subwoofer (with
internal amplifier) unplugged from AC wall
outlets.
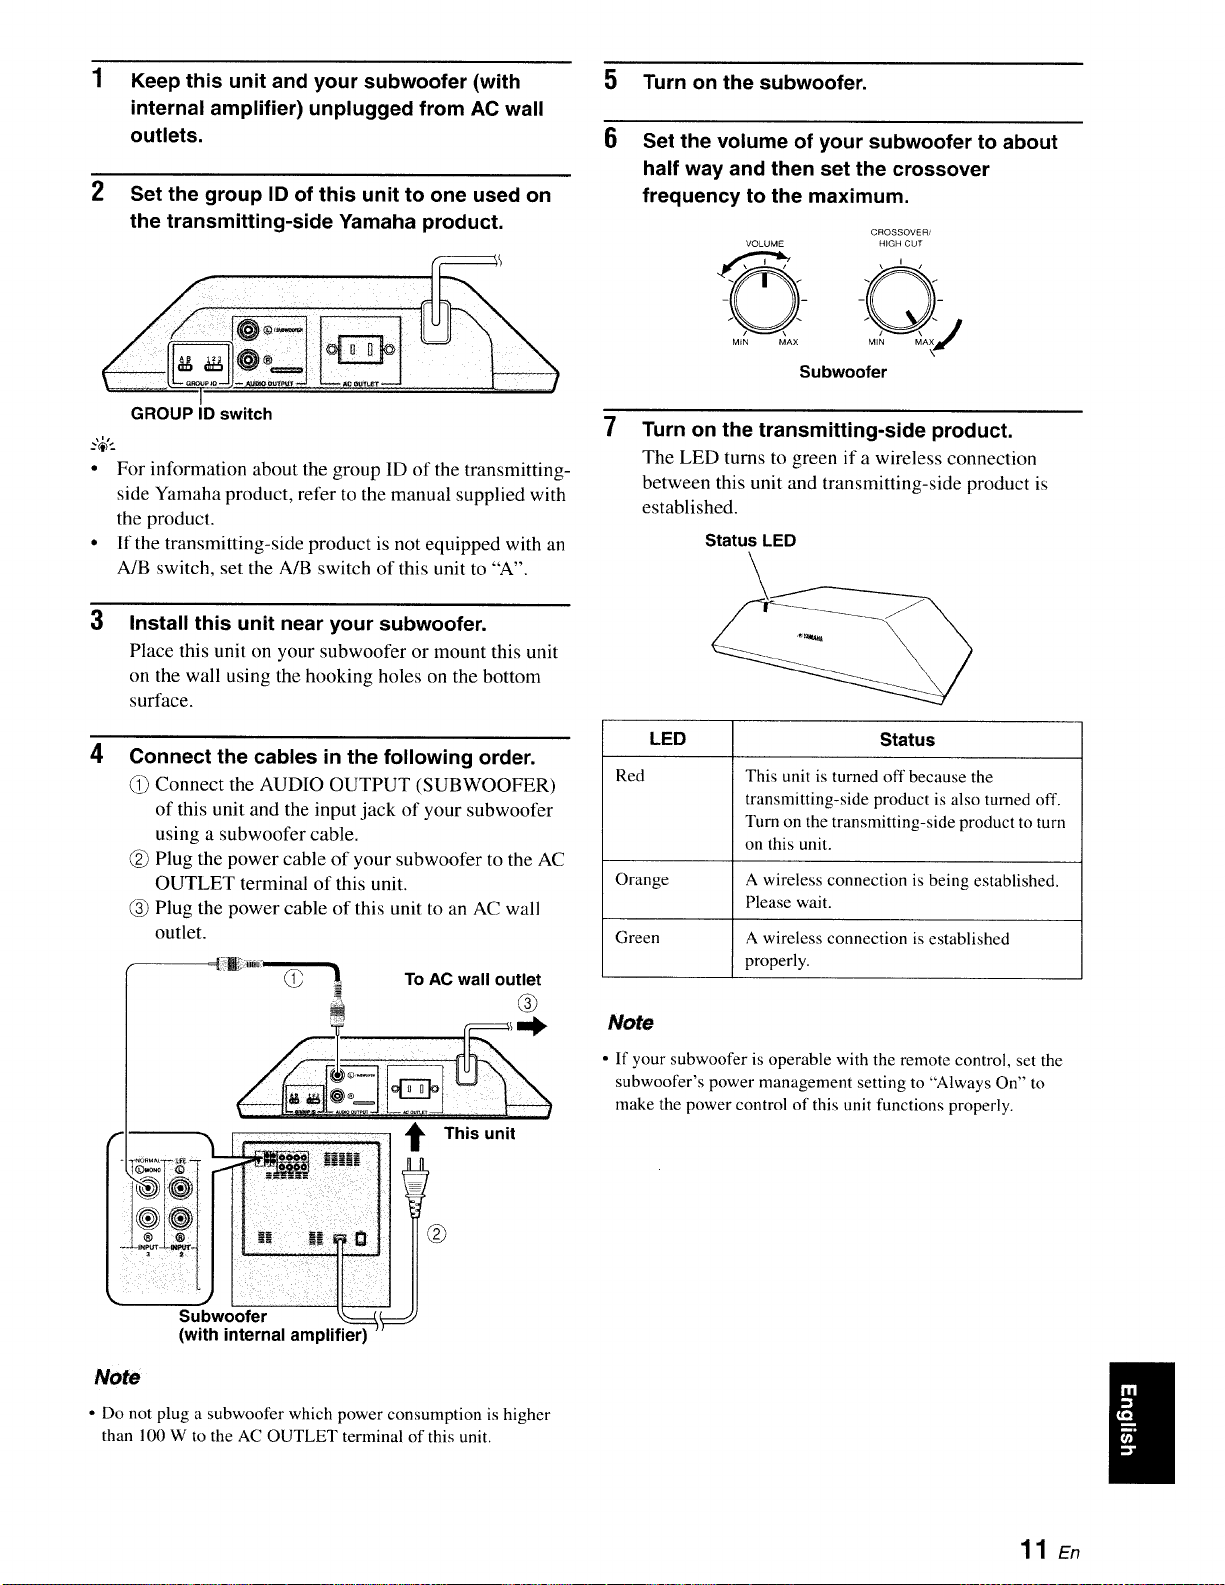
Set the group ID of this unit to one used on
the transmitting-side Yamaha product.
-ilill !iiiiiiii ii !iii
GROUP ID switch
.,_,.
•For information about the group ID of the transmitting-
side Yamaha product, refer to the manual supplied with
the product.
• If the transmitting-side product is not equipped with an
A/B switch, set the A/B switch of this unit to "A".
3Install this unit near your subwoofer.
Place this unit on your subwoofer or mount this unit
on the wall using the hooking holes on the bottom
surface.
4Connect the cables in the following order.
Connect the AUDIO OUTPUT (SUBWOOFER)
of this unit and the input.jack of your subwoofer
using a subwoofer cable.
Plug the power cable of your subwoofer to the AC
OUTLET terminal of this unit.
(_ Plug the power cable of this unit to an AC wall
outlet.
To AC wall outlet
:i.......
!i!,woo!!!
(with internal amplifier)
t This unit
No_ ¸
• Do not plug a subwoofer which power consumption is higher
than 100 W to the AC OUTLET terminal of this unit.
5 Turn on the subwoofer.
6Set the volume of your subwoofer to about
half way and then set the crossover
frequency to the maximum.
CROSSOVER/
VOLUME HIGH CUT
MiN MAX
Subwoofer
7Turn on the transmitting-side product.
The LED turns to green if a wireless connection
between this unit and transmitting-side product is
established.
Status LED
LED Status
Red This unit is turned off because the
transmitting-side product is also turned off.
Turn on the transmitting-side product to turn
on this unit.
Orange A wireless connection is being established.
Please wait.
Green A wireless connection is established
properly.
Note
• If your subwoofer is operable with the remote control, set the
subwoofer's power management setting to "Always On" to
make the power control of this unit functions properly.
11 En
Loading ...
Loading ...
Loading ...