Loading ...
Loading ...
Loading ...
WINDING/INSTALLING THE BOBBIN
GETTING READY
33
1
j
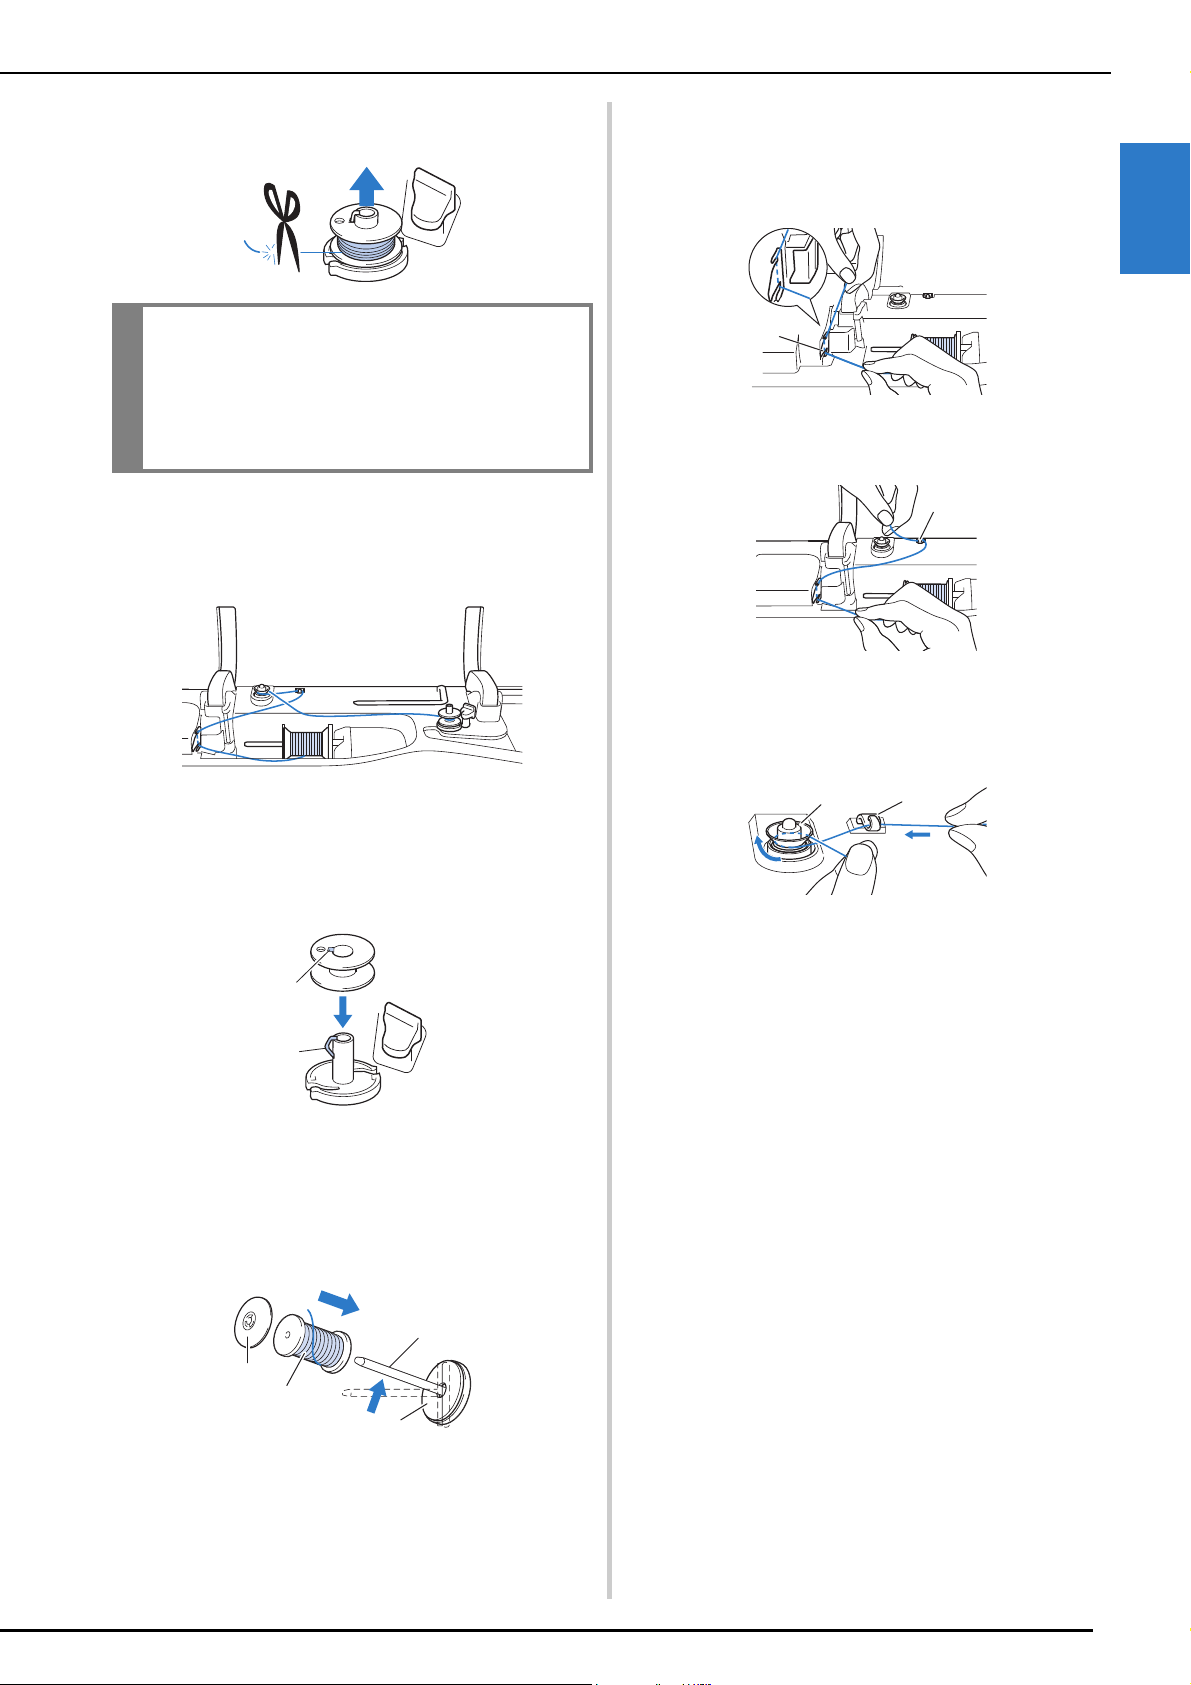
After bobbin winding is finished, cut the thread with
scissors and remove the bobbin.
Using the Spool Pin
You can use the main spool pin to wind the bobbin before
sewing. You cannot use this spool pin to wind the bobbin
while sewing.
a
Turn the main power to ON and open the top cover.
b
Align the groove in the bobbin with the spring on the
bobbin winder shaft, and set the bobbin on the shaft.
1 Groove in the bobbin
2 Spring on the bobbin winder shaft
c
Remove the spool cap and place the spool of thread for
the bobbin onto the spool pin.
Slide the spool onto the spool pin so that the thread
unwinds to the front from the bottom.
1 Spool pin
2 Spool cap
3 Spool of thread
4 Spool felt
d
Slide the spool cap onto the spool pin as far as possible
to the right, with the rounded side on the left.
e
While holding the thread with both hands, pass the
thread through grooves of the thread guide plate.
1 Thread guide plate
f
Pass the thread through the thread guide.
1 Thread guide
g
Pass the thread around the pretension disk making sure
that the thread is under the pretension disk.
Pull the thread as far as possible.
1 Pretension disk
2 Thread guide
h
Follow steps g through j on page 32 through
page 33.
IMPORTANT
• When removing the bobbin, do not pull on the
bobbin winder seat. Doing so could loosen or
remove the bobbin winder seat, and could
result in damage to the machine.
a
b
a
b
c
d
a
a
a
b
Loading ...
Loading ...
Loading ...