Loading ...
Loading ...
Loading ...
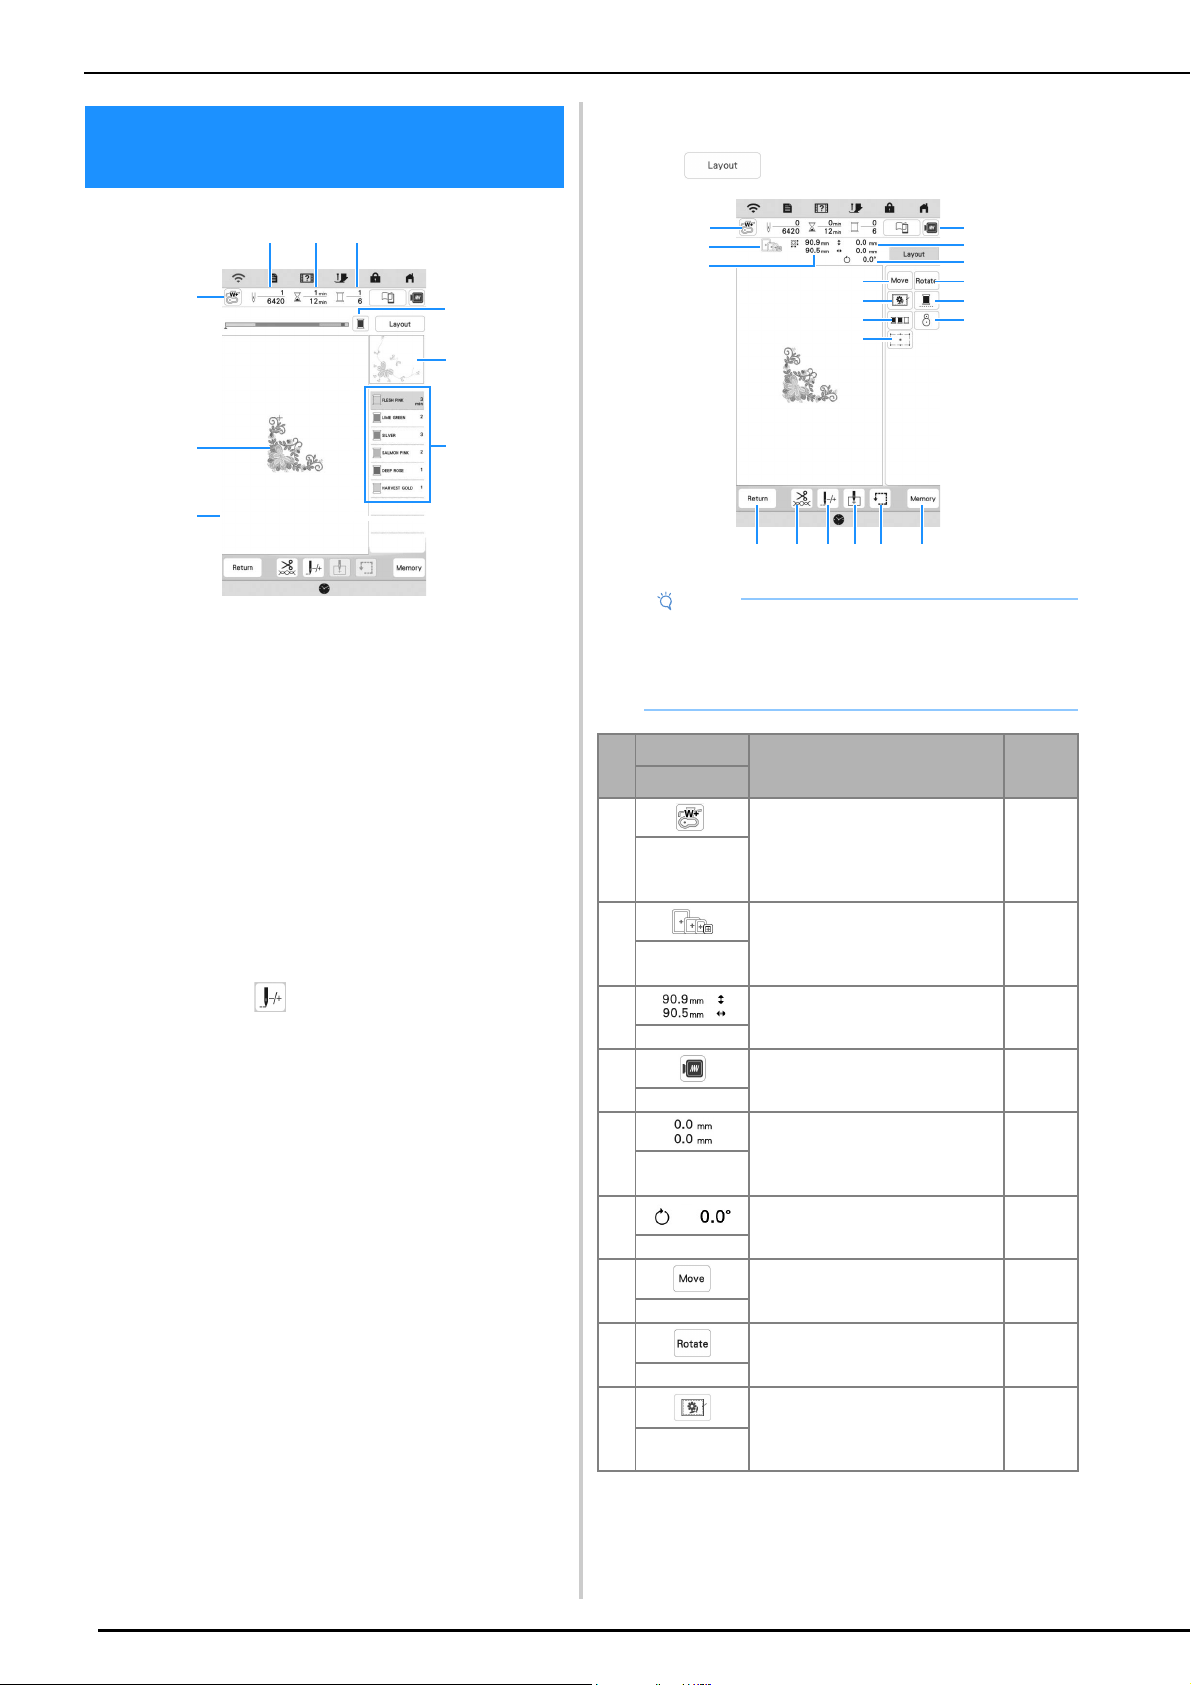
VIEWING THE EMBROIDERY SCREEN
124
* This screen appears when embroidery starts.
1 The presser foot symbol
Attach embroidery foot “W+” with LED pointer or
embroidery foot “W” (sold separately) for all embroidery
projects.
2 A preview of the pattern
3 The boundary for embroidering with the selected frame
in the settings screen
4 Total number of stitches in the selected pattern and
number of stitches that have already been embroidered
5 The time necessary to embroider the pattern, and the
time already spent embroidering the pattern (not
including time for changing and automatically trimming
the thread)
6 The number of colors in the pattern, and the number of
the color currently being embroidered
7 Switch the progress bar (which shows the embroidering
progress) between showing only one color or all colors.
This key appears after starting embroidering or after
touching the key.
8 The part of the embroidery pattern that will be
embroidered with the thread color at the top of the list
9 The order for thread color changes and the embroidering
time for each thread color
* The displayed time is the approximate time that will
be required. The actual embroidering time may be
longer than the displayed time, depending on the
embroidery frame that is used. In addition, the
amount of time required to change thread colors is
not included.
Key Functions
Using these keys, you can move or rotate pattern, etc.
Touch to display the editing window.
VIEWING THE EMBROIDERY
SCREEN
9
1
2
3
7
4 5 6
8
Note
• Some operations or functions are not available for
certain patterns. If the key display is grayed out,
you cannot use that function or operation with the
selected pattern.
No.
Display
Explanation Page
Name
1 Turn on the light of the LED
pointer.
Touch this key to check the needle
drop point with the light of the LED
pointer.
130
Needle point
check key
2 Shows the embroidery frames that
can be used for the selected
pattern.
Be sure to use the proper frame.
127
Available
frames
3 Shows the size of the selected
pattern.
—
Pattern size
4 Preview the embroidery image. 113
Image key
5 Shows the distance between the
embroidering position and the
center (when the embroidery
pattern is moved).
—
Distance
6 Shows the degree of rotation of
the pattern.
—
Degree
7 Display the pattern moving
window.
—
Move key
8 Display the pattern rotating
window.
—
Rotate key
9 Add the basting stitch around the
pattern. You can select the
distance from the pattern to the
basting stitching.
22, 143
Basting key
8
EFH G
4
0
B
1
DI
7
9
A
3
2
5
6
C
Loading ...
Loading ...
Loading ...