Loading ...
Loading ...
Loading ...
assembly
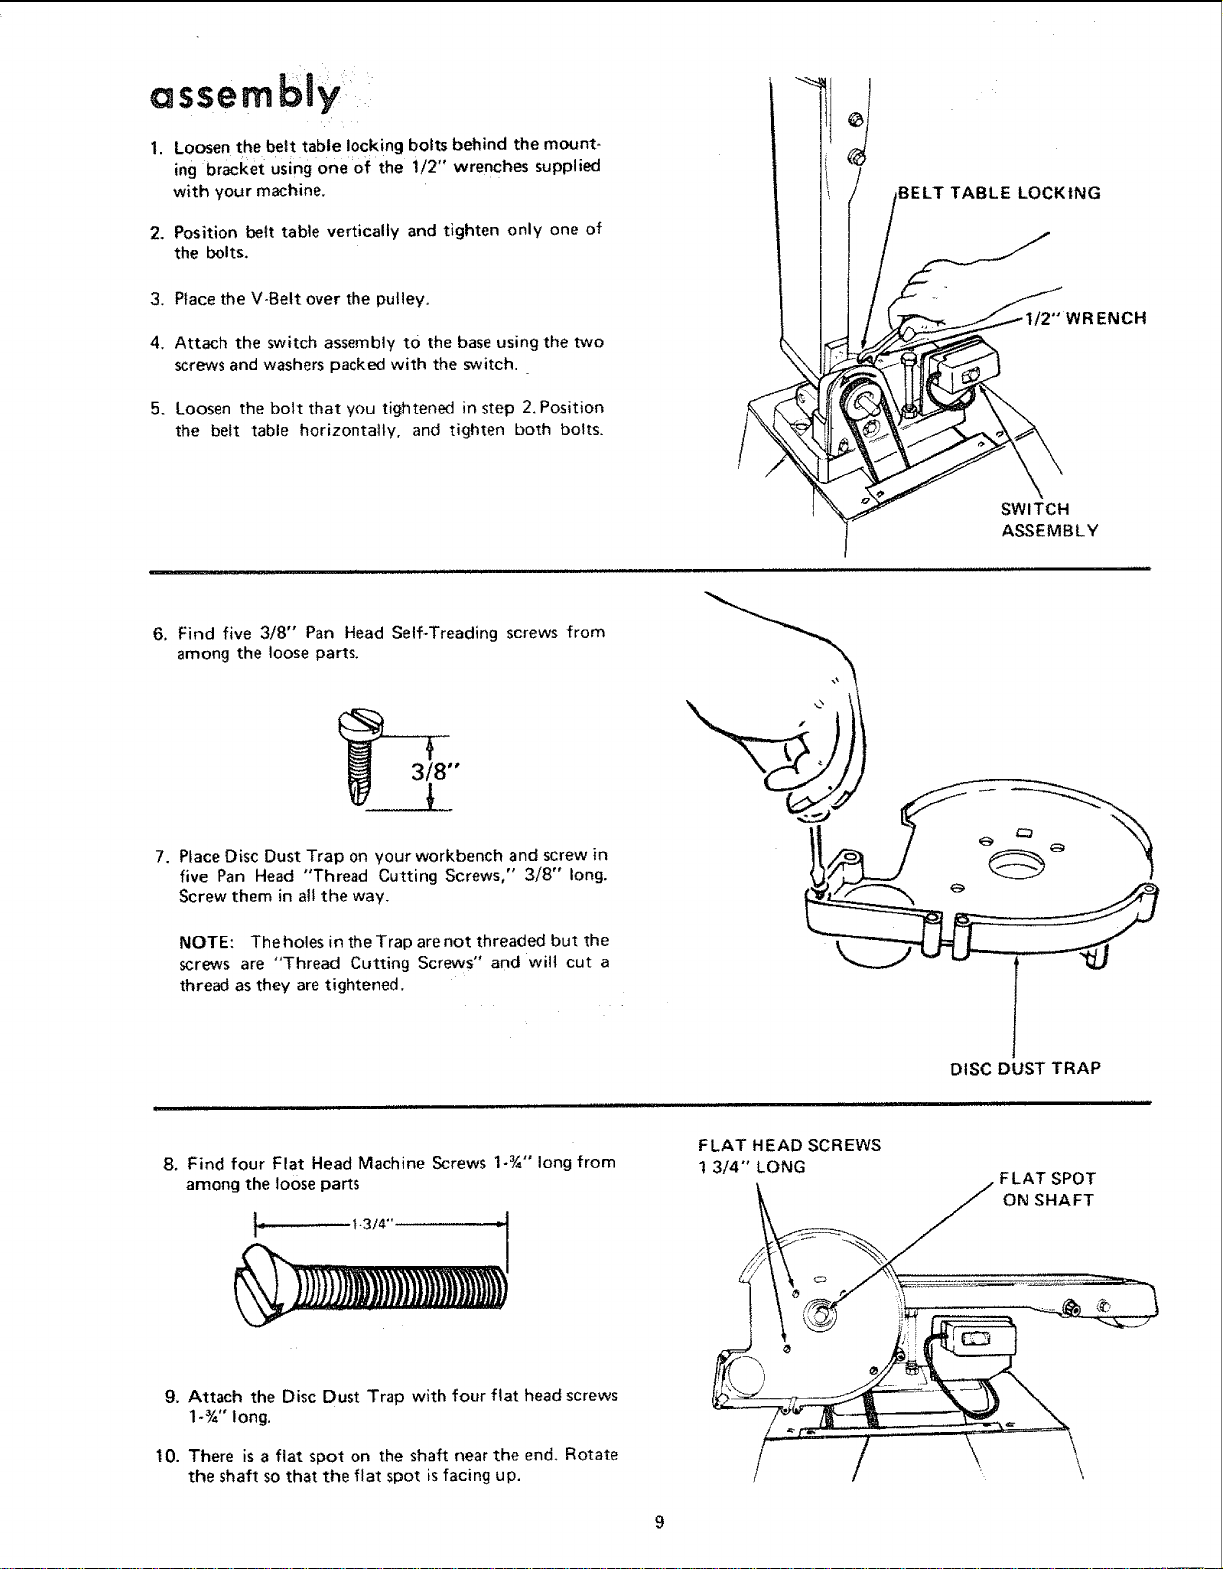
I. Loosen the belt table locking bolts behind the mount-
ing bracket using one of the i12" wrenches supplied
with your machine,
2, Position belt table vertically and tighten only one of
the bolts.
3. Place the V-Bett over the pulley,
4. Attach the switch assembly tO the base using the two
screws and washers packed with the switch.
5. Loosen the bolt that you tightened in step 2. Position
the belt table horizontally, and tighten both bolts.
JBELT TABLE LOCKING
!NCH
SWITCH
ASSEMBLY
6. Find five 3/8" Pan Head Self-Treading screws from
among the loose parts,
3/8"
7. Place Disc Dust Trap on your workbench and screw in
five Pan Head "Thread Cutting Screws," 3/8" long.
Screw them in all the way,
NOTE: The holes in the Trap are not threaded but the
screws are "Thread Cutting Screws" and wilt cut a
thread as they are tightened.
DISC DUST TRAP
B. Find four Flat Head Machine Screws 1-¾" long from
among the loose parts
! _ t.3/4'
FLAT HEAD SCREWS
t 3/4" LONG
FLAT SPOT
ON SHAFT
9, Attach the Disc Dust Trap with four flat head screws
1-¾" long.
10. There is a flat spot on the shaft near the end, Rotate
the shaft so that the flat spot is facing up.
Loading ...
Loading ...
Loading ...