Loading ...
Loading ...
Loading ...
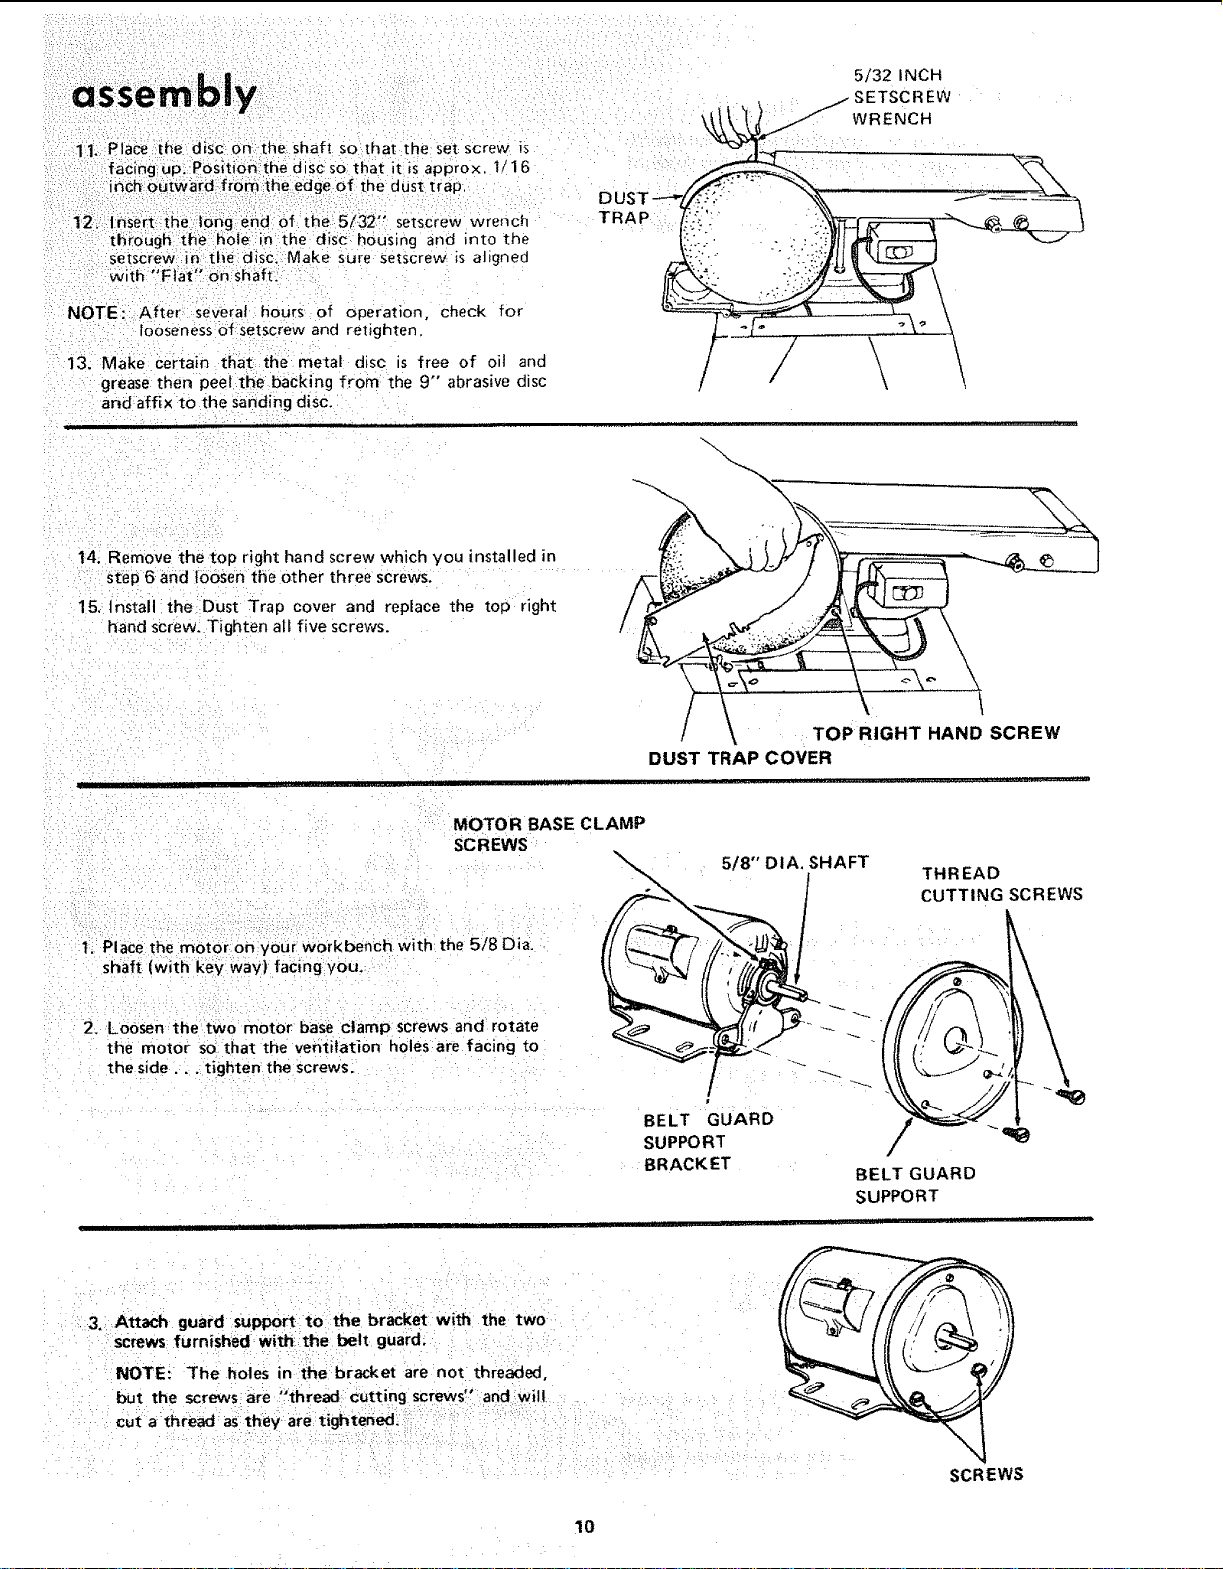
1I: Pia_ :tthel dis:€ on:the shaft so that the set screw is
facing Up, PbSition::the disc: so that it is approx I/1 6
:: i_chOutwa[d; f_6m:_(heedge of the dust trap.
,etscrewwrench
tli_oUgh tlSe h01e in the disc housing and into the
s_etscrew :in =tl_e: disc: Make sure Setscrew is aligned
• t_ tw f
w=th Flat on sha t,
NOTE::i:After several hoUr_ of Operation, check for
looseness of setscrew and retighten.
13. Make certain that the metal disc is free of oil and
grease then peel the backing from the 9" abrasive disc
and:affix to the sanding disc.
DU
TRAP
t
5/32 INCH
SETSCREW
WRENCH
\
\
14_ Remove the top right hand screw which you installed in
step 6and loosen the other three screws.
15, install the Dust Trap cover and replace the top right
hand screw. Tighten all five screws.
\ TOP RIGHT HAND SCREW
DUST TRAP COVER
MOTOR BASE CLAMP
SCREWS
1. Place the motor on your workbench with the 5/8 D ia.
shaft (wit h key wav)facing you,:
5/8"' DIA. SHAFT
THREAD
CUTTING SCREWS
:: i ¸H- • • i " • /• • •i : ••
2. Loosen :the two motor base clamp screws and rotate
the motor so that the ventilation holes are facing to
the side.., tighten the screws.
I
BELT GUARD
SU PPORT
BRACKET
3. Attach guai'd Support to the bracket with the two
screws furnished with the belt guard;
NOTE: The holes in the bracket are not threaded,
but the screws:are °'thread cutting screws" and will
Cut a_thread ag:thev-are tighted_:. :
BELT GUARD
SUPPORT
i ii
SCREWS
10
Loading ...
Loading ...
Loading ...