Loading ...
Loading ...
Loading ...
OVENCOOK=NG
Control Panel
AB CD
C!!_ "Favorites
On/Off
&etup
On/Off
Clean
Rapid More
-- Preheat i_s_
J KL
E
TIMER 1
On / Off
Vent Oven
Fan Light CANCEL
M N 0
G
TIMER2
On/Off
P
H
_"""1
2 3
ABC DEF
4 5 6
GHI JKL MNO
7 8 9
POR$ TUV WXYZ
Back 0 Enter
l Sp_ce I
_ack
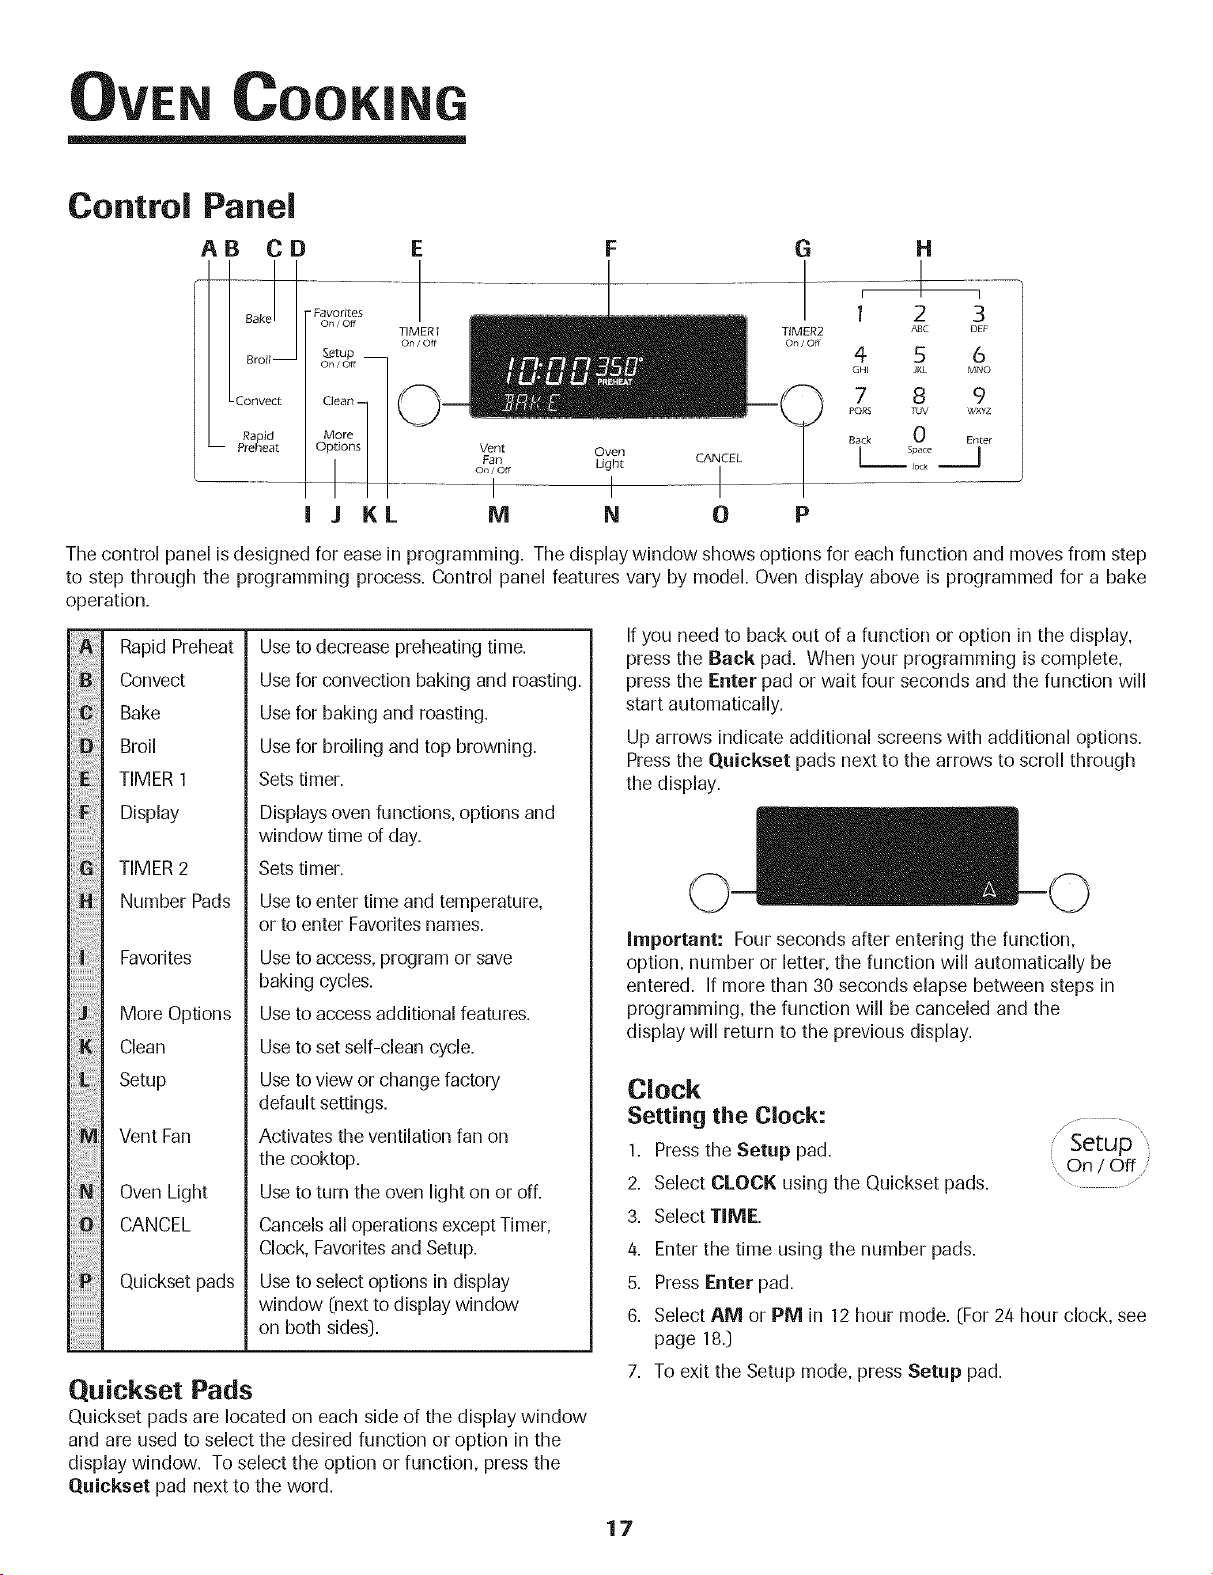
The control panel isdesigned for ease in programming. The display window shows options for each function and moves from step
to step through the programming process. Control panel features vary by model. Oven display above is programmed for a bake
operation.
i!ili!Hiiiili
Rapid Preheat
Convect
Bake
Broil
TIMER 1
Display
TIMER 2
Number Pads
Favorites
More Options
Clean
Setup
Vent Fan
Oven Light
CANCEL
Quickset pads
Useto decrease preheating time.
Usefor convection baking and roasting.
Usefor baking and roasting.
Usefor broiling and top browning.
Sets timer.
Displaysoven functions, options and
window time of day.
Sets timer.
Useto enter time and temperature,
or to enter Favorites names.
Useto access, program or save
baking cycles.
Useto access additional features.
Useto set self-clean cycle.
Useto view or change factory
default settings.
Activates the ventilation fan on
the cooktop.
Useto turn the oven light on or off.
Cancels all operations except Timer,
Clock, Favorites and Setup.
Useto select options in display
window (next to display window
on both sides:).
If you need to back out of a function or option in the display,
press the Back pad. When your programming is complete,
press the Enter pad or wait four seconds and the function will
start automatically.
Up arrows indicate additional screens with additional options.
Press the Quickset pads next to the arrows to scroll through
the display.
Iraportant: Four seconds after entering the function,
option, number or letter, the function will automatically be
entered. If more than 30 seconds elapse between steps in
programming, the function will be canceled and the
display will return to the previous display.
Clock
Setting the Clock: / ..............................
1. Press the Setup pad. Setup
On/Off /
2. Select CLOCK using the Quickset pads. " ...........
3. Select TIME.
4. Enter the time using the number pads.
5. Press Enter pad.
6. Select AM or PM in 12 hour mode. (For 24 hour clock, see
page 18.:)
Quickset Pads
Quickset pads are located on each side of the display window
and are used to select the desired function or option in the
display window. To select the option or function, press the
Quickset pad next to the word.
7. To exit the Setup mode, press Setup pad.
17
Loading ...
Loading ...
Loading ...