Loading ...
Loading ...
Loading ...
COMPONENT ACCESS
Whirlpool Smart All-In-One Washer & Dryer
n
4-13
Removing the Condenser Duct Assembly
WARNING
Electrical Shock Hazard
Disconnect power before servicing.
Failure to do so can result in death or
electrical shock.
Replace all parts and panels before operating.
To Remove the Condenser Duct Assembly
1. Unplug washer or disconnect power.
2. Turn o water supply to washer.
3. Disconnect cold inlet water hose and remove the drain
hose from the standpipe or laundry tub.
4. Perform the procedures on page 4-3, “Removing the Top
Panel” prior to performing the following steps.
5. Perform the procedures on page 4-7, “Removing the Rear
Access Panel” prior to performing the following steps.
6. Perform the procedures on page 4-12, “Removing the
Dryer Heater Channel Assembly” prior to performing the
following steps.
7. At this point, the Condenser Duct Assembly should look
like the example in Figure 1 below.
CONDENSER DUCT
Fan Port for Dryer
Heater Channel
Figure 1
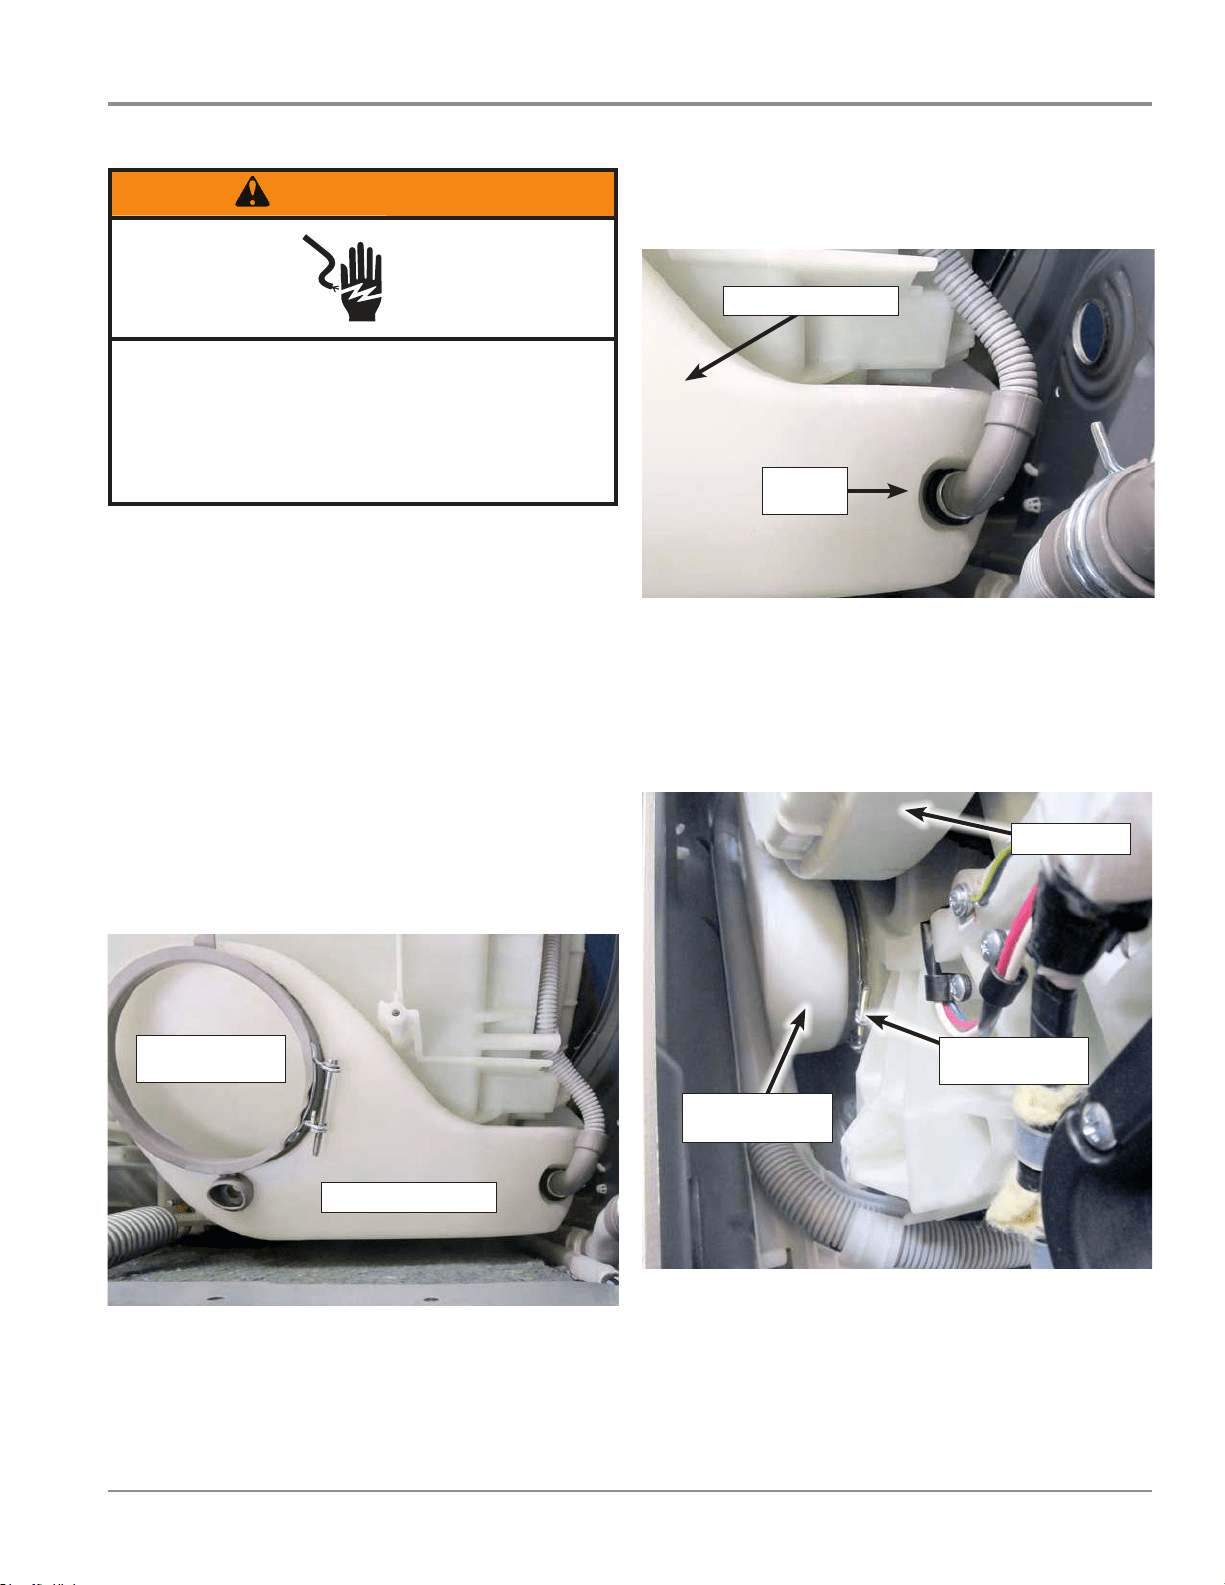
8. Use needle nose pliers to remove the clamp and hose
from the cooling nozzle on the top of the condenser duct.
See Figure 2.
Cooling
Nozzle
CONDENSER DUCT
Figure 2
9. Gently lay washer/dryer on its right side to access the
lower part of the condenser duct that connects to the rear
lower drum.
10. Locate the clamp screw at the boom of the condenser
duct. Loosen the clamp screw and separate the lower
condensate duct from the drum (see Figure 3).
Lower Condenser
Duct
Condenser Duct
Clamp Screw
Motor-Rotor
Figure 3
11. Remove condenser duct assembly from washer/dryer. If
necessary, remove cooling valve from condenser duct.
12. Reverse procedure to reinstall condenser duct.
Loading ...
Loading ...
Loading ...