Loading ...
Loading ...
Loading ...
4-6
n
Whirlpool Smart All-In-One Washer & Dryer
COMPONENT ACCESS
Removing the Front Panel & Bulkhead
WARNING
Electrical Shock Hazard
Disconnect power before servicing.
Failure to do so can result in death or
electrical shock.
Replace all parts and panels before operating.
To Remove the Front Panel
1. Unplug washer/dryer or disconnect power.
2. Turn o water supply to washer/dryer.
3. Disconnect cold inlet water hose and remove the drain
hose from the standpipe or laundry tub.
4. Perform the procedures on page 4-2 “Removing the Door
Assembly” prior to performing the following steps.
5. Perform the procedures on page 4-3, “Removing the Top
Panel” prior to performing the following steps.
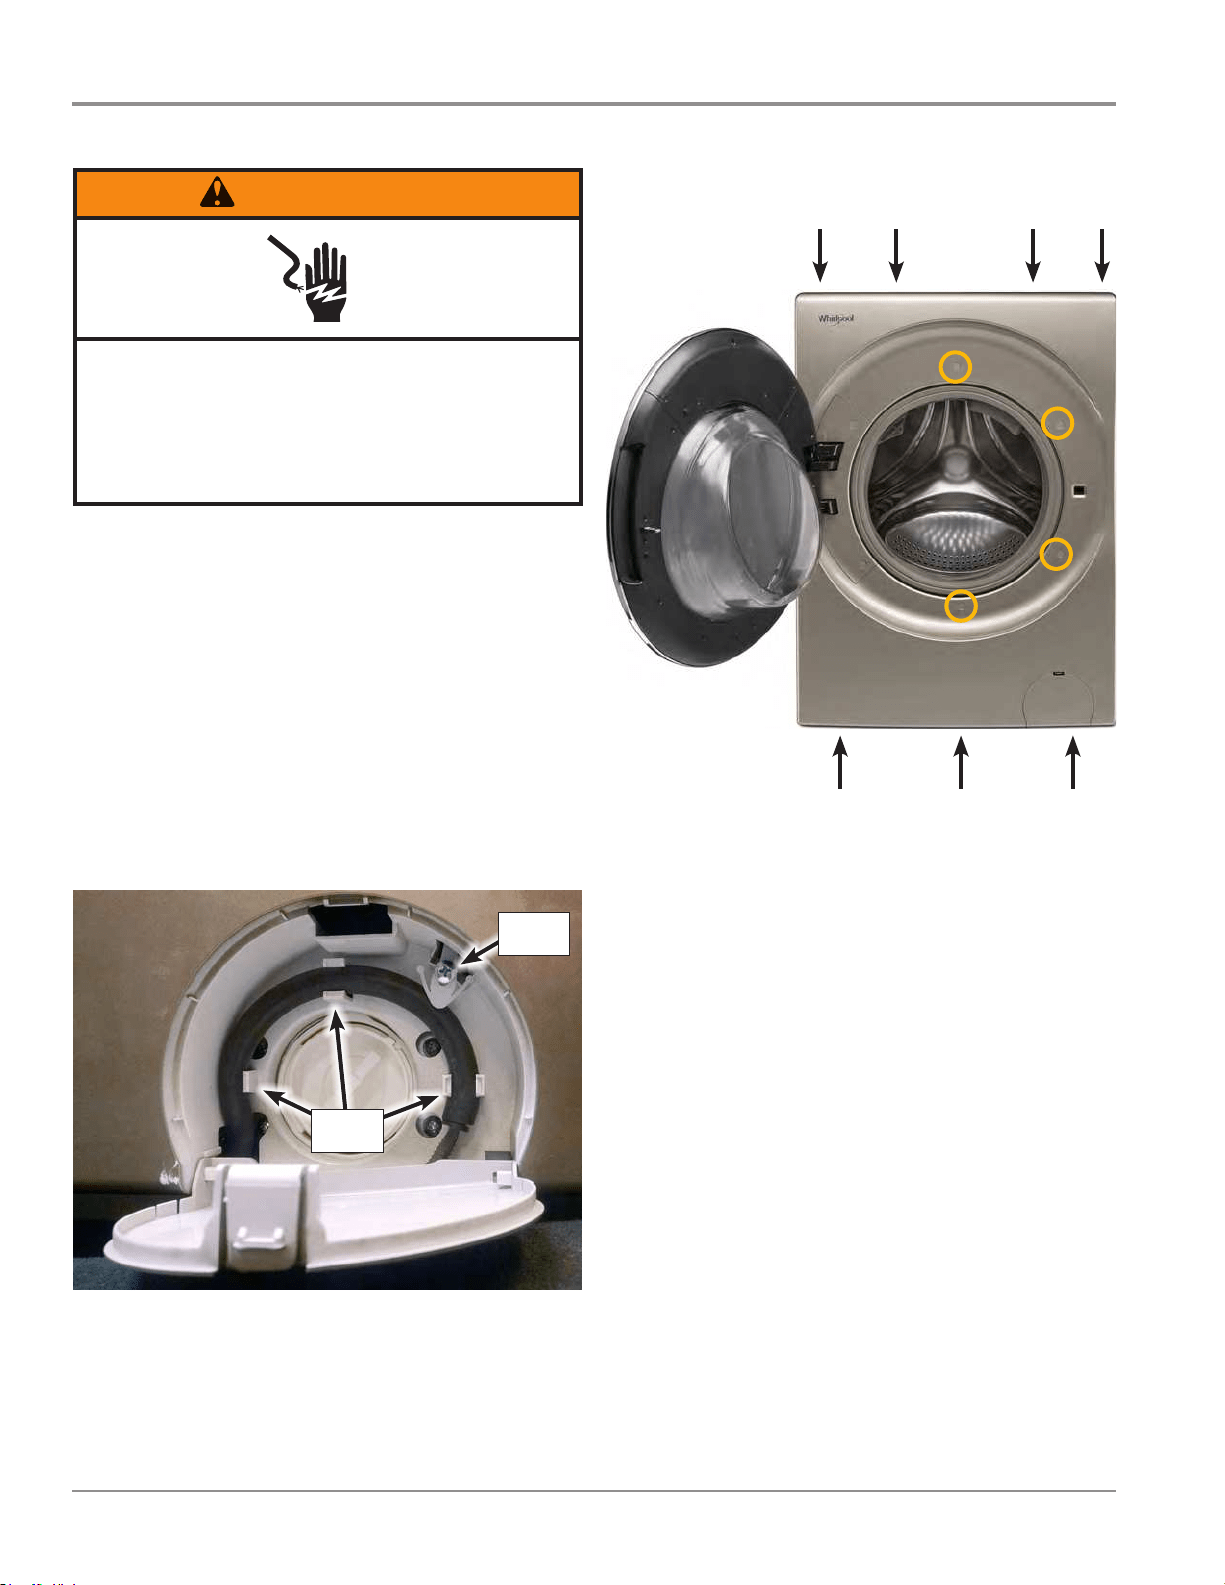
6. Open the drain access door at the boom of the front
panel. Unclip the drain hose from its 3 clips. Remove the
Phillips screw securing the manual door release tab.
Remove
Screw
Unclip
Hose
Figure 1
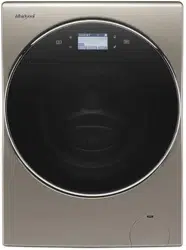
7. Using a Phillips screwdriver, remove the eleven (11)
remaining screws indicated in Figure 1.
Figure 2
8. Li up on the top 4 tabs at the top of the front panel.
Separate the front panel slightly from the washer/dryer,
while feeding the drain hose and manual door release tab
through the panel assembly.
9. Remove front panel from washer/dryer. Set aside for
reassembly.
10. Reverse procedure to reinstall front panel.
To Remove the Front Bulkhead
1. Perform the procedures “Removing the Front Panel” prior
to performing the following steps.
2. Remove the spring clamp securing the outer bellows to
the front bulkhead. Loosen and pull away the bellows
from the opening in the bulkhead.
3. Reach in between bellows and front bulkhead to
disconnect the door lock harness. Detach door lock
harness from bulkhead.
4. Detach the HMI harness from the boom of the bulkhead.
5. Use a Phillips screwdriver to remove 6 (six) screws, 3 on
each side, securing the front bulkhead to the side panels.
Li up on bulkhead to release from side panels. Remove
bulkhead and set aside for reassembly.
6. Reverse procedure to reinstall bulkhead and front panel.
Loading ...
Loading ...
Loading ...