Loading ...
Loading ...
Loading ...
iii iii iiiiiiii i!iiiii ",,,,ii, iiii iliiii : : ,, ii !i!iiii ?, i ii,ii!t iiiii , iii, iiiiii ,i iiiiii,,iiii'iiii , iiiiiiiii!i!
Your cooktop is designed for ease of care. You can
do most cleaning with items found around the
home. Cleaning your cooktop whenever spills or
soiling occur will help to keep it looking and
operating like new.
NOTES:
• Before cleaning make sure all controls are off
and the cooktop is cool.
• Do not obstruct the flow of combustion and ven-
tilation air.
• If knobs are removed while cleaning, be careful
not to spill liquids through holes in the control area.
• Be careful not to allow moisture to collect in control
area. Moisture could cause ignitor switches to fail.
Surface burners
• The burner caps should be routinely removed
and cleaned. Always clean burner caps after a
spillover. Keeping the burner caps clean prevents
improper ignition and an uneven flame.
• For proper flow of gas and ignition of the burner,
DO NOT ALLOW SPILLS, FOOD, CLEANING
AGENTS, OR ANY OTHER MATERIAL TO
ENTER THE GAS TUBE OPENING.
• Occasionally check the burner flames for proper
size and shape as shown later in this section. A
good flame is blue in color. If flames lift off ports,
are yellow, or are noisy when turned off, you may
need to clean the burners.
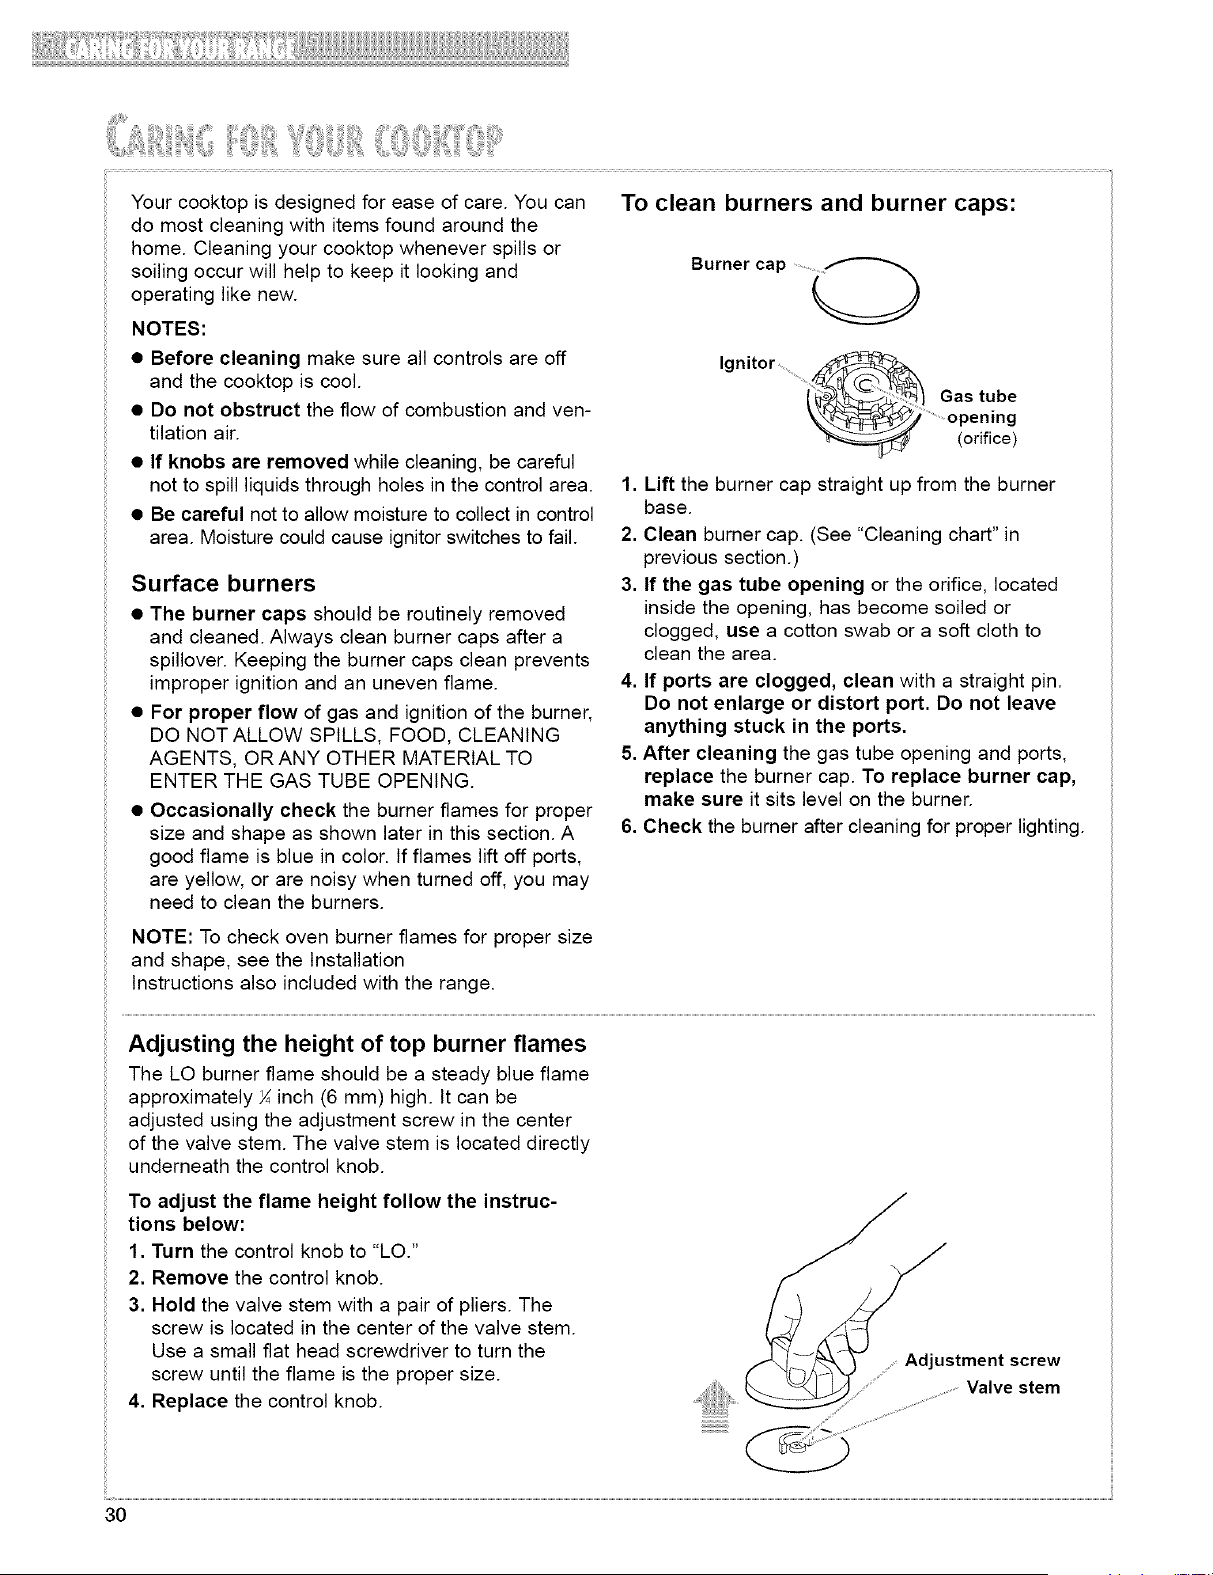
To clean burners and burner caps:
Burner cap
Ignitor,
{__/ Gas tube
open.,ng
_ormce)
1. Lift the burner cap straight up from the burner
base.
2. Clean burner cap. (See "Cleaning chart" in
previous section.)
3. If the gas tube opening or the orifice, located
inside the opening, has become soiled or
clogged, use a cotton swab or a soft cloth to
clean the area.
4. If ports are clogged, clean with a straight pin.
Do not enlarge or distort port. Do not leave
anything stuck in the ports.
5. After cleaning the gas tube opening and ports,
replace the burner cap. To replace burner cap,
make sure it sits level on the burner.
6. Check the burner after cleaning for proper lighting.
NOTE: To check oven burner flames for proper size
and shape, see the Installation
Instructions also included with the range.
Adjusting the height of top burner flames
The LO burner flame should be a steady blue flame
approximately _ inch (6 mm) high. tt can be
adjusted using the adjustment screw in the center
of the valve stem. The valve stem is located directly
underneath the control knob.
To adjust the flame height follow the instruc-
tions below:
1. Turn the control knob to "LO."
2. Remove the control knob.
3. Hold the valve stem with a pair of pliers. The
screw is located in the center of the valve stem.
Use a small flat head screwdriver to turn the
screw until the flame is the proper size.
4. Replace the control knob.
...... Adjustment screw
..... Valve stem
30
Loading ...
Loading ...
Loading ...