Loading ...
Loading ...
Loading ...
Tonestellyouif afunctionisenteredcorrectlyor
not.Theyalsotellyouwhena cycleiscompleted.
Toshut off all tonesexcepttheend-of-cycleand
errortones:
PressandholdtheSTOPTIMEbuttonfor5
seconds.A shorttonewilltellyouthatthetones
STOPTIMEhavebeenchanged.Repeatto turnthe
tonesbackon.Youwillsee"OFF"for 3
secondswhenthetonesareturnedoff,
and"On"for 3 secondswhentheyare
turnedon.
Tochoose between high and low volume tones:
Press and hold the DELAY button for 5 seconds. A
DELAY short tone will tell you that the tones have
been changed. Either "Hi" or "Lo" will
appear on the display for 3 seconds to
show the volume you chose.
Your oven is designed with a temperature management
system to constantly monitor oven temperature. The
burner element will cycle as needed to maintain the
desired temperature. This feature is automatically
activated when the oven is in operation.
IMPORTANT: Do not try to light the oven burner
during a power failure.
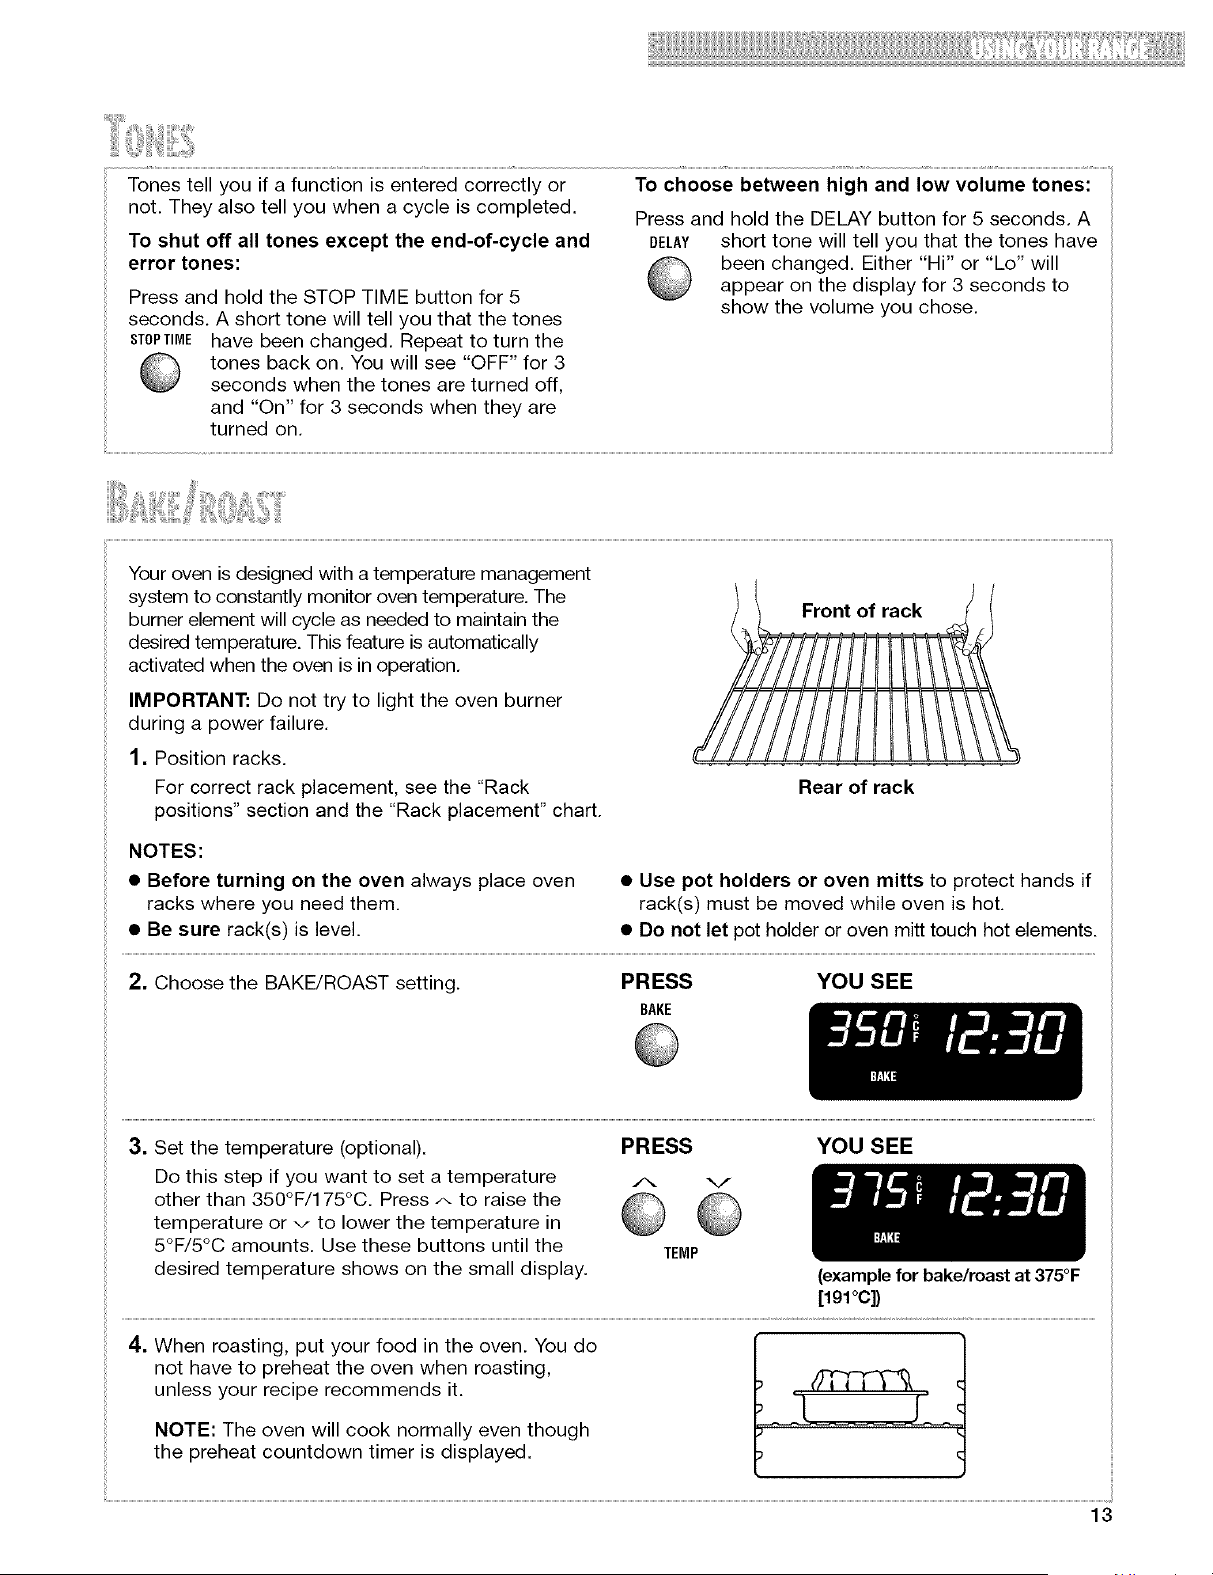
1. Position racks.
For correct rack placement, see the "Rack
positions" section and the "Rack placement" chart.
Front of rack
Rear of rack
NOTES:
• Before turning on the oven always place oven • Use pot holders or oven mitts to protect hands if
racks where you need them. rack(s) must be moved while oven is hot.
• Be sure rack(s) is level. • Do not let pot holder or oven mitt touch hot elements.
2. Choose the BAKE/ROAST setting. PRESS YOU SEE
BAKE
3. Set the temperature (optional).
Do this step if you want to set a temperature
other than 350°F/175°C. Press A to raise the
temperature or v to lower the temperature in
5°F/5°C amounts. Use these buttons until the
desired temperature shows on the small display.
PRESS YOU SEE
A V
TEMP
(example for bake/roastat 375°F
[lgl°c])
4. When roasting, put your food in the oven. You do
not have to preheat the oven when roasting,
unless your recipe recommends it.
NOTE: The oven will cook normally even though
the preheat countdown timer is displayed.
[ ]
13
Loading ...
Loading ...
Loading ...