Loading ...
Loading ...
Loading ...
careand cleating
—
~Do notimmerseplug-insurface ‘
unitsin liquidsofanykind.
~
Propercareandcleaningare
importantso yourRangewillgive
youe~lcientandsatisfactoryservice.
Followthesedirectionscarefillyin
cuing foryourrangeto assuresafe
andpropermaintenance.
grease,maycatchfire. Tomake
cleaningeasier,theplug-insurface
unitsareremovable.
@Do notbendtheplug-insurface
unitplugterminals.
R
R
@Do not attemptto clean,adjust
or in anywayrepairtheplug~in
receptacle.
mlt-bek 3-h-l
surfaceHeatingUtit
Theporcelainenamelfinishis
sturdybut breakableif misused.
Thisfinishis acidresistant.
However,anyacidfoodsspilled
(suchas fruitjuices,tomato,or
vinegar)shouldnotbe permitted
toremainon thefinish.
TheTilt-Lock3-in-1surfaceunitis
To Caean:
stationaryand cannotbe removed.
It canbe lifiedupwardandlocked
in thatpositionforcleaningunder
theunit. Be certain the unit is
coolbefore liftingthe CON.
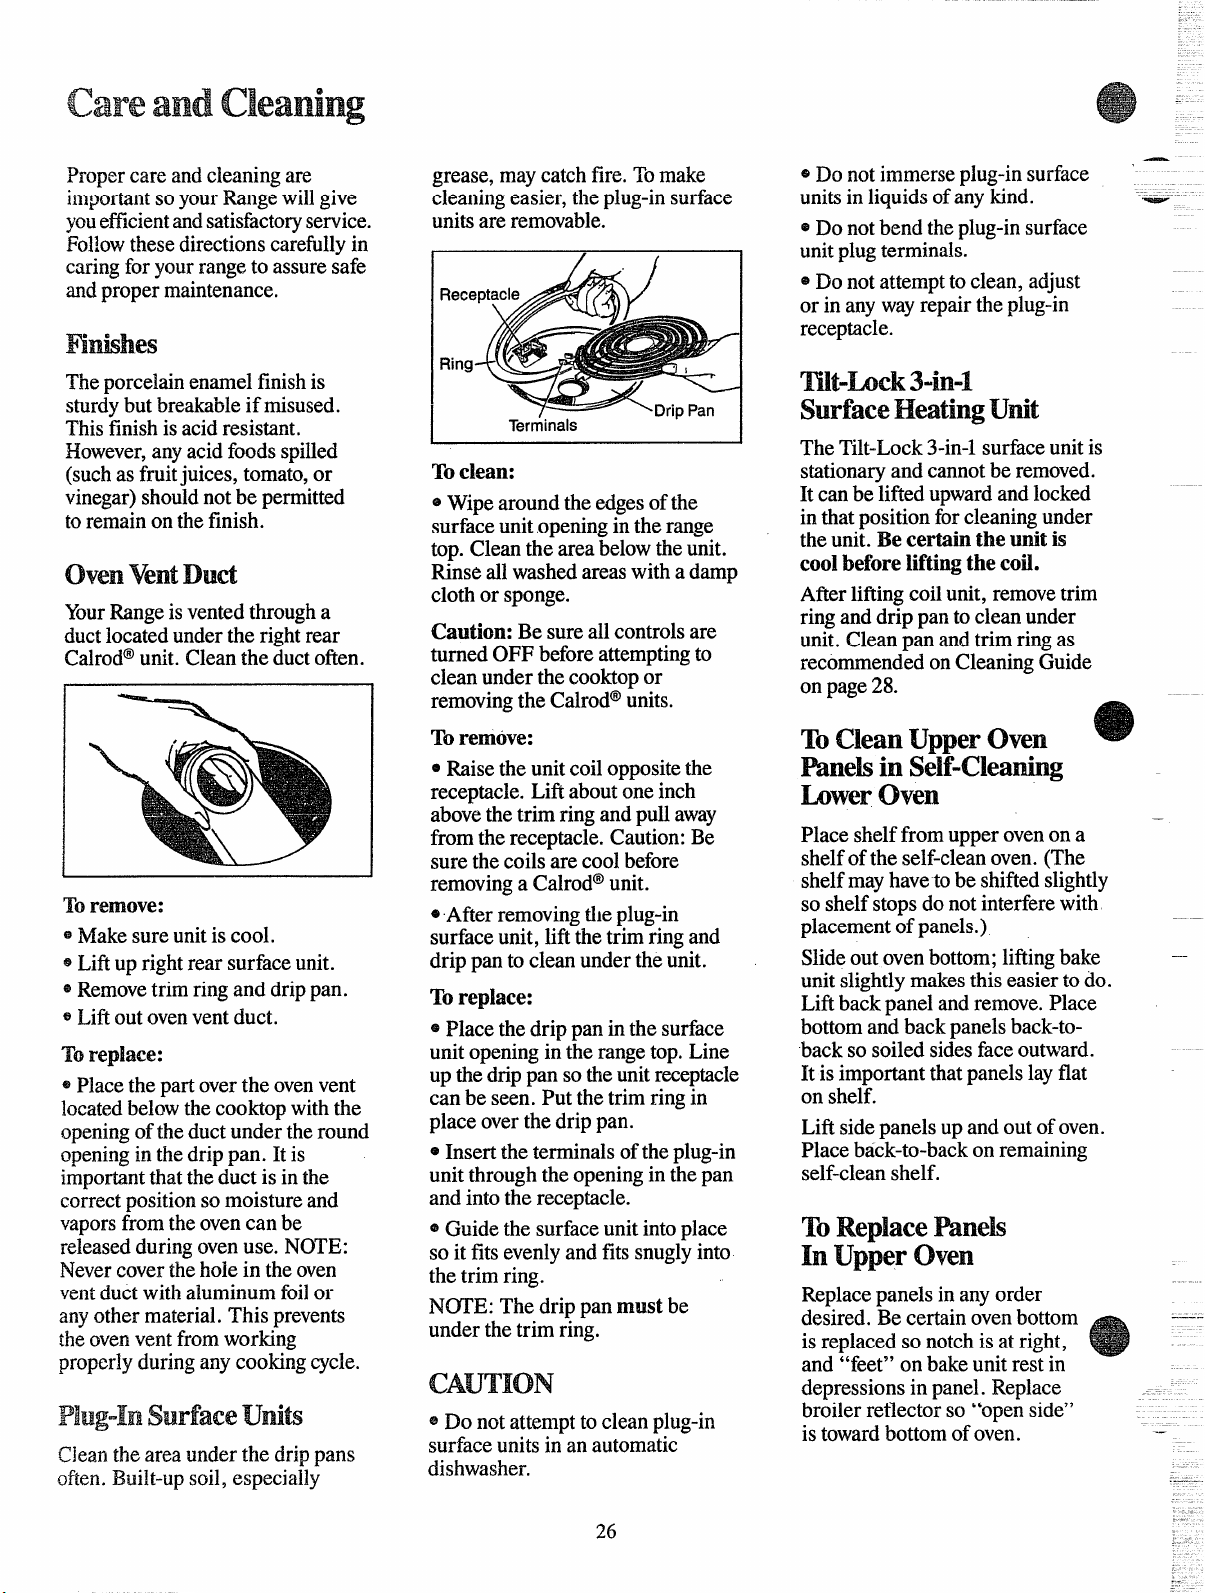
@Wipearoundthe edgesofthe
surfaceunitopeningin the range
top. Cleanthe areabelowtheunit.
Rinseallwashedareaswith a damp
clothor sponge.
ovenventDud
Afierliftingcoilunit, removetrim
ringanddrip panto cleanunder
unit.Cleanpan andtrim ringas
recommendedonCleaningGuide
YourRangeis ventedthrougha
ductlocatedunderthe rightrear
Calrod@unit. Cleanthe ductoften.
Caution:Be sureallcontrolsare
turnedOFF beforeattemptingto
cleanunderthe cooktopor
removingthe Calrod”units.
on page28.
ToCleanUpperOven
To remOve:
@Raisethe unitcoiloppositethe
receptacle.Liftaboutoneinch
abovethe trim ringandpullaway
fromthe receptacle.Caution:Be
surethe coilsare coolbefore
removinga Calrod@unit.
hwer Oven
Placeshelffromupperovenon a
shelfofthe self-cleanoven.(The
shelfmayhaveto be shiftedslightly
so shelfstopsdo notinterferewith
placementof panels.)
Toremove:
@Afier removingthe plug-in
surfaceunit, liftthe trimring and
drip panto cleanundertheunit.
~Makesureunitis cool.
~Liftup rightrear surfaceunit.
@Removetrimringand drippan.
~Liftoutovenventduct.
Slideoutovenbottom;liftingbake --
unitslightlymakesthiseasierto do.
Lifibackpanelandremove.Place
bottomand backpanelsback-to-
backso soiledsidesfaceoutward.
It is importantthatpanelslayflat
on shelf.
To replace:
@Placethedrip panin thesurface
unitopeningin the rangetop.Line
up thedrippan sotheunitreceptacle
can be seen. Put thetrim ringin
placeoverthedrip pan.
To replace:
@Placethe partoverthe ovenvent
locatedbelowthecooktopwiththe
openingof theductundertheround
openingin thedrip pan. It is
importantthattheduct is in the
correctpositionso moistureand
vaporsfromtheovencan be
releasedduringovenuse. NOTE:
Nevercovertheholein theoven
ventductwithaluminumfoilor
anyothermaterial.This prevents
theovenventfromworking
properlyduringanycookingcycle.
Lift sidepanelsup andoutofoven.
Placeback-to-backon remaining
self-cleanshelf.
@Insertthe terminalsoftheplug-in
unitthroughtheopeningin thepan
and intothe receptacle.
ToReplaceWneIs
In upper oven
~Guidethe surfaceunitintoplace
so it fitsevenlyandfits snuglyinto
the trim ring.
Replacepanelsin anyorder
desired.Be certainovenbottom
is replacedso notchis at right,
and “feet” on bakeunitrest in
N~E: Thedrip pan must be
underthetrim ring.
CAUTION
depressionsin panel. Replace
broilerreflectorso “openside”
@Do not attemptto cleanplug-in
surfaceunitsin an automatic
dishwasher.
is towardbottomofoven.
-—
Cleanthearea underthe drippans
often.Built-upsoil, especially
..—.
26
Loading ...
Loading ...
Loading ...