
Loading ...
Loading ...
Loading ...
36 37
34
BEFORE SELF-CLEANING
1. Remove all utensils and bakeware.
2. Remove non-porcelain oven racks. If chromed racks are left in the oven
during the self-clean cycle, they will permanently lose the shiny finish and
change to a dull dark finish. See Oven Cleaning Chart for proper care.
3. Wipe up any soft soil spills and grease with paper towels. Excess grease
will cause flames and smoke inside the oven during self-cleaning.
4. Be sure oven interior lights are turned off and the light bulbs and lens
covers are in place.
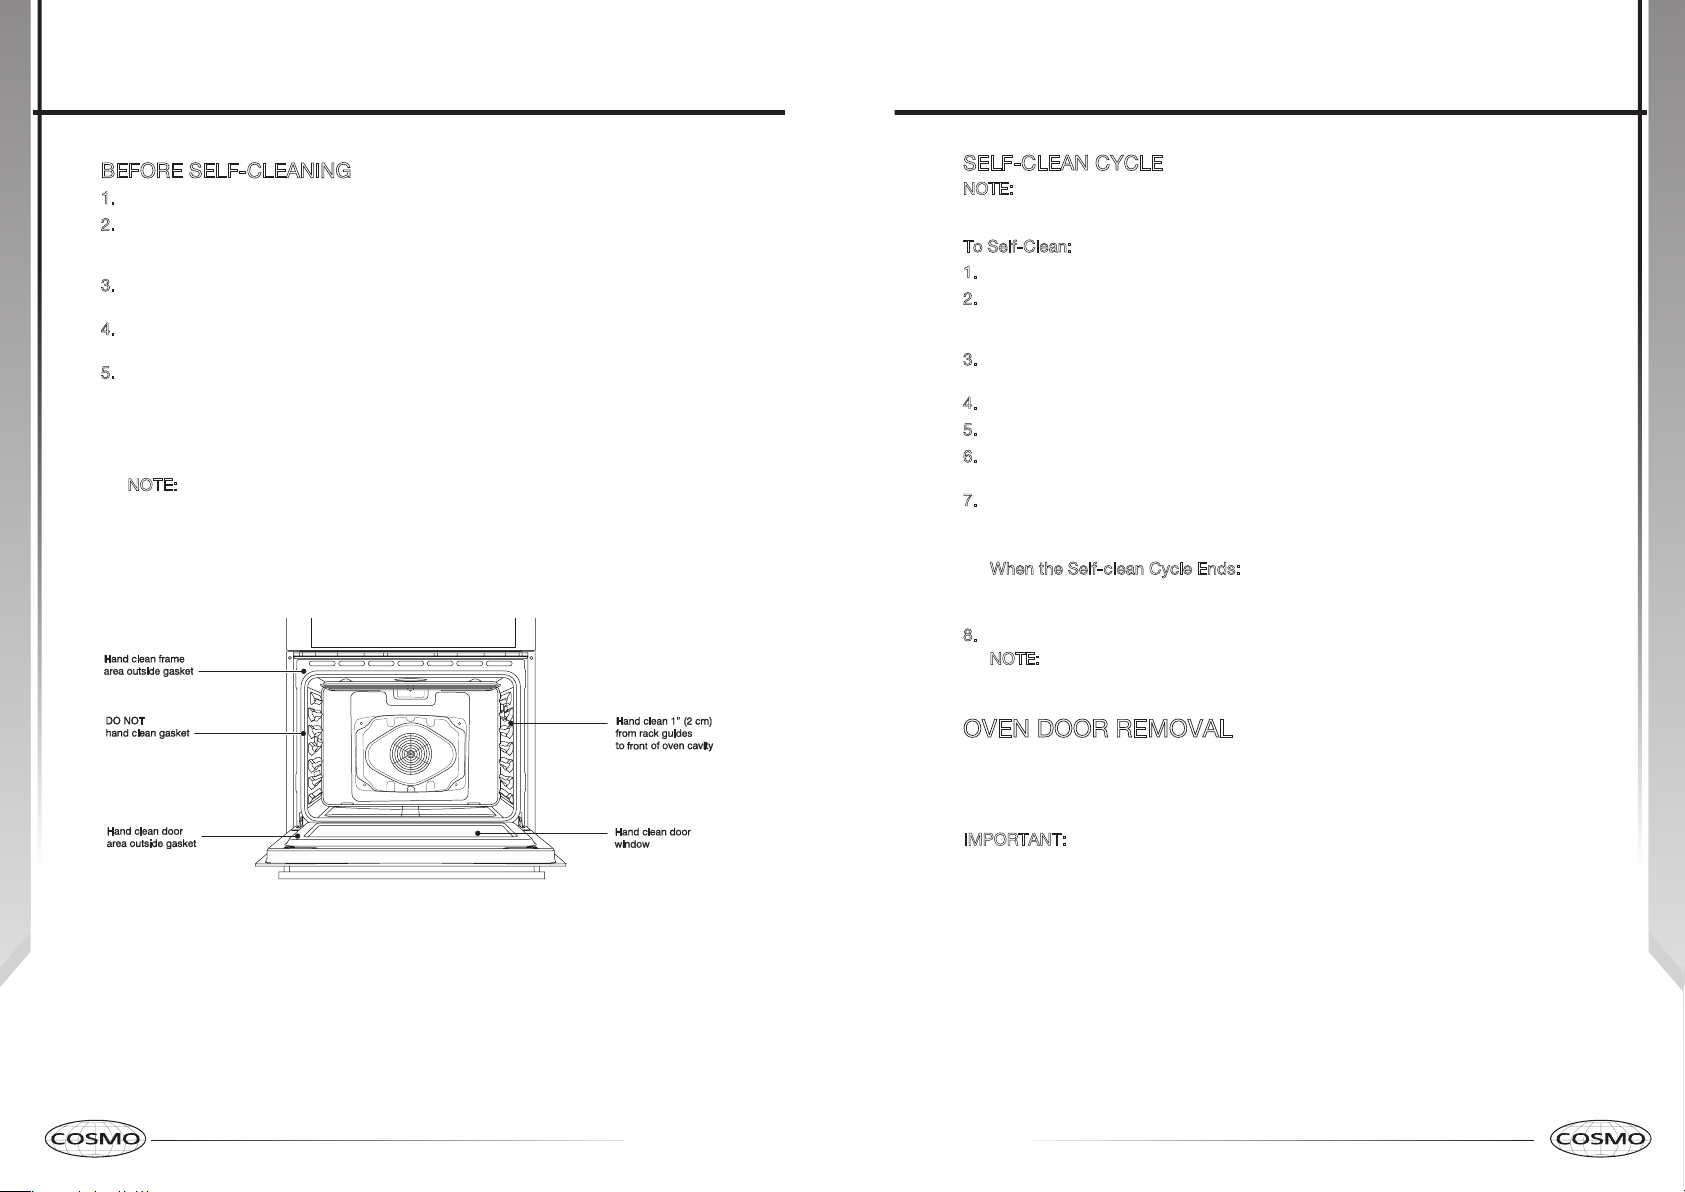
5. Some areas of the oven such as the oven door edge, oven door window,
oven front frame and up to 1½" (2-3 cm) inside the frame do not get hot
enough during the cleaning cycle for soil to burn away and must be
cleaned by hand BEFORE the cycle begins. Clean using a soapy sponge or
plastic scrubber and a solution of detergent and hot water. Rinse and dry
all areas thoroughly.
N
OTE: Do not rub the oven door gasket.
Oven Care
CAUTION: DO NOT LEAVE FOOD OR COOKING UTENSILS, ETC., IN OVEN
DURING THE PYROLYTIC SELF-CLEANING MODE OF OPERATION
35
SELF-CLEAN CYCLE
NOTE: Only one oven can use the Self-Clean cycle at a time, and a 24-hour
wait is recommended before starting the next Self-Clean cycle.
T
o Self-Clean:
1. Close the oven door.
2. Press SELF CLEAN. “Press 1 for Upper Oven” will appear in the upper oven
text area of the display and “Press 2 for Lower Oven” will appear in the lower
oven text area of the display.
3. Press “1” or “2” on the number keypad to select the desired oven. “REMOVE
RACKS” will scroll in the selected oven text area of the display.
4. “2:00 3:00 3:30” will appear in the display.
5. Use the number keypad to select the clean level.
6. If you want to delay the start of the self-cleaning cycle, press START
TIME, and then set a time, by pressing the number keypad.
7. Press START.
After the door is locked, “Oven is cleaning” will scroll in the selected text
area until the clean cycle is finished.
W
hen the Self-clean Cycle Ends:
“COMPLETE” appears in the display.
8
. Once the oven has completely cooled, remove ash with a damp cloth.
N
OTE: To avoid breaking the glass, do not apply a cool, damp cloth to the
inner door glass before it has cooled completely.
OVEN DOOR REMOVAL
For normal oven use, there is no need to remove the oven door. However,
should it become necessary to remove the door, follow the instructions in this
section.
IMPORTANT:
•
Make sure oven is cool and that power to the oven has been turned off before
removing the door.
•
The oven door is heavy and fragile, and the door front is glass. To avoid oven
door glass breakage, use both hands, and grasp only the sides of the oven
door to remove. Do not grasp the handle.
•
Be sure both levers are securely in place before removing the door.
•
Do not force door open or closed.
Oven Care
Loading ...
Loading ...
Loading ...