Loading ...
Loading ...
Loading ...
En
10
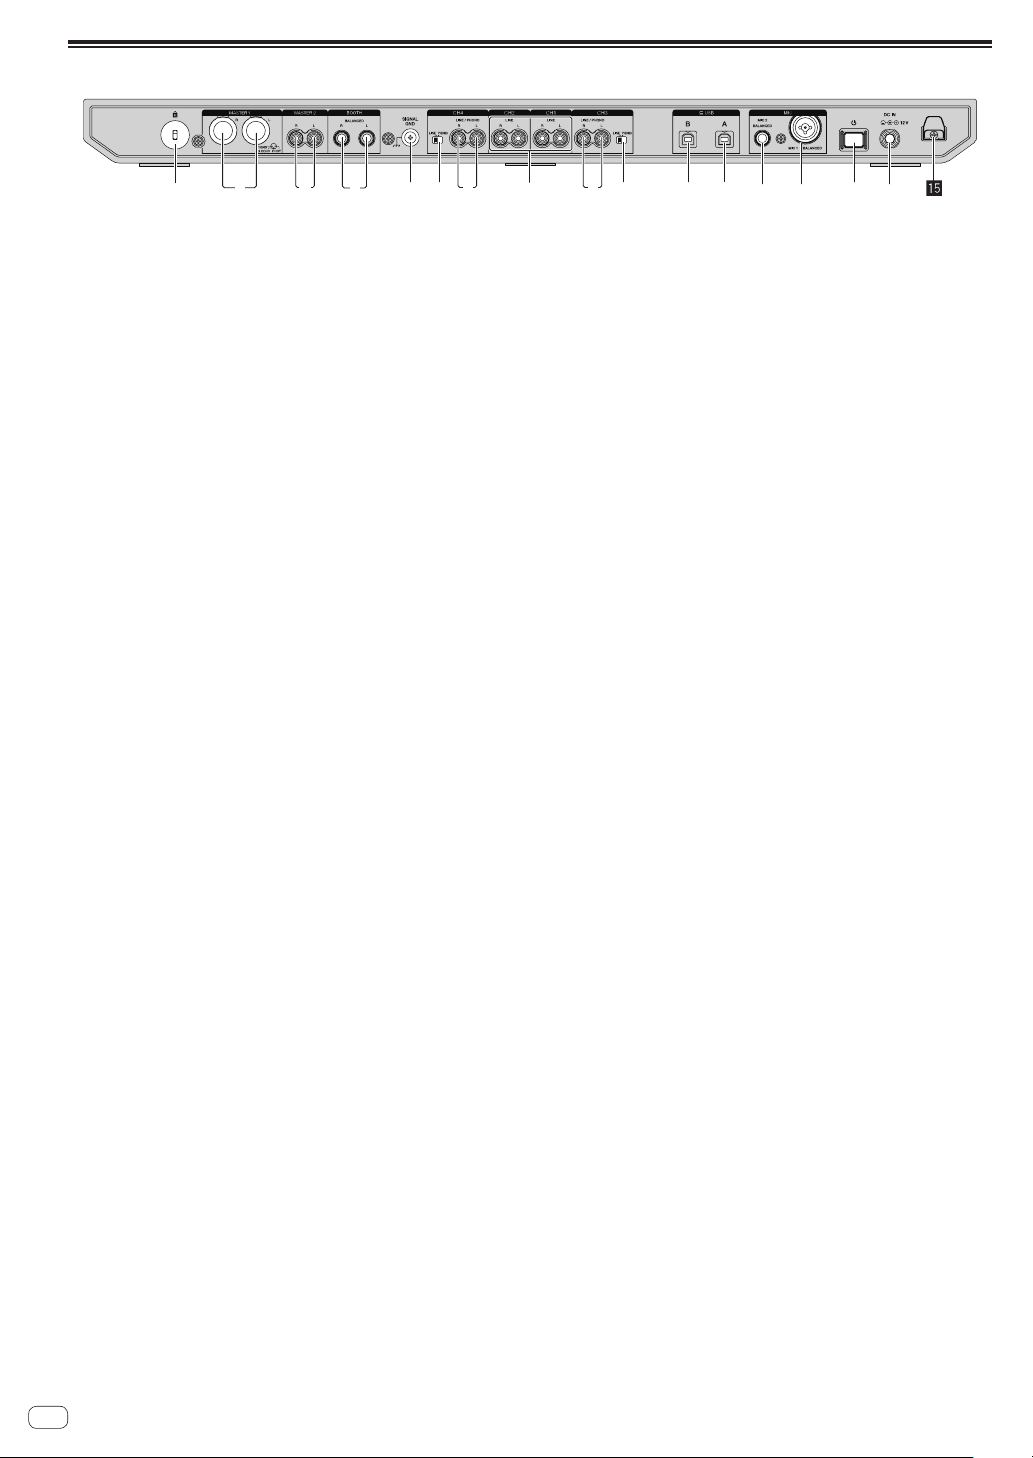
Rear panel
2 7 731 4 66 89abcde5
1 Kensington security slot
2 MASTER 1 output terminal
Connect a powered speaker, a power amp, etc.
! Compatible with XLR connector type balanced outputs.
Be sure to use these as balanced outputs.
! Be careful not to accidentally insert the power cord of
another unit.
! Do not connect a terminal that can supply phantom power.
3 MASTER 2 output terminal
Connect a powered speaker, a power amp, etc.
! Compatible with RCA pin-jack type unbalanced outputs.
4 BOOTH output terminal
Output terminals for a booth monitor.
! Compatible with TRS connector type balanced outputs.
Be sure to use these as balanced outputs.
! The master channel sound can be output from the [BOOTH]
output terminals regardless of the audio level set for the master
channel.
The sound level can be adjusted using the
[BOOTH MONITOR LEVEL] control.
5 SIGNAL GND terminal
Connect a ground wire of an analog player to reduce noise that
occurs when an analog player is connected.
6 LINE/PHONO switch
Selects the input source for each channel from the components
connected to this unit.
! [LINE]: Uses a line level output device (DJ player, etc.) connected
to the [LINE/PHONO] input terminals.
! [PHONO]: Uses a phono level (for MM cartridges) output device
(analog player, etc.) connected to the [LINE/PHONO] input
terminals.
7 LINE/PHONO input terminals
Connect a phono level (for MM cartridges) output device (analog
player, etc.) or a line level output device (DJ player, etc.). Switch
the input source according to the connected device using the
[LINE/PHONO] switch on the rear panel of this unit.
! Set the [USB A, PHONO/LINE, USB B] selector switch on top of
the unit to [PHONO/LINE] beforehand.
8 LINE input terminals
Connect to a DJ player or other line level device.
! Set the [USB A, LINE, USB B] selector switch on top of the unit to
[LINE] beforehand.
9 USB terminals (USB B)
Connect to a computer.
! Connect this unit to your computer directly via the USB cable
included with this product or one that conforms to USB 2.0.
! Do not use a USB hub.
a USB terminals (USB A)
Connect to a computer.
! Connect this unit to your computer directly via the USB cable
included with this product or one that conforms to USB 2.0.
! Do not use a USB hub.
b MIC2 input terminals
Connect a microphone.
! Only phone plugs (Ø 6.3 mm) can be used.
c MIC1 input terminals
Connect a microphone.
! Either an XLR connector or a phones plug (Ø 6.3 mm) can be
used.
d u switch
Turns this unit on or puts this unit into standby mode.
e DC IN terminal
Connect to a power outlet using the included AC adapter (with the
included power cord connected).
!
Connect the AC adapter after all the connections between
devices are completed.
! Use the included AC adapter.
f DC cord hook
Hook for the AC adapter power cord.
! If the AC adapter is disconnected during playback, the sound will
be interrupted.
Loading ...
Loading ...
Loading ...