Loading ...
Loading ...
Loading ...
13
Instruction for oven use
FOR ELECTRICAL CONNECTION, SEE THE PARAGRAPH ON INSTALLATION
The Artisan oven is equipped with an electrical socket on the rear wall of the oven to supply power to
the heating element inside the Artisan accessory when plugged in.
1
12
5
2
4
13
8
15
16
9
11
10
7
6
3
14
17
18
19
20
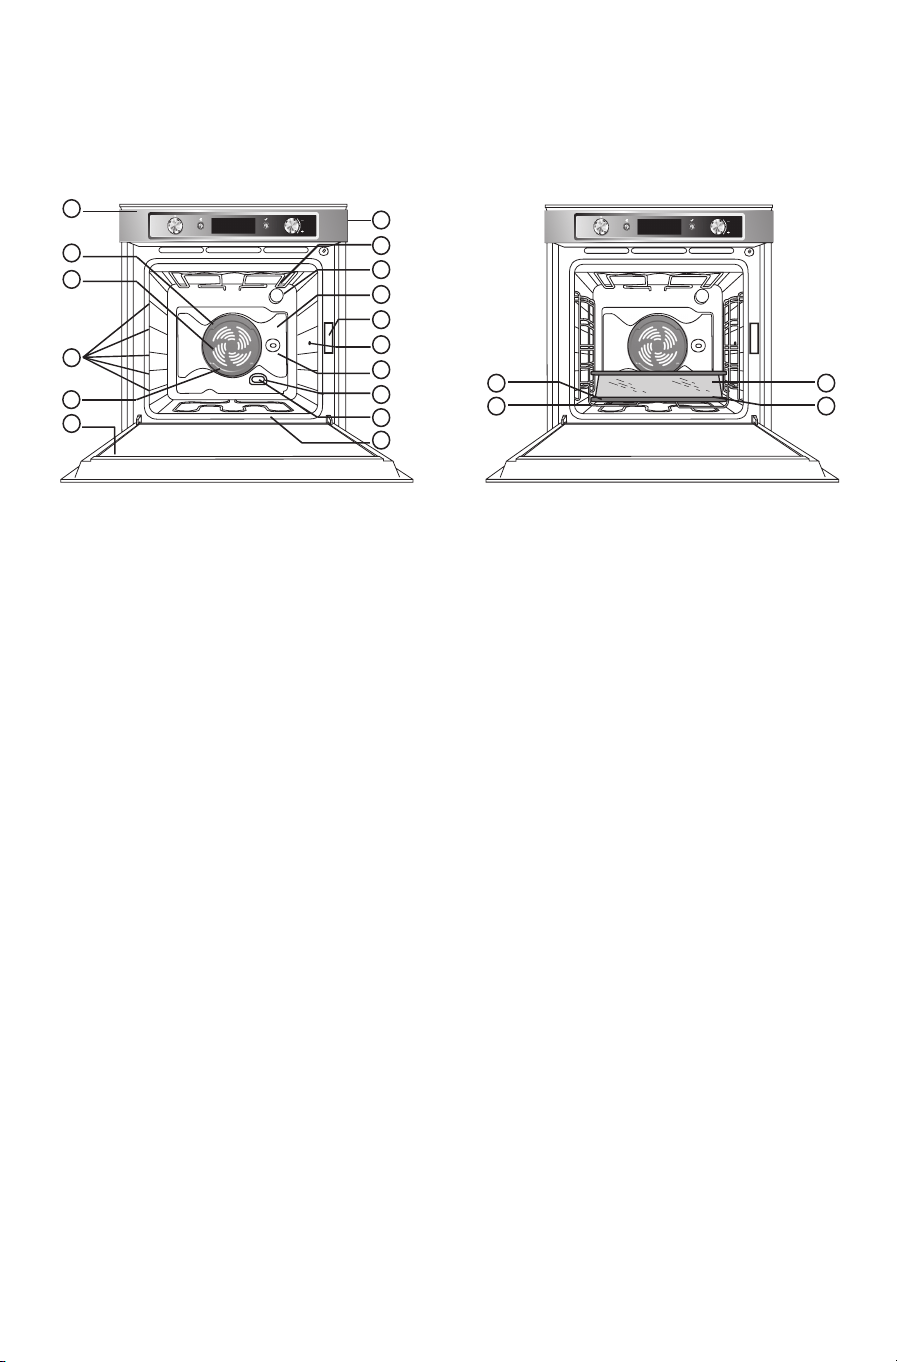
1. Control panel
2. Upper heating element/grill
3. Cooling fan (not visible)
4. Rating plate (not to be removed)
5. Lamps
6. Circular heating element (not visible)
7. Fan
8. Rotisserie (if supplied)
9. Bottom heating element (not visible)
10. Door
11. Position of shelves (the number of shelves is indicated on the front of the oven)
12. Rear wall
13. Meat probe connection
14. Twelix disc
15. Modular plug connection
16. Cap (When the Artisan accessory is removed from the oven, ensure that the cap supplied is used to
prevent dirt entering the electrical socket)
17. Glass lid
18. Perforated shelf
19. Drip tray + heating element
20. Drip tray rack
N.B:
– During cooking, the cooling fan may switch on at intervals in order to minimise energy consumption.
– At the end of cooking, after the oven has been switched o, the cooling fan may continue to run for
a while.
– When the oven door is opened during cooking, the heating elements switch o.
Loading ...
Loading ...
Loading ...