Loading ...
Loading ...
Loading ...
281
EN
Connecting the Camera to External Devices
5
4
Highlight an item using the FG buttons and press
the I button.
100
%
HDMI
HDMI Control
Output Frame Rate
Output Size
60p Priority
Back Set
Off
1080p
5
Highlight the desired option using the FG buttons
and press the Q button.
• Repeat Steps 4 and 5 as required.
100
%
HDMI
HDMI Control
Output Frame Rate
Output Size
60p Priority
Off
1080p
Back
Set
C4K
4K
1080p
720p
480p/576p
6
Press the MENU button repeatedly to exit the menus.
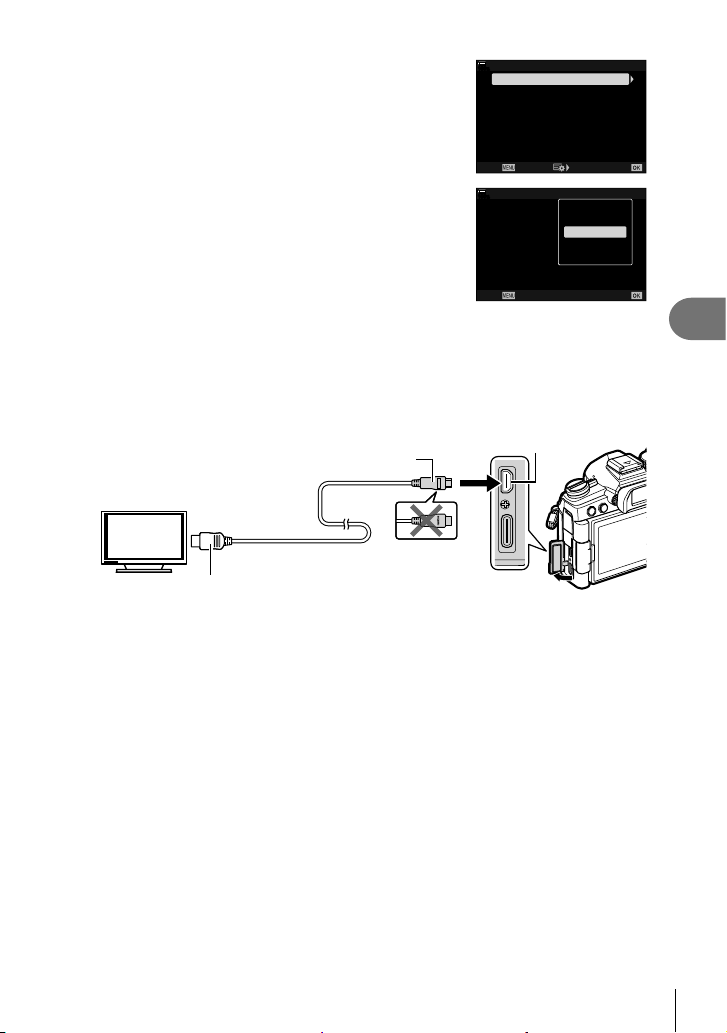
Connecting the Camera to a TV
Connect the camera using an HDMI cable.
1
After confi rming that the camera is off, connect it to the TV using an HDMI
cable.
HDMI cable
(Connect to the HDMI connector on
the TV.)
HDMI connector
Type D
Type A
2
Switch the TV to HDMI input and turn the camera on.
• The TV will show the contents of the camera monitor. Press the q button to view
pictures.
• If [On] is selected for [HDMI Control] (P. 282), the camera monitor will turn off when an
HDMI cable is connected.
• For information on switching to HDMI input, see the manual provided with the TV.
• Depending on TV settings, the image may be cropped and some indicators may not be
visible.
• HDMI cannot be used while the camera is connected to a computer via USB.
• If [Record Mode] is selected for [n HDMI Output] (P. 164) > [Output Mode] in the
n video menu, the signal will be output at the current movie frame size. No image will be
displayed if the TV does not support the selected frame size.
• If [4K] or [C4K] is selected, 1080p priority format will be used during still photography.
Loading ...
Loading ...
Loading ...