Loading ...
Loading ...
Loading ...

EN
35
Picture mode (Photography)
MANUAL FOCUSING
Turn the Focus ring on the lens until your subject or a key feature of the
subject is fully in focus on the focusing screen in the viewfinder or on the
LCD panel in e.g. Live View mode.
▸ Select CAMERACAMERA
▸ Select Focus ModeFocus Mode in the main menu
▸ Select MFMF
You can have your settings and the limits of the current depth of field
range shown in the top display.
You can select the unit of measure for the display or deactivate the
display altogether.
▸ Select SETUPSETUP
▸ Select Capture AssistantsCapture Assistants in the main menu
▸ Select Distance unit Distance unit [[(m/ft)(m/ft)]] in the submenu
▸ Select a unit of measure - mm (meters) or ftft (feet/inches) or deactivate
the display - OFFOFF.
• When the function is activated, the distance values for the set
distance (FOCUSFOCUS) and the front (FRONTFRONT) and rear (BACKBACK) limits of the
depth of the field are displayed when the shutter button is pressed
to the 1st pressure point.
Notes
• You can activate the Autofocus mode at any time via the joystick while
using the manual focus option.
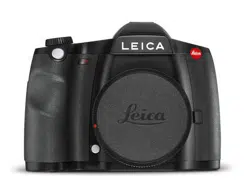
• The Leica S3 comes equipped with a focusing screen as standard, with
allows setting a focus on subject elements anywhere in the image field.
It is suitable for most photographic fields of application and subjects. It
is particularly useful when working with longer focal lengths and for
macro photography. Other focusing screens are available as optional
accessories, which offer excellent setting options depending on the
field of application and which are easy to replace.
ASSIST FUNCTIONS FOR MANUAL FOCUSING IN LIVE VIEW
MODE
Your camera offers two useful assist functions to facilitate and improve
setting accuracy:
– The magnification of an (initially) central cropped section of the screen
image (Zooming).
– Marking of screen image sections where subject elements are in clear
focus (Focus Peaking)
Both assist functions can be used simultaneously. Both assist functions
are part of the factory settings and therefore activated as standard. You
can optionally use only the magnification function or only Focus Peaking
– or you can deactivate both.
ENLARGEMENT
Enlarged display of a central section:
The larger details of the image subject appear on the screen, the better
you can assess their sharpness.
Select cropped sections at different levels of magnification:
▸ Press the BL button repeatedly
• The view will appear as follows in sequence
– 50% magnification
– 100% magnification
– back to original size
• There will be no button display in magnification view; a frame
containing a rectangle will appear at the bottom left, which indicates
the position of the cropped section in the image.
Moving the cropped section:
▸ Move the joystick to the relevant direction
Notes
• The grid lines are not displayed in magnification view.
• The most recently selected view will appear after the camera is
switched off and on again. The most recently selected displays will
appear when Live View mode is deactivated and activated again, but
not the enlarged view.
You can call up an enlarged cropped section in Live View to help with
picture settings. When this function is activated, a 100% magnification of
the central image section is initially displayed each time the focus setting
ring is turned. Use the joystick to move the magnified section to another
part of the image.
▸ Select SETUPSETUP
▸ Select Capture AssistantsCapture Assistants in the main menu
▸ Select Manual Focus AssistManual Focus Assist in the submenu
▸ Select OnOn
FOCUS PEAKING
This assist function highlights the edges of in focus subject elements in
color. The color can be freely selected.
▸ Select SETUPSETUP
▸ Select Capture AssistantsCapture Assistants in the main menu
▸ Select Focus PeakingFocus Peaking in the submenu
▸ Select the desired color
• All picture elements that are rendered in perfect focus at the
selected distance setting will be marked with a contour in the color
of your choice.
Practical Application
▸ Select an image section
▸ Turn the focus ring to mark the picture elements of your choice
• All picture elements that are rendered in perfect focus at the
selected distance setting will be marked with a contour in the color
of your choice.
Note
Focus peaking is based on subject contrast, i.e. differences between light
and dark. As a result, high contrast subject parts could be marked, even
if they are not completely in focus.
Loading ...
Loading ...
Loading ...
