Loading ...
Loading ...
Loading ...
Introduction
WARNING
See the Important Safety and Product Information guide in the
product box for product warnings and other important
information.
Always consult your physician before you begin or modify any
exercise program.
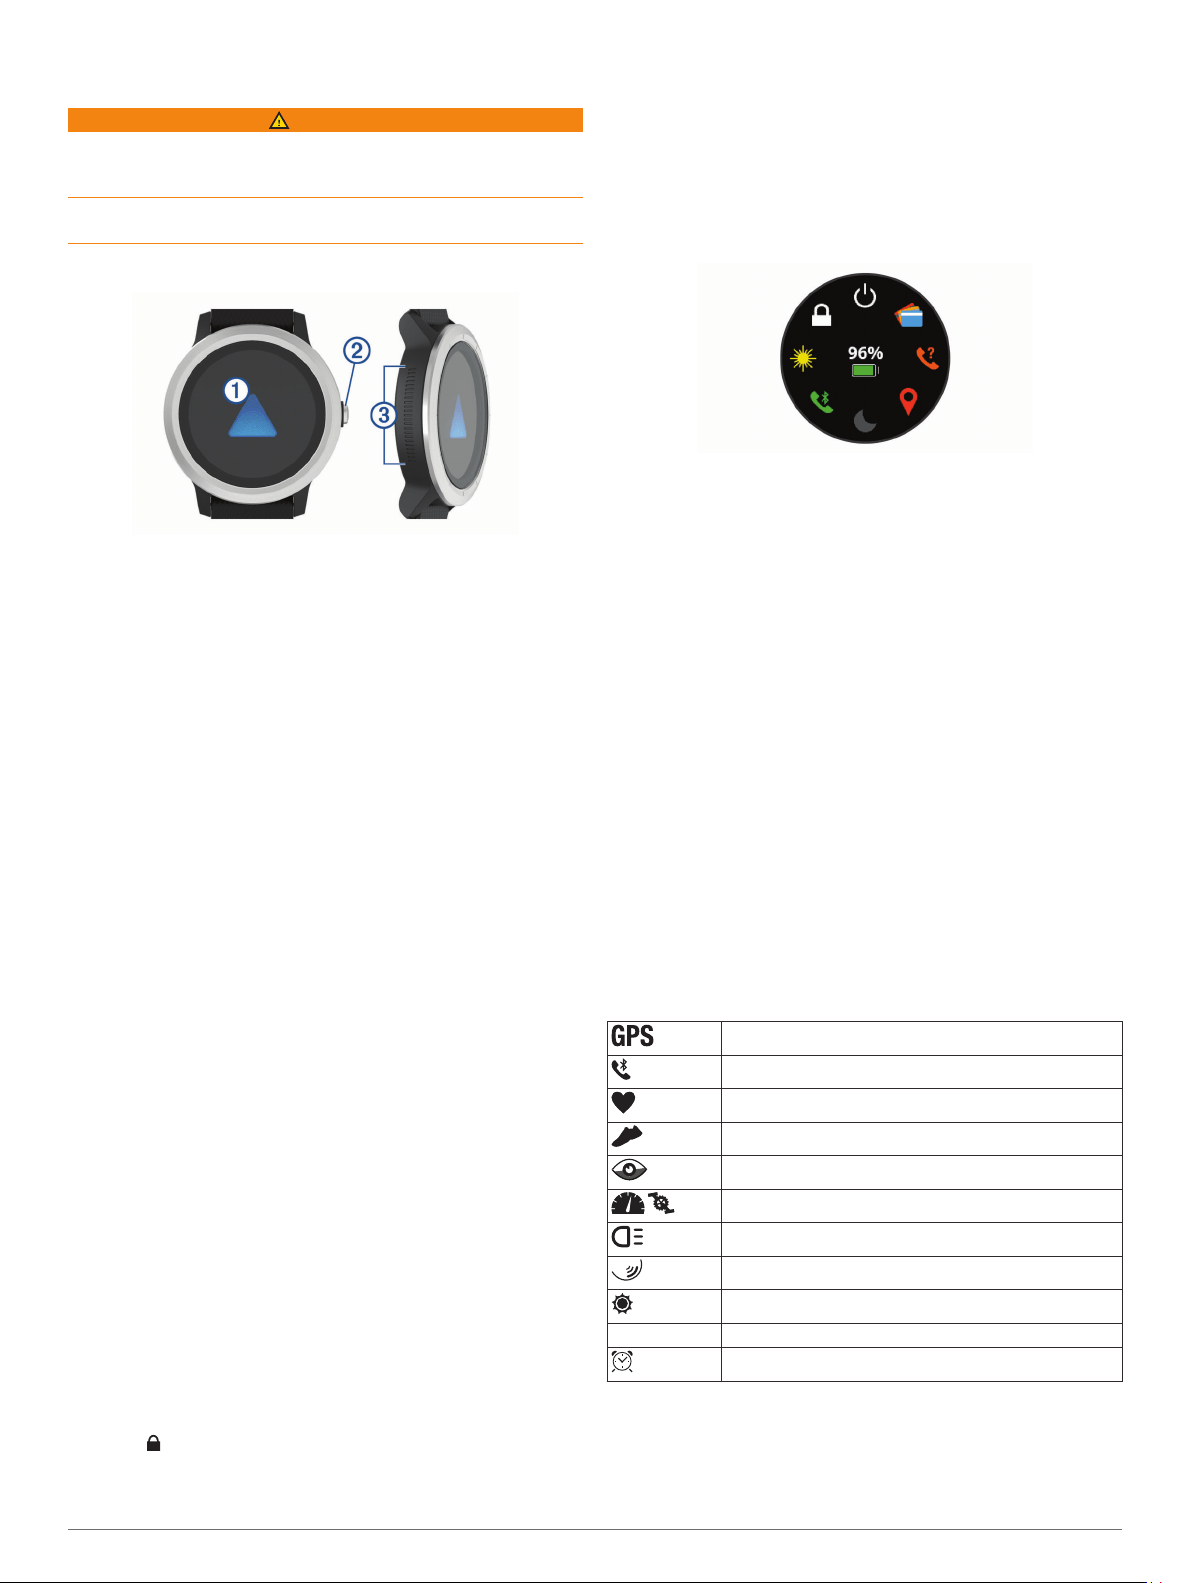
Device Overview
À
Touchscreen: Swipe up or down to scroll through widgets,
features, and menus.
Tap to select.
Swipe right to go back to the previous screen.
During an activity, swipe right to view the watch face and
widgets.
During an activity, double-tap to mark a new lap, start a new
set of reps, or advance to the next stage of a workout.
Hold to view a menu of device settings and options for the
current screen.
Á
Key: Hold to turn on the device.
Hold to view the controls menu, including device power.
Press to return to the watch face from any screen, except
during an activity.
During an activity, press to pause the activity.
Â
Side Swipe
™
Control: Slide up or down along the textured
area to scroll through widgets, data screens, and menus.
When a field with + and - buttons appears, slide up or down
to increase or decrease the value in the field.
Touchscreen Tips
• Hold your finger on the touchscreen to view an options menu.
• Drag up or down to scroll through lists and menus.
• Swipe up or down to scroll quickly.
• Tap to select a button, a list item, or a menu item.
• From the watch face, swipe up or down to scroll through the
widgets on the device.
• From a widget, tap to view additional widget screens, if
available.
• During an activity, swipe up or down to view the next data
screen.
• During an activity, swipe right to view the watch face and
widgets, and swipe left to return to the activity data fields.
• Perform each menu selection as a separate action.
Locking and Unlocking the Touchscreen
You can lock the touchscreen to prevent inadvertent screen
touches.
1
Hold the key.
2
Select .
The touchscreen locks and does not respond to touches until
you unlock it.
3
Hold the key to unlock the touchscreen.
Using the Controls Menu
The controls menu contains customizable shortcuts, such as
turning on do not disturb mode, locking the touchscreen, and
turning the device off.
NOTE: You can add, reorder, and remove the shortcuts in the
controls menu (Customizing the Controls Menu, page 14).
1
From any screen, hold the key.
2
Select an option.
Side Swipe Control Tips
The Side Swipe control is a touch-sensitive area on the side of
the watch body, which allows you to scroll through lists and
menus and adjust some field values without obscuring the
touchscreen. This feature can help you to quickly navigate
menus by using one finger to scroll and another to select items
on the touchscreen.
• Slide up or down on the Side Swipe control to scroll through
widgets, menus, and lists.
• When a field with + and - buttons appears, such as volume or
brightness, slide up or down to increase or decrease the
value in the field.
• Customize the scrolling direction of the Side Swipe control
and the watch orientation in the system settings (System
Settings, page 16).
To operate the Side Swipe control using your thumb, you
should wear the watch with the key facing toward your wrist.
To use your index finger, you should wear the watch with the
key facing away from your wrist.
Icons
A flashing icon means the device is searching for a signal. A
solid icon means the signal was found or the sensor is
connected.
GPS status
Smartphone connection status
Heart rate monitor status
Foot pod status
LiveTrack status
Speed and cadence sensor status
Varia
™
bike light status
Varia bike radar status
tempe
™
sensor status
VIRB VIRB
®
camera status
vívoactive 3 alarm status
Introduction 1
Loading ...
Loading ...
Loading ...