Loading ...
Loading ...
Loading ...
Going for a Ride
Before you can use a wireless sensor for your ride, you must
pair the sensor with your device (Pairing Your Wireless Sensors,
page 17).
1
Pair your wireless sensors, such as a heart rate monitor,
speed sensor, or cadence sensor (optional).
2
Press the key.
3
Select Bike.
4
When using optional wireless sensors, wait while the device
connects to the sensors.
5
Go outside, and wait while the device locates satellites.
6
Press the key to start the activity timer.
The device records activity data only while the activity timer is
running.
7
Start your activity.
8
Swipe up or down to scroll through data screens.
9
After you complete your activity, press the key, and select
to save the activity.
Viewing Your Ski Runs
Your device records the details of each downhill skiing or
snowboarding run using the auto run feature. This feature is
turned on by default for downhill skiing and snowboarding. It
automatically records new ski runs based on your movement.
The timer pauses when you stop moving downhill and when you
are on a chairlift. The timer remains paused during the chairlift
ride. You can start moving downhill to restart the timer. You can
view run details from the paused screen or while the timer is
running.
1
Start a skiing or snowboarding activity.
2
Hold the touchscreen.
3
Select View Runs.
4
Select and to view details of your last run, your current run,
and your total runs.
The run screens include time, distance traveled, maximum
speed, average speed, and total descent.
Going for a Pool Swim
NOTE: Heart rate is not available while swimming.
1
Press the key.
2
Select Pool Swim.
3
Select your pool size, or enter a custom size.
4
Press the key to start the activity timer.
The device records activity data only while the activity timer is
running.
5
Start your activity.
The device automatically records swim intervals and lengths.
6
Press the key when you rest.
The display inverts color, and the rest screen appears.
7
Press the key to restart the interval timer.
8
After you complete your activity, hold the key to stop the
activity timer, and hold the key again to save the activity.
Setting the Pool Size
1
Press the key.
2
Select Pool Swim > Pool Size.
3
Select your pool size, or enter a custom size.
Swim Terminology
Length: One trip down the pool.
Interval: One or more consecutive lengths. A new interval starts
after a rest.
Stroke: A stroke is counted every time your arm wearing the
device completes a full cycle.
Swolf: Your swolf score is the sum of the time for one pool
length and the number of strokes for that length. For
example, 30 seconds plus 15 strokes equals a swolf score of
45. Swolf is a measurement of swimming efficiency and, like
golf, a lower score is better.
Golfing
Downloading Golf Courses
Before you play a course for the first time, you must download it
using the Garmin Connect Mobile app.
1
From the Garmin Connect Mobile app, select Download Golf
Courses > .
2
Select a golf course.
3
Select Download.
After the course finishes downloading, it appears in the list of
courses on your vívoactive 3 device.
Playing Golf
Before you play a course for the first time, you must download it
using your smartphone (Downloading Golf Courses, page 9).
Downloaded courses are updated automatically. Before you play
golf, you should charge the device (Charging the Device,
page 18).
1
Press the key.
2
Select Golf.
3
Wait while the device locates satellites.
4
Select a course from the list of available courses.
5
Swipe up or down to scroll through the holes.
The device automatically transitions when you move to the
next hole.
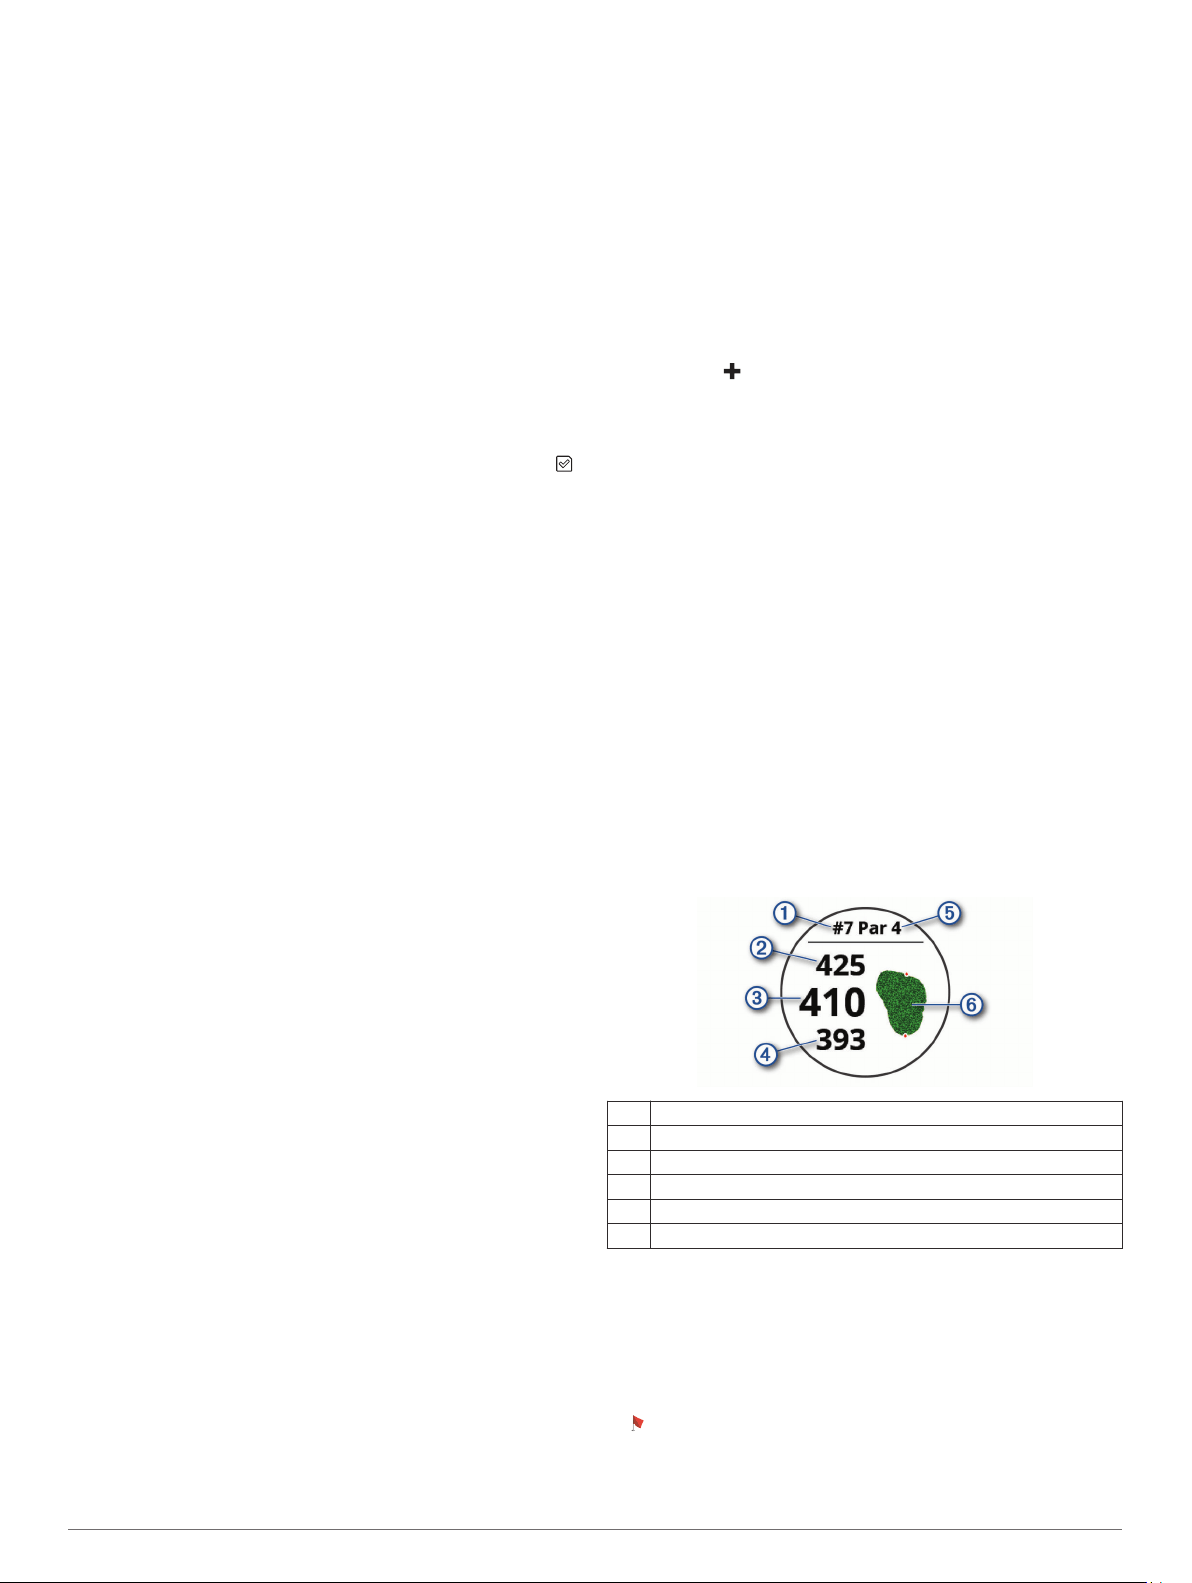
Hole Information
The device calculates the distance to the front and back of the
green, and to the selected pin location (Changing the Pin
Location, page 9).
À
Current hole number
Á
Distance to the back of the green
Â
Distance to the selected pin location
Ã
Distance to the front of the green
Ä
Par for the hole
Å
Map of the green
Changing the Pin Location
While playing a game, you can take a closer look at the green
and move the pin location.
1
Select the map.
A larger view of the green appears.
2
Swipe up or down to scroll through the pin locations.
indicates the selected pin location.
3
Press the key to accept the pin location.
Apps and Activities 9
Loading ...
Loading ...
Loading ...