Loading ...
Loading ...
Loading ...
24
To protect the oven bottom surface, place a piece of aluminum foil slightly larger than the
baking dish on the rack below to catch any boilovers. It should not completely cover the
rack as this would cause uneven heat in the oven. Aluminum foil should not be placed on
the oven bottom.
If a spillover does occur on the oven bottom, allow the oven to cool first. You can clean
the bottom with soap and water, a mild abrasive cleanser, soap-filler abrasive pads or an
oven cleaner following package directions.
Broiler Compartment
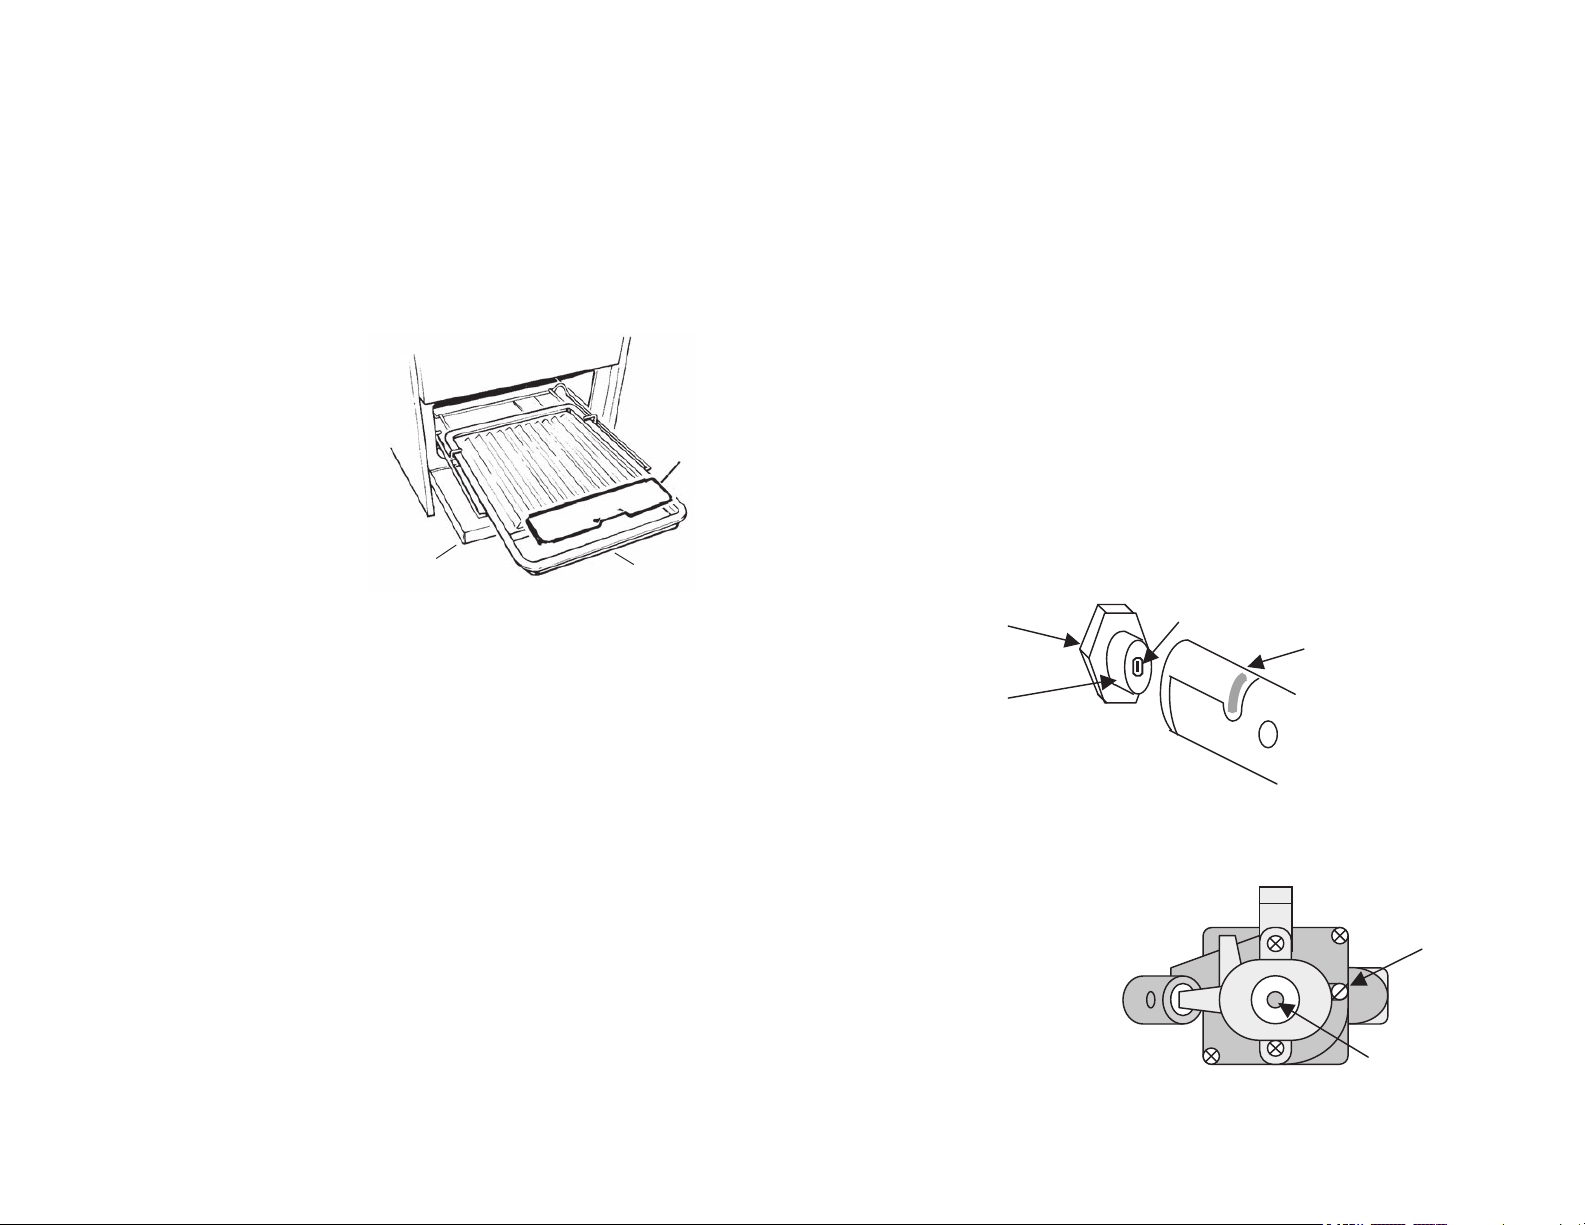
The broiler pan is held in place by a wire broiler rack. To open the broiler, gently lift up and
pull forward on the drop down broiler door. Pull the broiler pan forward. It will reach a
temporary stop position. Continue to pull forward and the broiler pan will pull out to
expose the entire broiler grill surface.
Remove the broiler pan from the broiler
rack by lifting up on the front of the
broiler pan so it will clear the wire rack.
Then pull forward slightly and use both
hands to lift the pan free of the rack. To
return the pan to the broiler rack, pull
the wire rack out to the stop position.
Insert the pan into the recessed section
of the broiler rack. Slide the pan in
place under the pan retainers. Push the
pan to the rear of the broiler
compartment. Close the broiler door.
Economy Broiler
Your range may be equipped with this optional broiler. The outward appearance of the
range will be the same. To open the broiler door, lift handle up slightly to release the door
catch and then lower the door. In the broiler section there are two positions of stamped-in
oven rack guides and a broiler pan and grill. When you want to broil, take one of the oven
racks and insert it into the rack guide positions. Next, place the broiler pan and grill on
the oven rack for broiling.
Broiling
Preheat the broiler area and broil pan for a few minutes. No definite time can be given for
broiling meats because of varying thickness, amounts of fat, and personal taste. Be
careful when handling hot broiler pans; be careful of the hot grease. Serious injury
can result due to spillage of hot grease. Never leave a dirty broil pan in place, always
clean it and return it to the broiler assembly. Unauthorized broil pan substitutes should
never be used. Excess fat should be trimmed to reduce the possibility of flame up. The
meat could be ruined or fire could occur causing loss of property and bodily injury.
When broiling fatty meats, the lowest broil must be used, however, we recommend the
lowest positions at all times.
Always broil with the oven door closed. When broiling is completed, turn the dial to OFF
and remove the broil pan temporarily for cleaning.
Do not use the broiler area for storage of utensils.
BROILER
DOOR
BROILER
PA N
BROILER
PAN COVER
24
To protect the oven bottom surface, place a piece of aluminum foil slightly larger than the
baking dish on the rack below to catch any boilovers. It should not completely cover the
rack as this would cause uneven heat in the oven. Aluminum foil should not be placed on
the oven bottom.
If a spillover does occur on the oven bottom, allow the oven to cool rst. You can clean
the bottom with soap and water, a mild abrasive cleanser, soap-ller abrasive pads or an
oven cleaner following package directions.
Broiler Compartment
The broiler pan is held in place by a wire broiler rack. To open the broiler, gently lift up and
pull forward on the drop down broiler door. Pull the broiler pan forward. It will reach a
temporary stop position. Continue to pull forward and the broiler pan will pull out to
expose the entire broiler grill surface.
Remove the broiler pan from the broiler
rack by lifting up on the front of the
broiler pan so it will clear the wire rack.
Then pull forward slightly and use both
hands to lift the pan free of the rack. To
return the pan to the broiler rack, pull
the wire rack out to the stop position.
Insert the pan into the recessed section
of the broiler rack. Slide the pan in
place under the pan retainers. Push the
pan to the rear of the broiler compartment.
Close the broiler door.
Economy Broiler
Your range may be equipped with this optional broiler. The outward appearance of the
range will be the same. To open the broiler door, lift handle up slightly to release the door
catch and then lower the door. In the broiler section there are two positions of stamped-in
oven rack guides and a broiler pan and grill. When you want to broil, take one of the oven
racks and insert it into the rack guide positions. Next, place the broiler pan and grill on
the oven rack for broiling.
Broiling
Preheat the broiler area and broil pan for a few minutes. No denite time can be given for
broiling meats because of varying thickness, amounts of fat, and personal taste. Be
careful when handling hot broiler pans; be careful of the hot grease. Serious injury
can result due to spillage of hot grease. Never leave a dirty broil pan in place, always
clean it and return it to the broiler assembly. Unauthorized broil pan substitutes should
never be used. Excess fat should be trimmed to reduce the possibility of ame up. The
meat could be ruined or re could occur causing loss of property and bodily injury.
When broiling fatty meats, the lowest broil must be used, however, we recommend the
lowest positions at all times.
Always broil with the oven door closed. When broiling is completed, turn the dial to OFF
and remove the broil pan temporarily for cleaning.
Do not use the broiler area for storage of utensils.
17
ALIGNMENTS AND ADJUSTMENT, Continued
Top Burner Height
Make sure the top burners are properly positioned. The top of the burner head should be
level with the surface of the main top. To check, lay a straight edge such as a 12-inch
ruler across the burner bowl opening. The ruler should rest squarely on the top while in
contact with the burner head.
If the burner is too high (make sure the burner is cool), push it down. Supply enough
force with the palm of you hand to accomplish this adjustment. To raise, pull up on the
burner support at the center of the support.
6. Oven Control (Thermostat)
The oven control has a flame safety device built into the body of the thermostat.
Presence of a gas ignition source (pilot) is verified by a flame safety probe. This flame
safety probe actuates the internal safety device to allow gas into the oven burner when
the oven is turned on. If there is a loss of gas ignition during operation, the flame safety
device will close off gas flow to the oven burner and pilot.
The oven burner orifice is located on a brass injector stud at the rear of the oven under
the oven floor. This orifice is dedicated to the gas for which the oven is to be used. The
orifice is not adjustable. It must be changed completely to convert from one gas to the
other. DO NOT DISCARD THE UNUSED ORIFICE. It should be saved in order to
convert the range back to its original fuel.
When converting the oven thermostat to LP (Propane) gas, the minimum bypass screw
must be screwed in all the way until it tightens. To convert back to natural gas, turn the
screw counterclockwise until the minimum burner flames appear as a row of 1/8”
diameter dots along the side of the burner.
ALIGNMENTS AND ADJUSTMENT, Continued
Ovens With Constant Pilot
The oven pilot is located along the left hand side of the oven burner. It is fastened under
the flame safety probe. The flame of the oven pilot ignites main burner gas when the
oven is turned on. If the pilot flame is not present, the flame safety device will not allow
pilot gas or main burner gas to flow.
Pilot flame size is set by the adjustment screw located along the side of the thermostat.
The outer tip of the flame should just barely reach the underside of the end of the flame
safety probe. The pilot screw must be adjusted if the range is converted to LP gas.
Light the oven pilot as follows:
• Fully press in and hold the oven control knob to allow pilot gas to flow to the pilot
burner. It will take 30 to 60 seconds to bleed all the air out of the pilot supply line.
• While pressing in the oven control knob, place a lit match or lighter under the pilot
burner to light it.
• Once the pilot burner is lit, continue to hold in the oven control knob for at least 10
seconds.
• If the pilot flame extinguishes when the oven control knob is released, repeat the
above procedure.
• Adjust the size of the oven pilot flame if needed.
ALWAYS LIGHT THE OVEN PILOT WITH ALL CONTROL KNOBS IN THE
“OFF” POSITION.
Make certain the oven is cool when manually lighting
oven pilot.
Ovens with Standby Pilot Battery Spark Ignition: Free-Standing Ranges
Ranges equipped with the battery ignition system have an electrode fastened on the left
hand side of the oven pilot and flame safety probe. In these models, the oven pilot is
used as an ignitor instead of a permanent pilot flame.
Minimum
Bypass Screw
Injector Stud
Mounting
Nut
Oven Burner
Orifice
Front Face of Thermostat
with Oven Knob Removed
End of
Control Stem
17
ALIGNMENTS AND ADJUSTMENT, Continued
Top Burner Height
Make sure the top burners are properly positioned. The top of the burner head should be
level with the surface of the main top. To check, lay a straight edge such as a 12-inch
ruler across the burner bowl opening. The ruler should rest squarely on the top while in
contact with the burner head.
If the burner is too high (make sure the burner is cool), push it down. Supply enough
force with the palm of you hand to accomplish this adjustment. To raise, pull up on the
burner support at the center of the support.
6. Oven Control (Thermostat)
The oven control has a ame safety device built into the body of the thermostat.
Presence of a gas ignition source (pilot) is veried by a ame safety probe. This ame
safety probe actuates the internal safety device to allow gas into the oven burner when
the oven is turned on. If there is a loss of gas ignition during operation, the ame safety
device will close off gas ow to the oven burner and pilot.
The oven burner orice is located on a brass injector stud at the rear of the oven under
the oven oor. This orice is dedicated to the gas for which the oven is to be used. The
orice is not adjustable. It must be changed completely to convert from one gas to the
other. DO NOT DISCARD THE UNUSED ORIFICE. It should be saved in order to
convert the range back to its original fuel.
When converting the oven thermostat to LP (Propane) gas, the minimum bypass screw
must be screwed in all the way until it tightens. To convert back to natural gas, turn the
screw counterclockwise until the minimum burner ames appear as a row of 1/8”
diameter dots along the side of the burner.
Loading ...
Loading ...
Loading ...