Loading ...
Loading ...
Loading ...
12
ALIGNMENTS AND ADJUSTMENTS
Installation
It is the responsibility of the installer to make certain that the range is properly adjusted at
the time of installation. Situations caused by improper adjustments or improper
installation are not covered under the warranty. Any expenses incurred due to such
situations will not be paid by the manufacturer of the appliance.
Gas Range Conversion and Adjustment Guide
The range will either be set for use with Liqueed Petroleum (LP) or Natural Gas. The
factory setting is indicated on the serial plate. When set for Natural Gas operation, the
pressure regulator will regulate the pressure to 4 inches water column. When set for LP
Gas operation, the pressure regulator will regulate the gas to 10 inches water column
pressure.
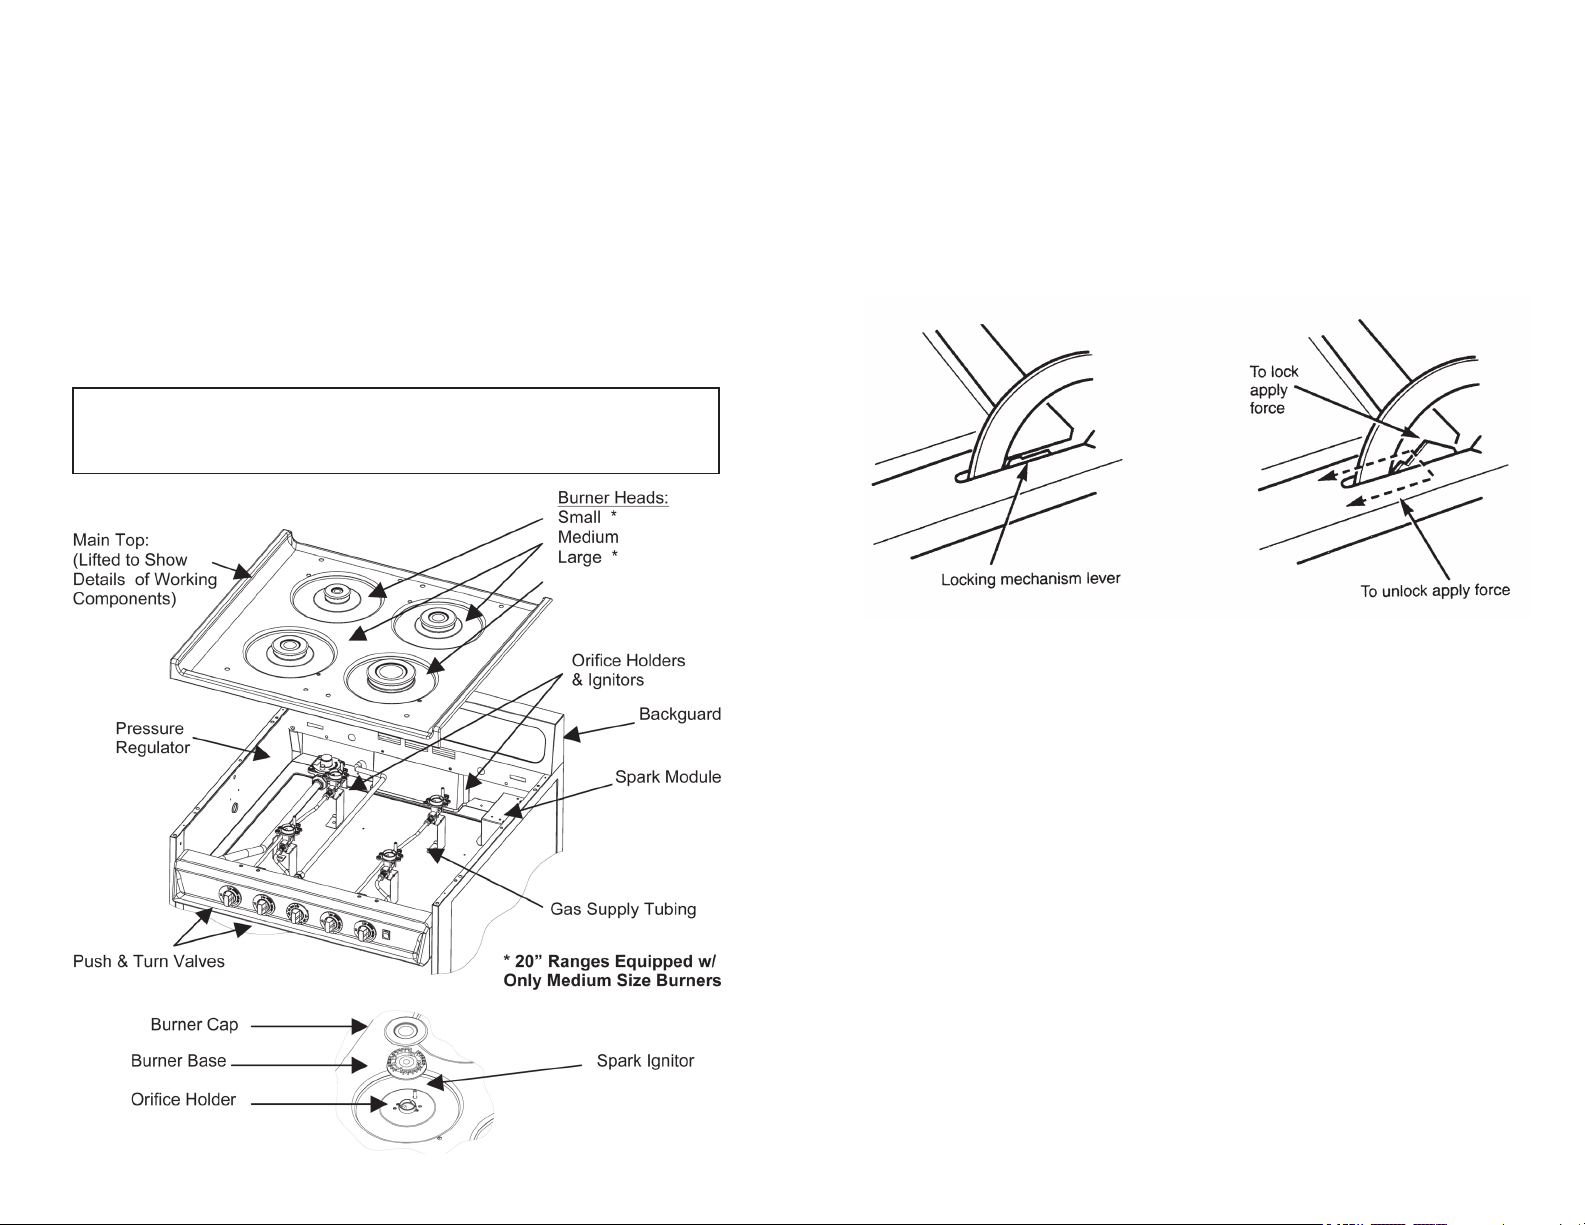
On sealed burner models, access to adjust the pressure regulator can be gained by
reaching behind the backguard. Burner orices can be accessed directly beneath the
liftoff burner heads. See illustrations.
CLEANING THE RANGE, Continued
To prevent this, open the oven door for the rst few seconds of initial oven heat-up. This
will allow the moist air within the oven to escape without the forming of visible moisture
on the range. The amount of moisture will depend upon the humidity of the air and water
content of the food being cooked. Fogging and even dripping water will usually occur in
geographic locations of high humidity.
Lift-Off Oven Door (on some models)
The oven door is removable (on some models) but it is heavy. You may need help
removing and replacing the door.
To remove the door, open it to the full open position. Raise the locking mechanism by
applying force to the locking mechanism lever. Close the door until it stops against the
locking mechanism. Grasp rmly on each side and lift the door straight up and off the
hinges.
To replace the door, position the slots in the bottom of the door squarely over the hinges.
Then lower the door slowly and evenly over both hinges at the same time.
Open the door to the full open position and press the locking mechanism back into its
original position.
DO NOT ATTEMPT TO CLOSE THE DOOR UNTIL THIS STEP IS COMPLETE.
THE HINGE OR DOOR COULD BE DAMAGED.
29
LIFT-OFF DOORS
Loading ...
Loading ...
Loading ...