Loading ...
Loading ...
Loading ...
59English
Cooktop Maintenance
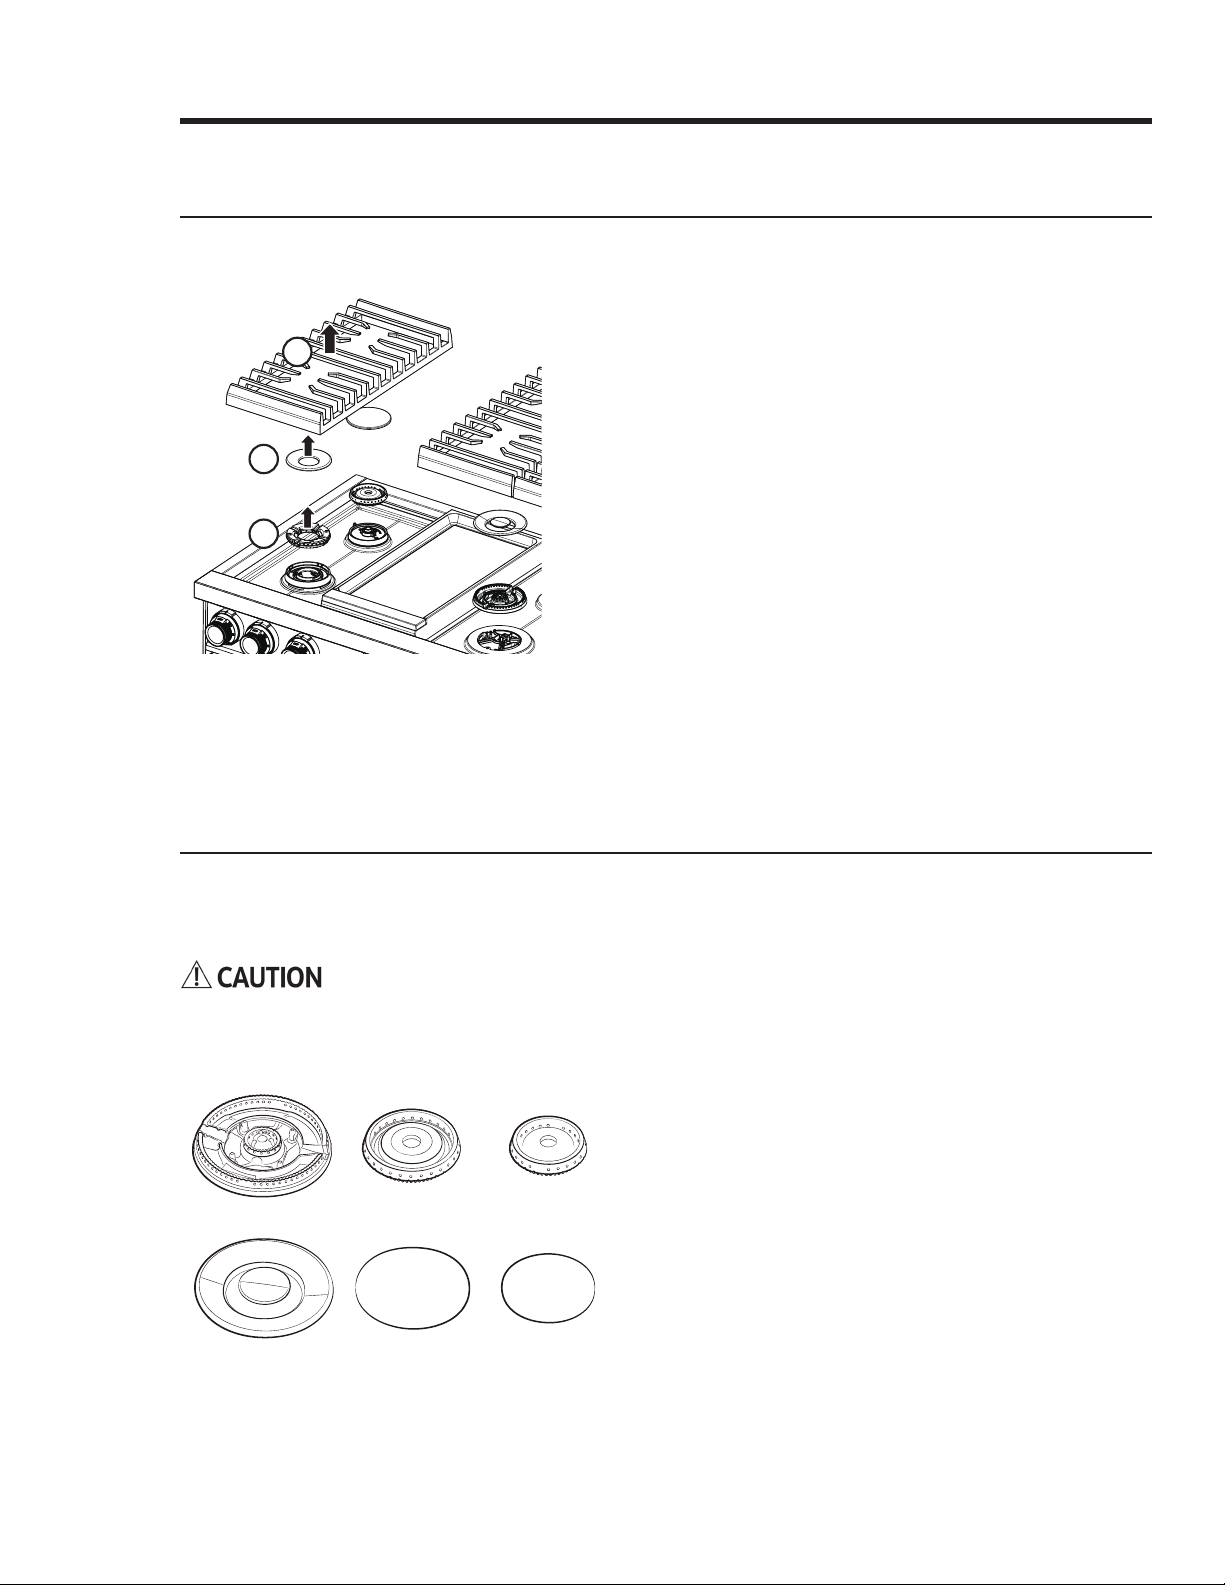
Disassembling/Assembling the Burners and Grates
Turn off burners, and wait for all surfaces to cool down.
1. Remove the burner grates.
2. Remove the burner caps and heads.
3. Clean the grates and burner parts in warm, soapy water.
(Do not use abrasive pads or cleaners.)
4. Rinse/dry grates and burner parts fully. (Ensure the
burner ports are dry.)
5. Reassemble the burner heads, ensuring a starter elec-
trode passes through the hole in each head (Pgs. 61).
6.
head.
7. Set the grates in their respective places.
8. Test all burners for proper function.
About Burner Caps and Heads
Wash the caps and heads in hot, soapy water, then rinse them under the tap. You may scour with a plastic
scouring pad to remove burned-on residue. Use a sewing needle or twist tie to unclog the small holes in the
burner head, if needed. After cleaning, return all burner caps and heads to their original positions.
Burner parts are not dishwasher safe. Do not use steel wool or scouring powders to clean them.
• The brass parts will discolor. However, this will not
affect performance.
• After cleaning, check that all burner ports are un-
clogged.
• You may swap the original burner caps for porcelain
caps.
• To remove burnt-on grease, soak the cap in a solution
of 1 cup water and either 1 tbsp white vinegar or lemon
juice. Do not clean with a metallic brush, which can
damage the brass.
2
3
1
1. Grate
2. Cap
3. Head
Loading ...
Loading ...
Loading ...