Loading ...
Loading ...
Loading ...
29English
Using the Basic Oven
2. Insert the temp probe plug fully into the socket on the top side wall of the oven.
3. (48" range) Tap LEFT or RIGHT, and swipe to a cooking operation (Bake, Convection Bake, Convection
Roast, Pure Conv.Sear, or Dual Four-Part Pure Convection). (36" range) Select a cooking mode, and
set the cooking temperature. (See Pg. 33.)
4. Tap Temp Probe, and on the numeric pad, set an internal temp from 100 °F to 200 °F.
5. (Option) Set Cook Time/Delay Start.
6. Tap START. (When the set internal temp is reached, the probe turns off, and an alarm sounds.)
Using the Temp Probe
For many foods, especially roasts and poultry, measuring the internal temperature is the best way to deter-
mine proper doneness. This feature lets you cook meat to an exact internal temperature. Use it with Bake, Con-
temperature reaches 100 °F, the current temperature appears on the probe display.
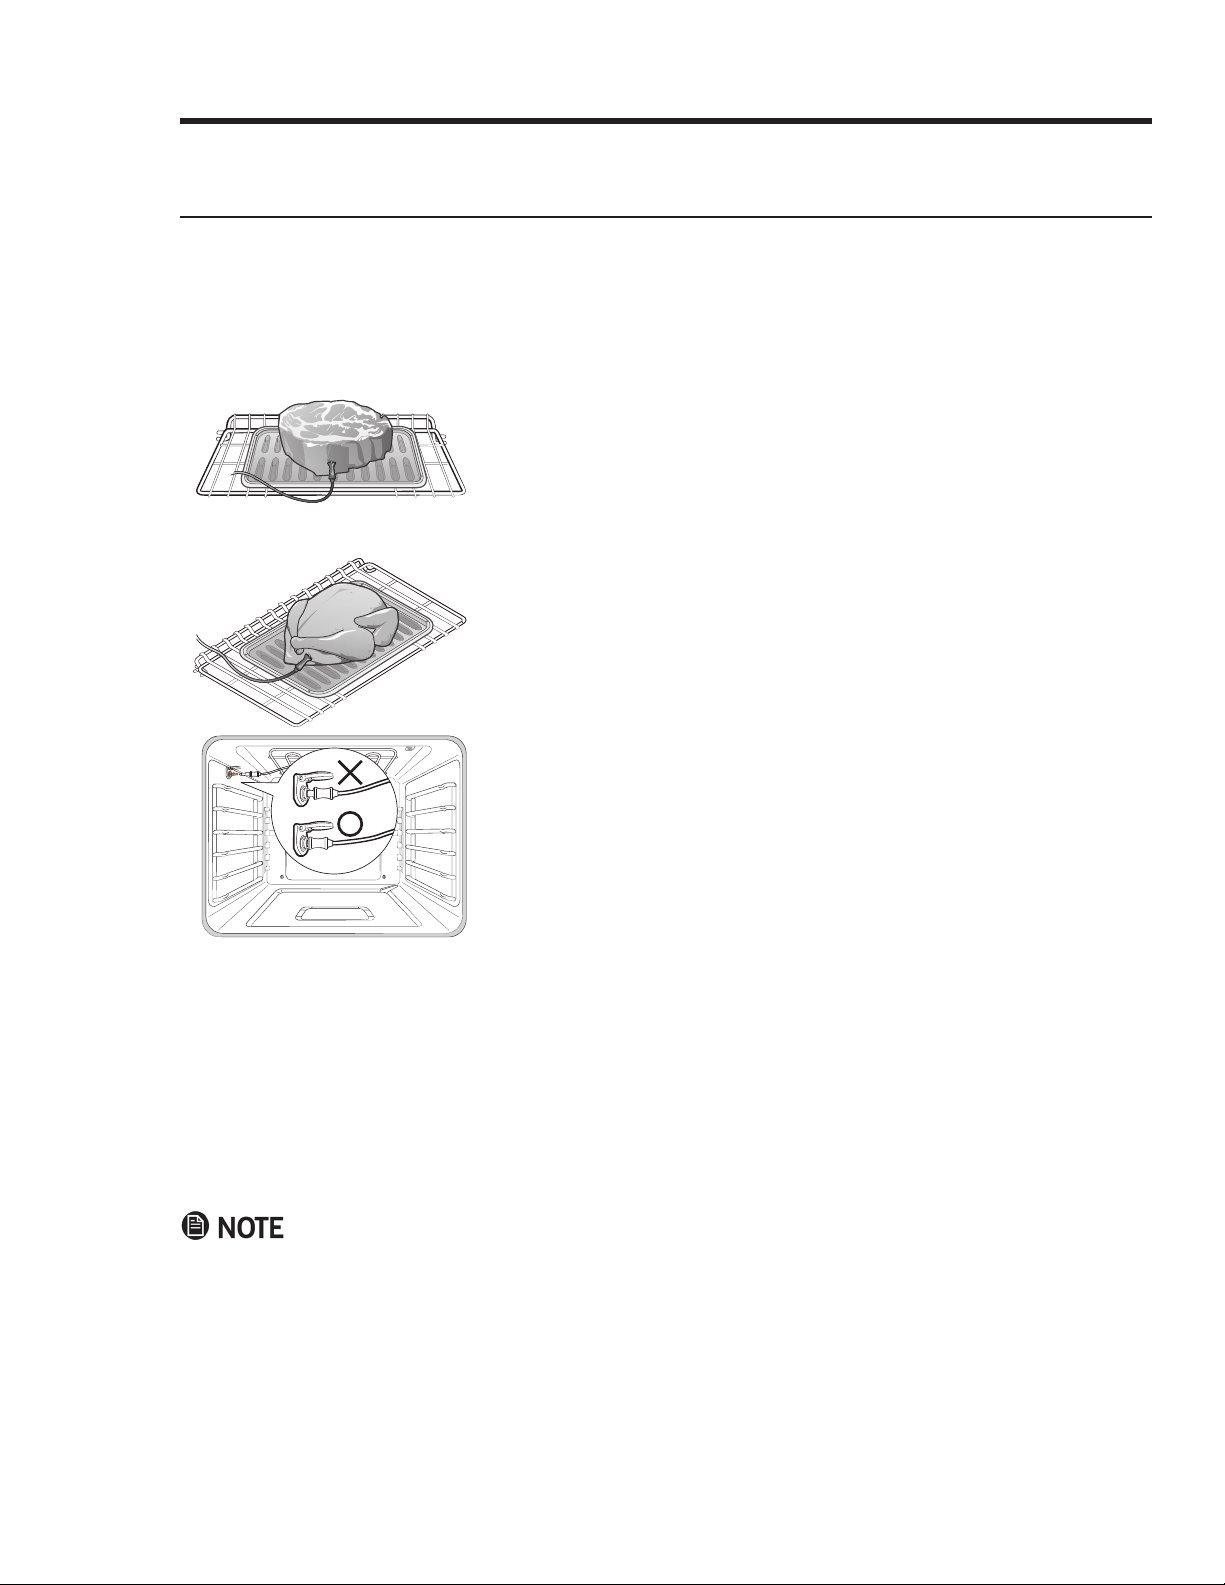
1. Push the temp probe tip into the center of the meat.
• Insert the probe as shown at left. Do not touch bone, fat,
or gristle. If you do not fully insert the probe, it senses
oven temp, not meat temp.
• Bone-in meat: Insert the probe in the center of the lowest,
thickest portion.
• Whole poultry: Insert the probe in the thickest part of the
inner thigh, parallel to the leg.
• If you activate Keep Warm to keep the meat warm after
cooking it using the temp probe, the meat may cook be-
yond the desired temp.
• Temp probe socket location, by model: 48" range (left
oven): left oven wall; (right oven): right oven wall; 36"
range: left oven wall.
If you remove the temp probe without canceling the function or insert it without setting the function, cooking
stops after 1 min.
Loading ...
Loading ...
Loading ...