Loading ...
Loading ...
Loading ...
40 English
Using the Basic Oven
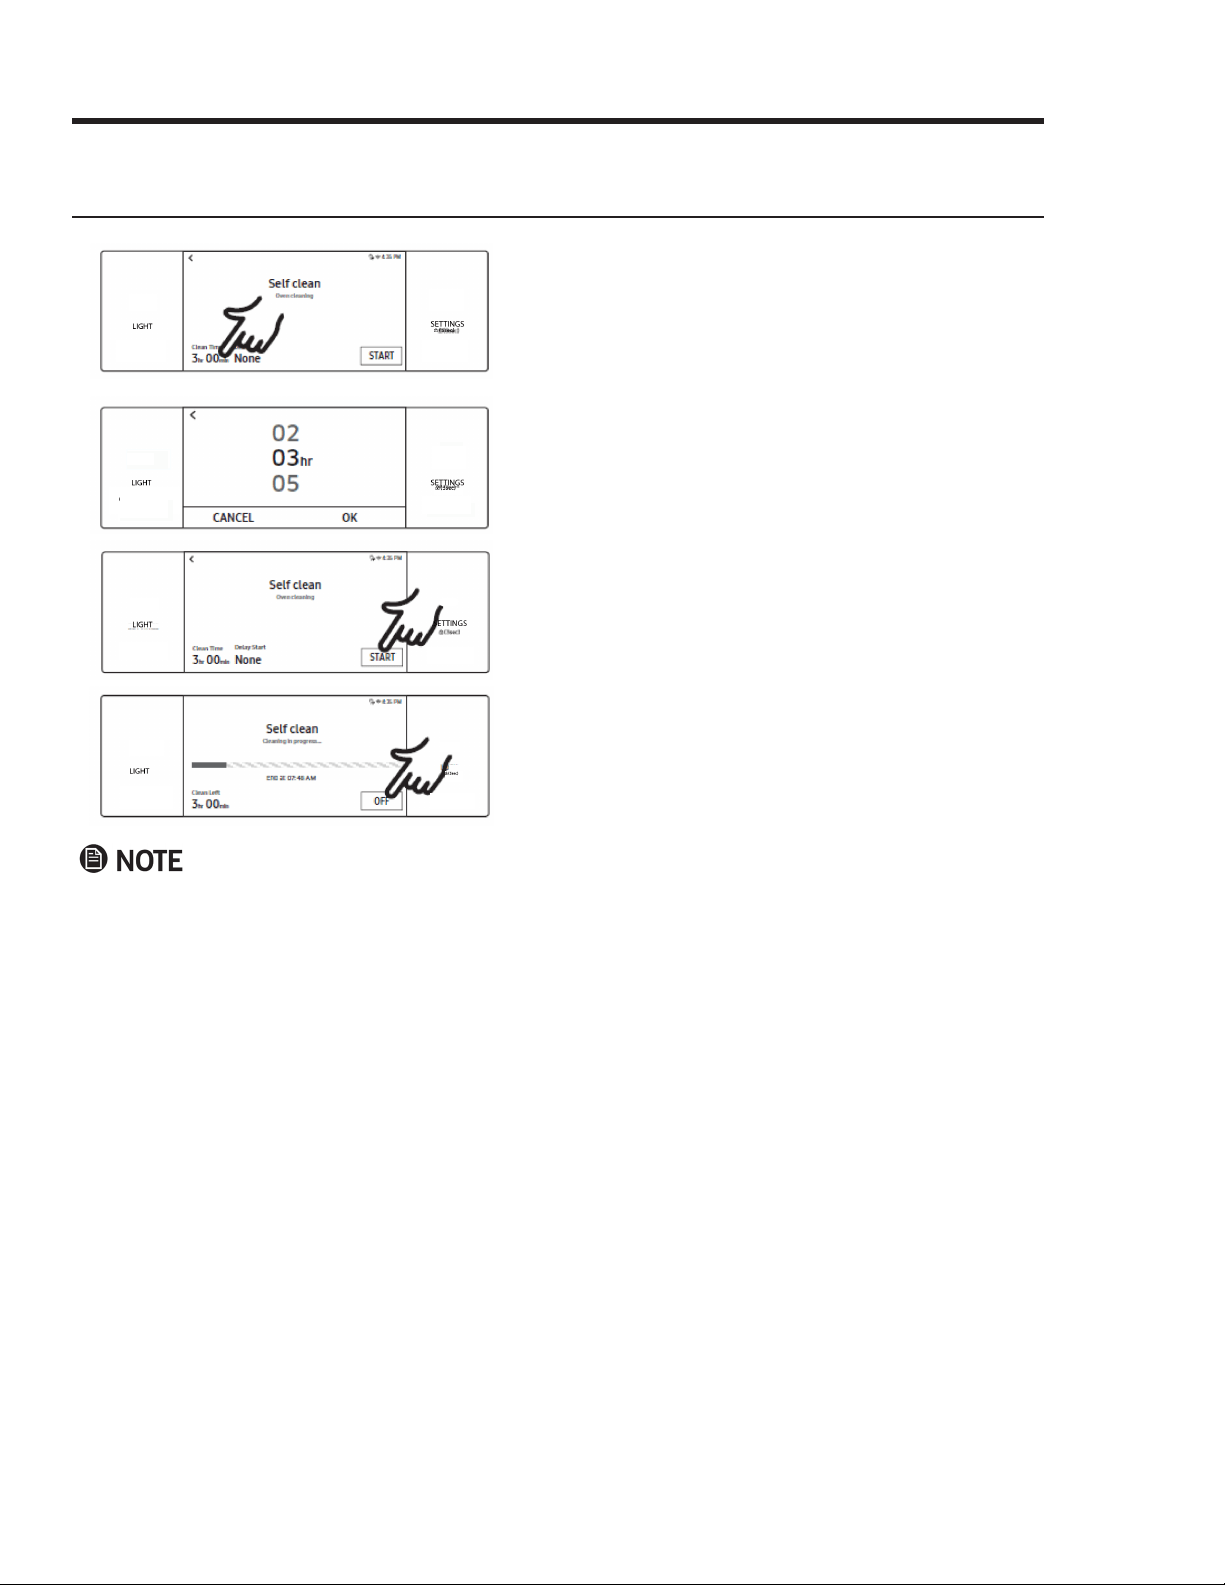
Using the Cleaning Features, cont.
4. Tap Clean Time
5. Tap the screen to set the clean time (2, 3, or 5 hrs (de-
fault: 3), and tap OK
.
6. If not using Delay Start, go to Step 8. Otherwise, tap
Delay Start, and go to Step 7.
7. Set the time you want self-cleaning to start, and tap
OK.
8. Tap START to begin self-cleaning. (Auto door lock
engages; both doors lock when you run self-cleaning
on either oven.)
If you need to cancel self-cleaning, tap OFF.
• You cannot start self-cleaning if control lockout is active or if the oven is too hot.
• During self-cleaning, the oven doors lock automatically. The display shows the remaining cleaning time.
The oven doors will not open until the oven has cooled fully.
• Self-cleaning can be used in only one oven at a time, and the idle oven cannot be used.
• Do not operate the cooktop during self-cleaning.
After a Self-Cleaning Cycle
•
and rinse thoroughly with a vinegar and water mixture.)
• If the oven is not clean after one cycle, repeat the cycle.
• You cannot set the oven to cook until the door unlocks.
TIMER
OPEN/CLOSE
RESERVOIR
OFF
LIFT PANEL
TIMER
OPEN/CLOSE
RESERVOIR
TIMER
OPEN/CLOSE
RESERVOIR
OFF
LIFT PANEL
TIMER
OPEN/CLOSE
RESERVOIR
OFF
LIFT PANEL
TINGS
TIMER
OPEN/CLOSE
RESERVOIR
LIFT PANEL
OFF
Loading ...
Loading ...
Loading ...