Loading ...
Loading ...
Loading ...
Troubleshooting
177
6
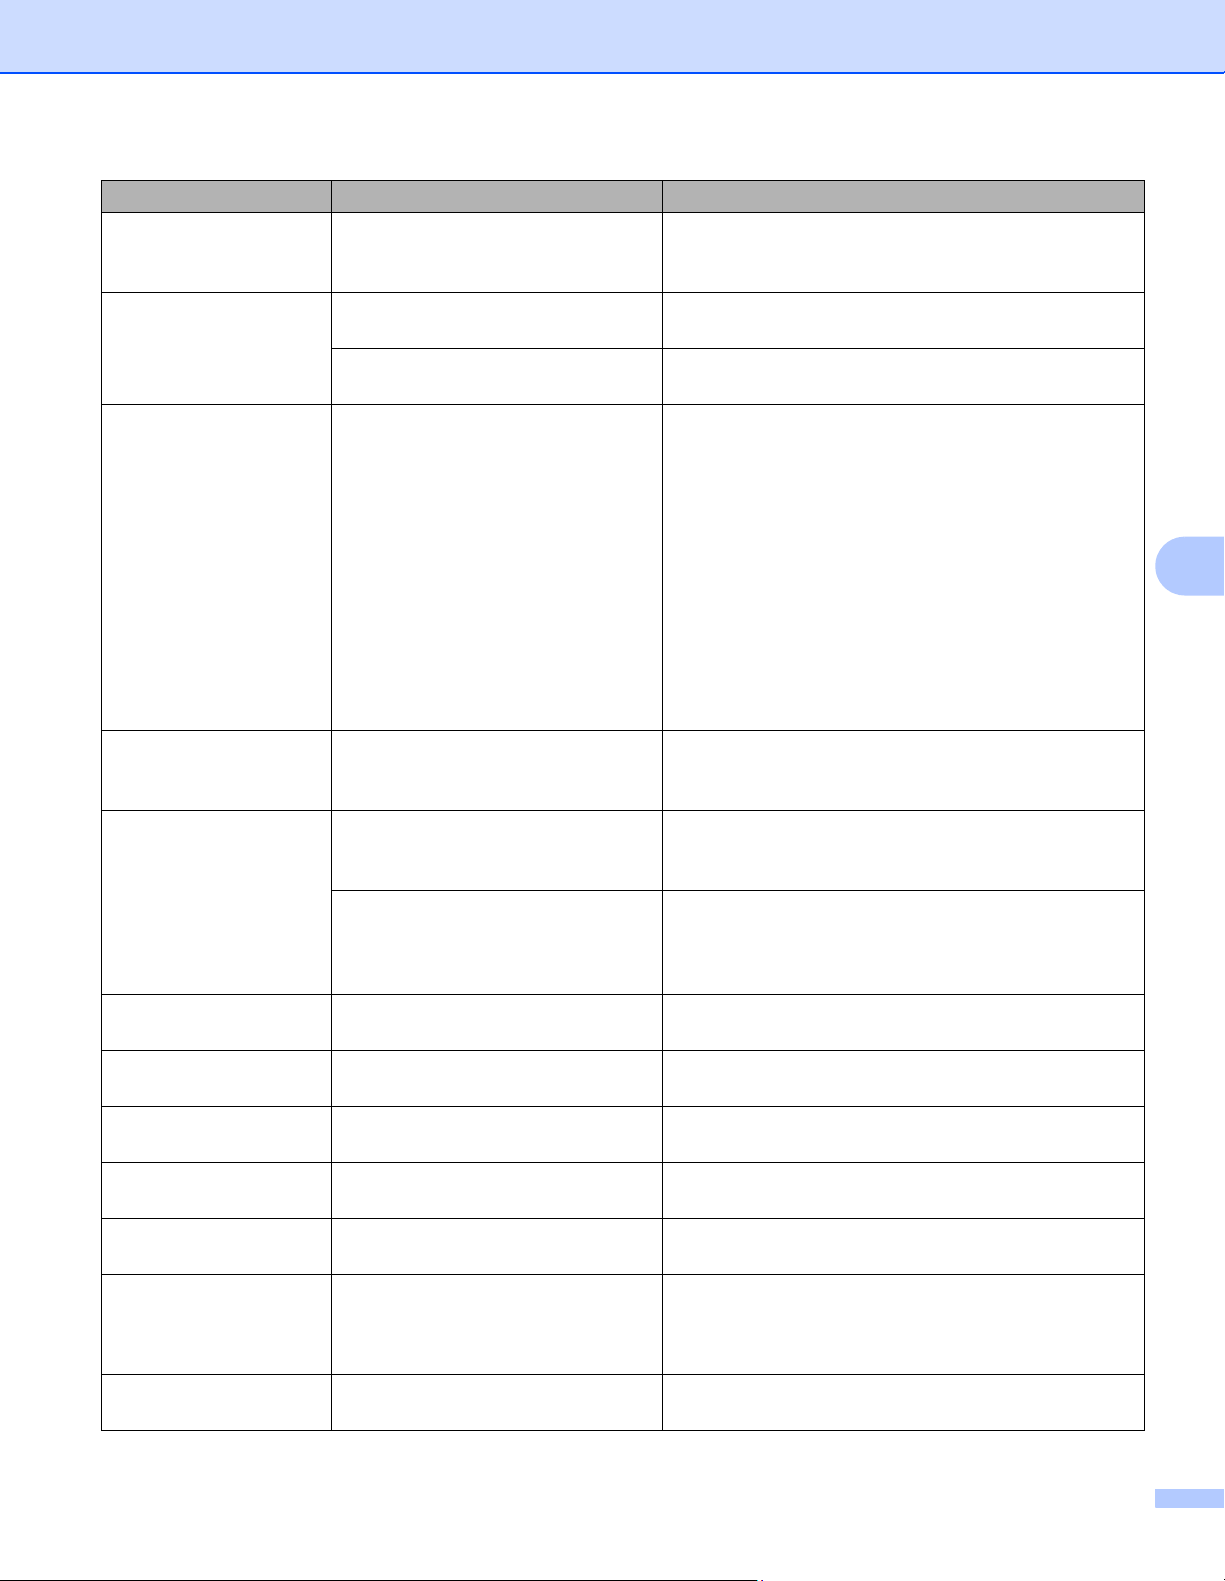
Condensation Condensation may have formed
inside the machine after a room
temperature change.
Leave the machine turned on. Wait for 30 minutes
with the front cover in the open position. Then turn off
the machine and close the cover. Turn it on again.
Cover is Open The front cover is not closed
completely.
Close the front cover of the machine.
The fuser cover is not closed
completely.
Close the fuser cover located inside the back cover of
the machine.
DIMM Error The DIMM is not installed
correctly.
The DIMM is broken.
The DIMM does not meet the
required specifications.
Turn off the machine and unplug the power cord.
Remove the DIMM. (See Installing extra memory
on page 121.)
Confirm that the DIMM meets the required
specifications. (For details, see SO-DIMM types
on page 120.)
Reinstall the DIMM correctly. Wait a few seconds.
Plug in the power cord, and then turn the machine
on again.
If this error message appears again, replace the
DIMM with a new one. (See Installing extra
memory on page 121.)
Drum End Soon The drum unit is near the end of its
life.
Order a new drum unit now so a replacement drum
unit will be available when the Touchscreen displays
Replace Drum (see Drum End Soon on page 133).
Drum ! The corona wire on the drum unit
needs to be cleaned.
Clean all four corona wires inside the drum unit by
sliding the blue tabs (see Cleaning the corona wires
on page 160).
The drum unit is not installed
correctly.
Remove the drum unit, remove the toner cartridges
from the drum unit, and put the toner cartridges back
into the drum unit. Reinstall the drum unit in the
machine.
Drum Stop It is time to replace the drum unit. Replace the drum unit (see Replacing the drum unit
on page 133).
Jam 2-sided The paper is jammed underneath
the paper tray or the fuser unit.
See Paper is jammed underneath the Paper Tray
on page 184.
Jam Inside The paper is jammed inside the
machine.
See Paper is jammed inside the machine
on page 190.
Jam MP Tray The paper is jammed in the
multi-purpose tray of the machine.
See Paper is jammed in the multi-purpose tray
on page 182.
Jam Rear The paper is jammed in the back of
the machine.
See Paper is jammed at the back of the machine
on page 187.
Jam Tray
Jam Tray1
Jam Tray2
The paper is jammed in the paper
tray of the machine.
See Paper is jammed in Paper Tray 1 or Tray 2
on page 182.
Limit Exceeded The print limit set in Secure
Function Lock was reached.
Contact your administrator to check your Secure
Function Lock settings.
Error message Cause Action
Loading ...
Loading ...
Loading ...