Loading ...
Loading ...
Loading ...
Function
20
O
X
O
O
O
O
X
X
X
X
X
X
X
X
O
X
X
X
X
O
X
O
O
O
O
X
X
X
X
X
X
X
X
O
X
X
X
X
O
X
O
O
O
O
X
X
X
X
X
X
X
X
O
X
X
X
X
O
O
X
O
O
O
X
X
X
X
X
X
X
X
O
X
X
X
X
< Remote Controller Function only operational in 3D mode >
3D Mode Top & Bottom Side by Side Frame Sequential Frame Packing
POWER
INPUT
3D
L/R
VOL ∧/∨
MUTE
USB
PAGE ∧/∨
RATIO
MENU
AUTO
Q.MENU
MARK
SLEEP
BACK
STILL
KEYSTONE
ZOOM
TIMER
2. RGB-PC should press auto correction button on remote controller before watch 3D image. (Please refer “PC
connection”on page 17 for HDMI-PC sound output)
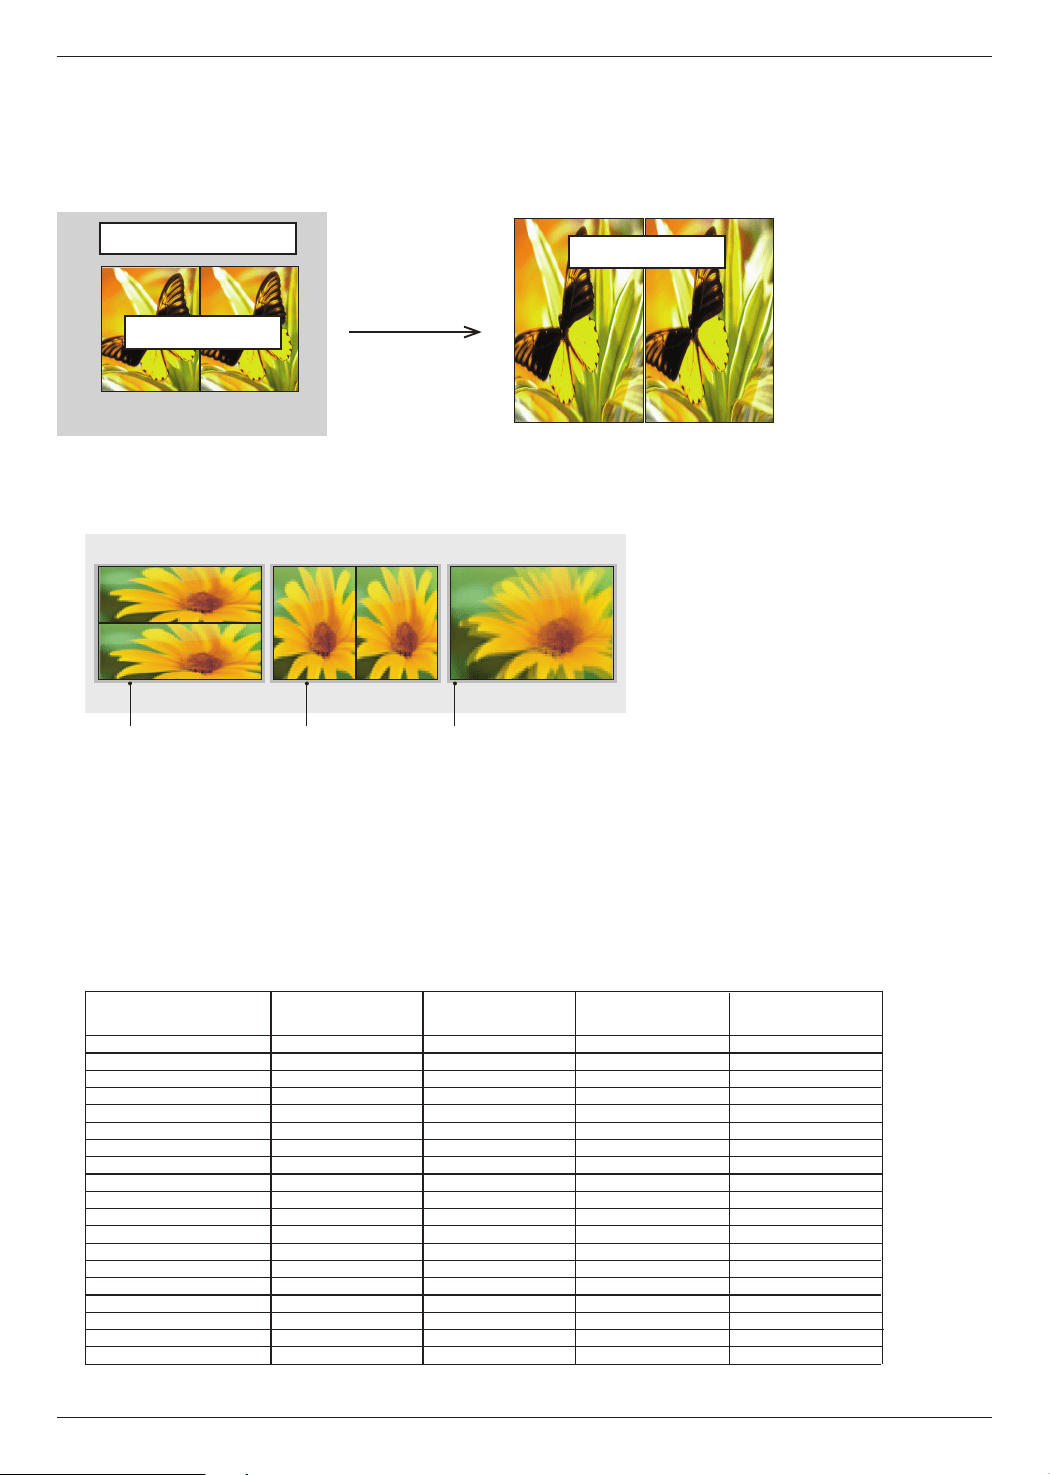
3. When watching 3D image with HDMI-PC or RGB-PC, non 3D part (wall paper, explorer, etc) will be shown in dual phase
(overlap phenomenon). So it needs to play the image in “full screen” mode of the video player.
3D part
Non 3-D part
ABCDFG
ABCDFG
ABCDFG
ABCDFG
Full screen
3D part
4. Press 3D image button
5. Press <, > button to select same shape on the projector screen and wear the 3D glasses.
To turn on 3D Mode, select this icon.
ꔁ Move ꔉ OK ꕉ Exit
Top & Bottom Side by Side
Frame Sequential
6. While watching 3D image from the projector, press a button on the glasses.
7. You can convert left/right image by pressing L/R selection button. Select the image that is seen better.
ꔈ Pressing 3D image button while watching 3D image will convert to image to normal.
8. 3D image only supports 4:3 aspect ratio
Loading ...
Loading ...
Loading ...