Loading ...
Loading ...
Loading ...
Fuses and bulbs
Complete operations only in the sequence
giv
en:
Dipped beam and main beam headlights
Fig. 85
A
1. Open the bonnet
›››
page 193.
2.
Remove the bulb connector H4. Remove the
rubber cover using the t
abs.
Press the retaining clip
›››
Fig. 86
D
down-
wards in the dir
ection of the arrow, unclip side-
ways, and remove it.
3.
Remove the bulb from the holder. If necessary,
press the lock on the bulb hol
der.
4.
Replace the faulty bulb with a new identical
bulb.
5.
Insert the bulb, r
eturn it to its position and insert
the retaining clip
›››
Fig. 86
D
6.
Place the rubber cover and check that is in the
correct position. Insert the connector t
o the
bulb H4.
Side light and daytime lights Fig. 85
B
/
Front turn indicat
or Fig. 85
C
1. Open the bonnet
›››
page 193.
2.
Turn the bulb holder in an anticlockwise di-
rection
as far as it will go and remove it, along
with the bulb, pulling backwards.
3.
Remove the bulb from the holder. If necessary,
press the lock on the bulb hol
der.
Side light and daytime lights Fig. 85
B
/
Front turn indicat
or Fig. 85
C
4.
Replace the faulty bulb with a new identical
bulb.
5.
Insert the bulb holder in the headlight and t
urn
it clockwise as f
ar as the stop.
Note
The images show the left hand headlight
from behind. The structur
e of the right hand
side headlight is symmetric.
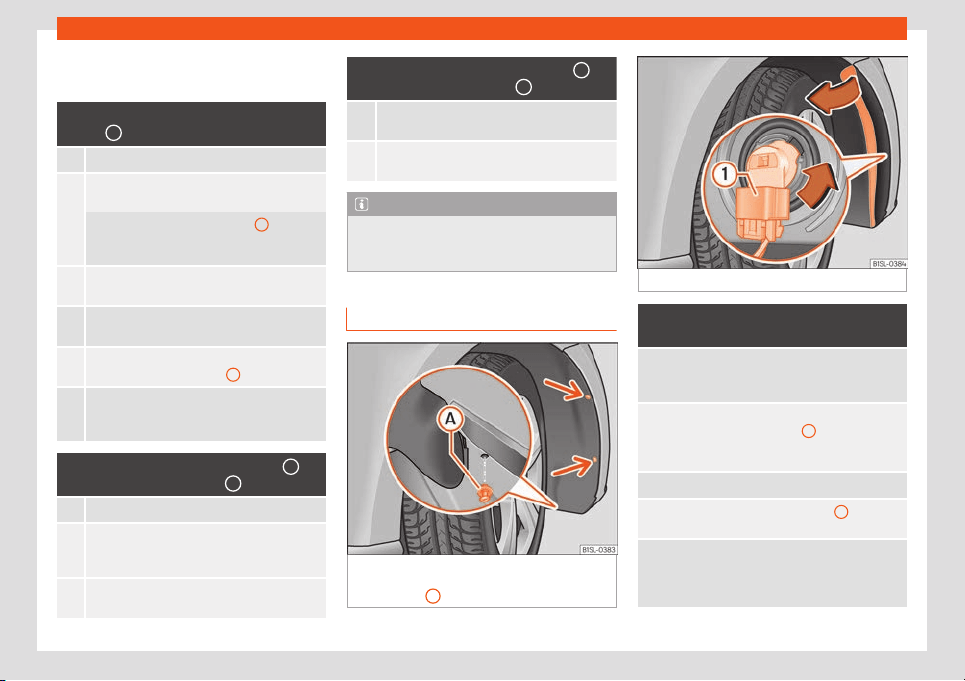
Replacing the front bumper bulbs
Fig. 87 In the front right arch trim: remove the
r
et
aining scr
ews (arrows) and take out the ex-
pansive rivet
A
.
Fig. 88 Changing the bulbs in the headlights
Complete operations only in the se-
quence given:
1.
Unscre
w the 2 retaining screws of the wheel
arch trim
››
›
Fig. 87 (arrows) with the screwdriv-
er from the vehicle took kit
›››
page 70.
2.
Unscrew the expansive rivet in the lower front
part of the wheel arch trim
A
with the screw-
driver from the v
ehicle tool kit and completely
remove it
›››
page 70.
3. Carefully fold the wheel arch trim to the side.
4.
Release the connector
›››
Fig. 88
1
and re-
move it.
5.
T
urn the bulb holder
›››
Fig. 88 in the direction
of the arrow, in an anticlockwise direction as
far as it will go and remove it, along with the
bulb, pulling backwards.
»
81
Loading ...
Loading ...
Loading ...