Loading ...
Loading ...
Loading ...
The essentials
●
R
epl
ace the co
ver again or close the fuse
box lid.
Bulbs
Bulbs (12 V)
Light source used for each function
Halogen headlights. Type
Daytime running light/side
light
W21/5W
Dipped beam headlights H4 LL
Main beam headlights H4 LL
Turn signal PY21W NA
Rear bulb light Type
Brake/side lights P21/5W LL
Side lights P21/5W LL
Turn signal PY21W NA LL
Retro fog light P21W
Reverse lights R10W
Action in the event of a punc-
t
ur
e
What t
o do first
●
Park the vehicle on a horizontal surface and
in a safe place as f
ar away from traffic as
possible.
●
Apply the handbrake.
●
Switch on the hazard warning lights.
●
Manual transmission: select the 1st gear.
●
Aut
omatic transmission: Move the selector
lever to position D or R.
●
If you are towing a trailer, unhitch it from
your vehicle.
●
Have the vehicle tool kit
›››
page 71
and the spare wheel* ready
›››
page 213.
●
Observe the applicable legislation for each
country (reflective vest, warning triangles,
etc.).
●
All occupants should leave the vehicle and
wait in a safe place (for instance behind the
roadside crash barrier).
WARNING
●
Always observ
e the above steps and pro-
tect yourself and other road users.
●
If you change the wheel on a slope, block
the wheel on the opposite side of the car
with a stone or similar to prevent the vehi-
cle from mo
ving.
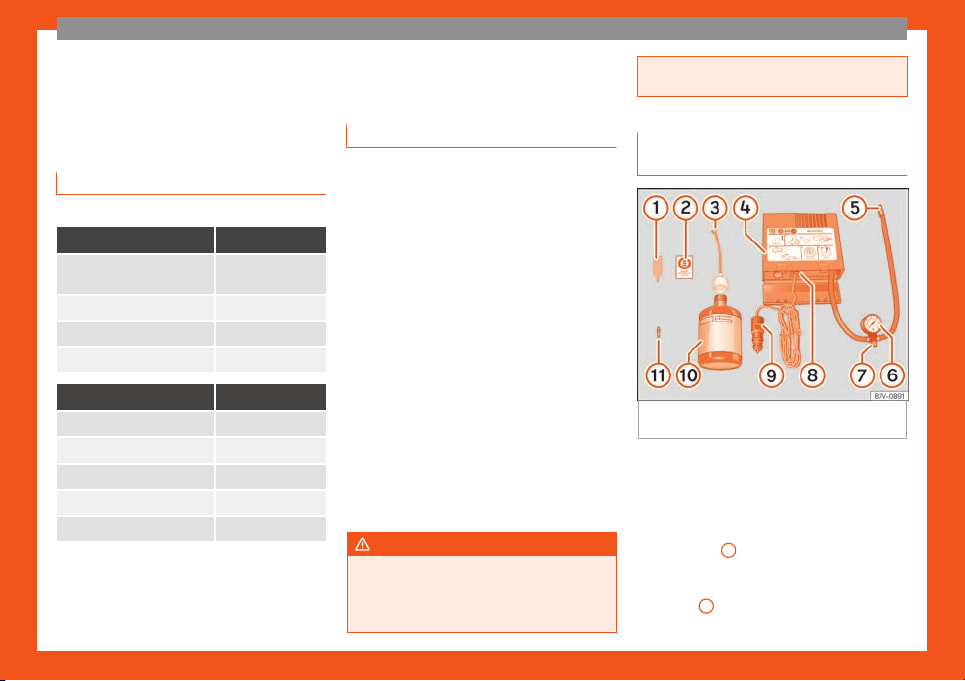
Repairing a tyre with the anti-punc-
ture kit
Fig. 49
Standard display: contents of the anti-
punct
ur
e kit.
The anti-puncture kit is located under the
fl
oor panel in the luggage compartment.
Sealing the t
yr
e
●
Unscrew the tyre valve cap and insert. Use
the
›››
Fig. 49
1
tool to remove the insert.
Pl
ace it on a cl
ean surf
ace.
●
Shake the tyre sealant bottle vigorously
›››
Fig. 49
10
.
36
Loading ...
Loading ...
Loading ...