Loading ...
Loading ...
Loading ...
30
CARE AND CLEANING
Cleaning the cooktop and surface burners
To avoid possible burns turn off all of the surface burners
and allow them to cool. Any additions, changes or conver-
sions required in order for this appliance to satisfactorily
meet the application needs must be made by an authorized
qualified agency.
Routinely clean the cooktop. Wipe with a clean, damp cloth
and wipe dry to avoid scratches. Keeping the surface
burner head ports and slots clean will prevent improper
ignition and an uneven flame.
To clean recessed and contoured areas of cooktop
If a spill occurs on or in the recessed or contoured areas,
blot up spill with an absorbent cloth. Rinse with a clean,
damp cloth and wipe dry.
To clean burner grates
• Clean when the grates are cool. Use nonabrasive
plastic scrubbing pad and mild abrasive cleanser.
• Food soils containing acids may affect the finish. Clean
immediately after the grates are cool. Thoroughly dry
grates immediately following cleaning.
To clean burner caps
• Remove caps from burner heads after they have
cooled. Clean heavy soils with a plastic scrubbing pad
and absorbent cloth. Thoroughly dry burner caps imme-
diately following cleaning including the bottom and
inside of cap.
• Do not use abrasive cleaners. Do not clean burner caps
in the dishwasher. Do not operate surface burners
without burner caps properly in place.
To clean the surface burner heads
For proper gas flow it may be necessary to clean the burner
head and slots. First use a clean damp cloth to soak up any
spills. Remove any food from between the burner slots
using a small nonabrasive brush like a toothbrush and wipe
up using a damp cloth. For stubborn soils located in the
slots, use a small-gauge wire or needle to clean. The
electrode must be carefully cleaned. Take care not to hit the
electrode with any thing hard or it could be damaged.
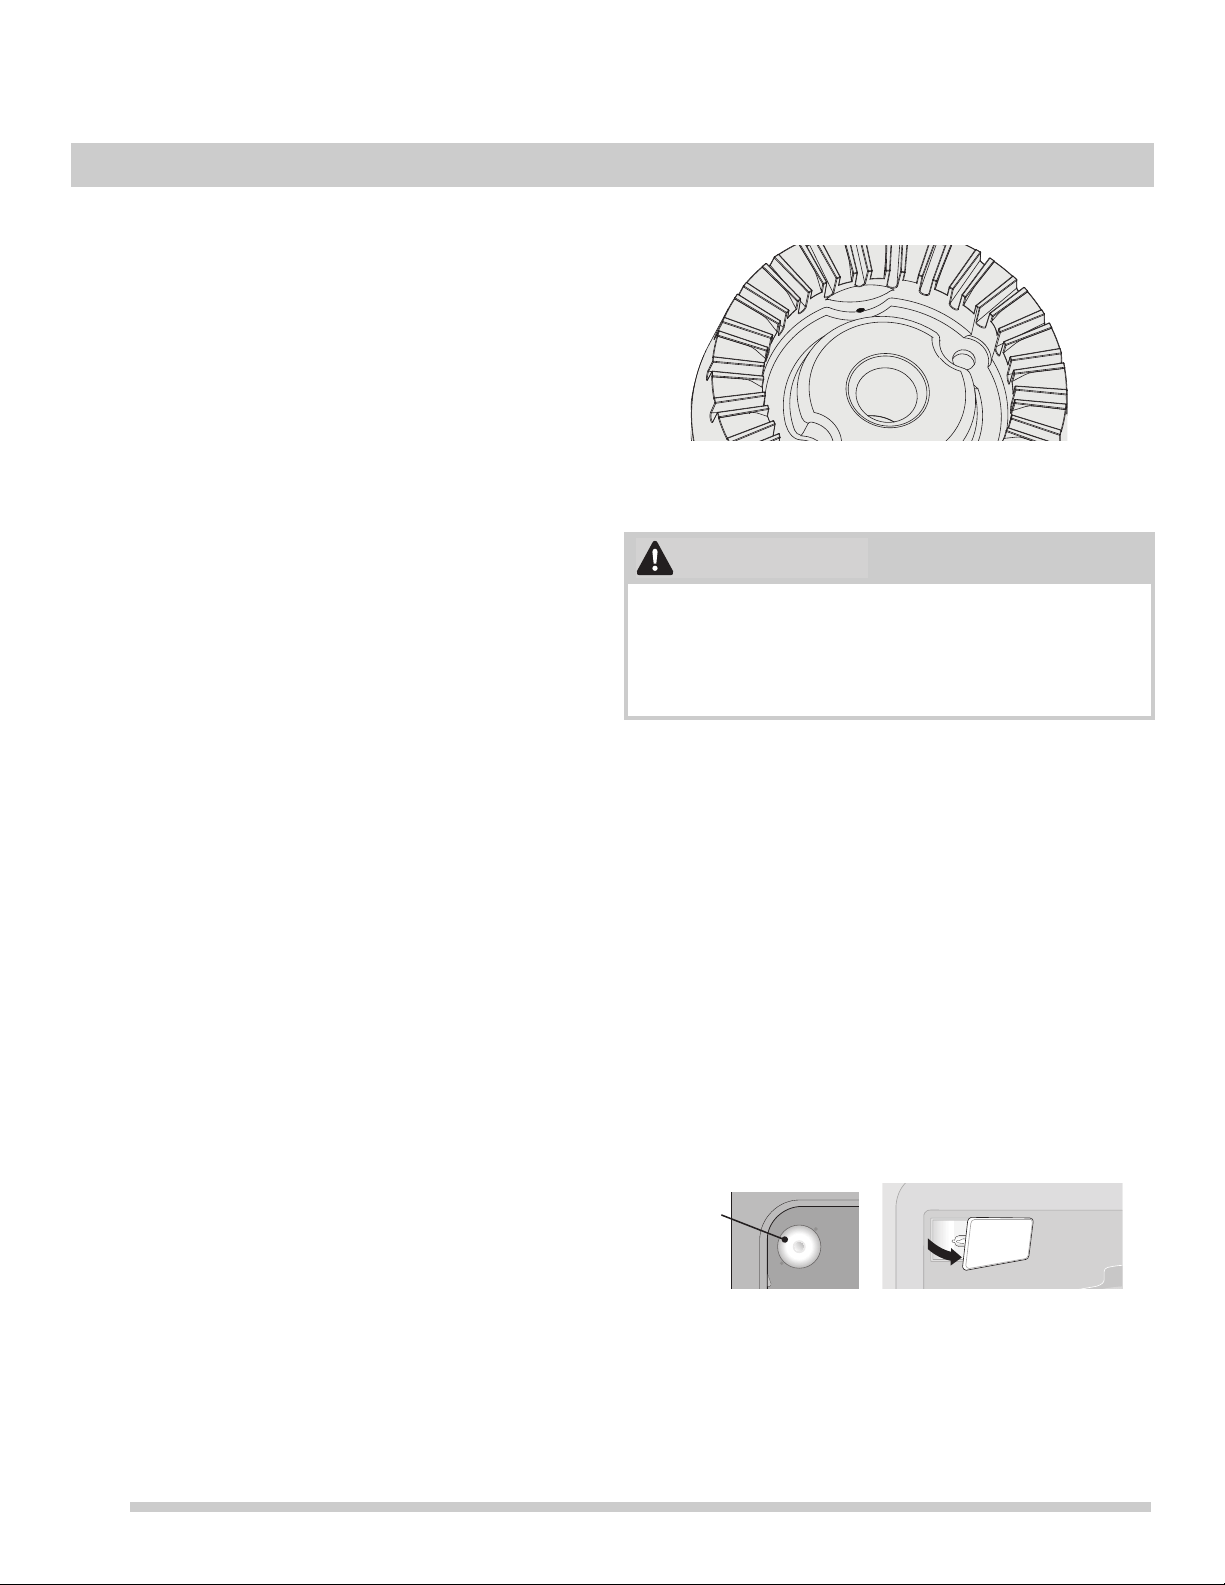
To clean the burner head ignition ports
Each burner head has a small ignition port (Figure 25).
Should you experience ignition problems it may be that this
port hole is partially blocked with soil. With the burner head
in place, use a small wire gauge needle or the end of paper
clip to clear the ignition port.
Replacing the oven light
The interior oven lights are located at the rear of the oven
cavity and are covered with a glass shield.
To replace the oven interior light bulb:
1. Turn electrical power off at the main source or unplug
the appliance.
2. Remove interior oven light shield by turning a quarter
turn in upper oven, and by removing shield in lower
oven as shown below.
3. Replace with a new T-4 type Halogen 40 watt appliance
bulb in lower cavity and a 25 watt incandescent bulb in
the upper cavity.
4. Replace glass oven light shield.
5. Turn power back on again at the main source (or plug
the appliance back in).
6. Be sure to reset the time of day on the clock.
Figure 25: Gas burner head parts
Be sure the oven is unplugged and all parts are cool
before replacing oven light. Do not allow your fingers to
touch the new halogen bulb when replacing. This will
shorten the life of the bulb. Use a paper towel or cotton
glove handling and installing.
Figure 26: Upper oven light (L) and lower oven (R)
ignition
port
slots
orice
port
CAUTION
glass
shield
halogen light bulb
light shield
Loading ...
Loading ...
Loading ...