Loading ...
Loading ...
Loading ...
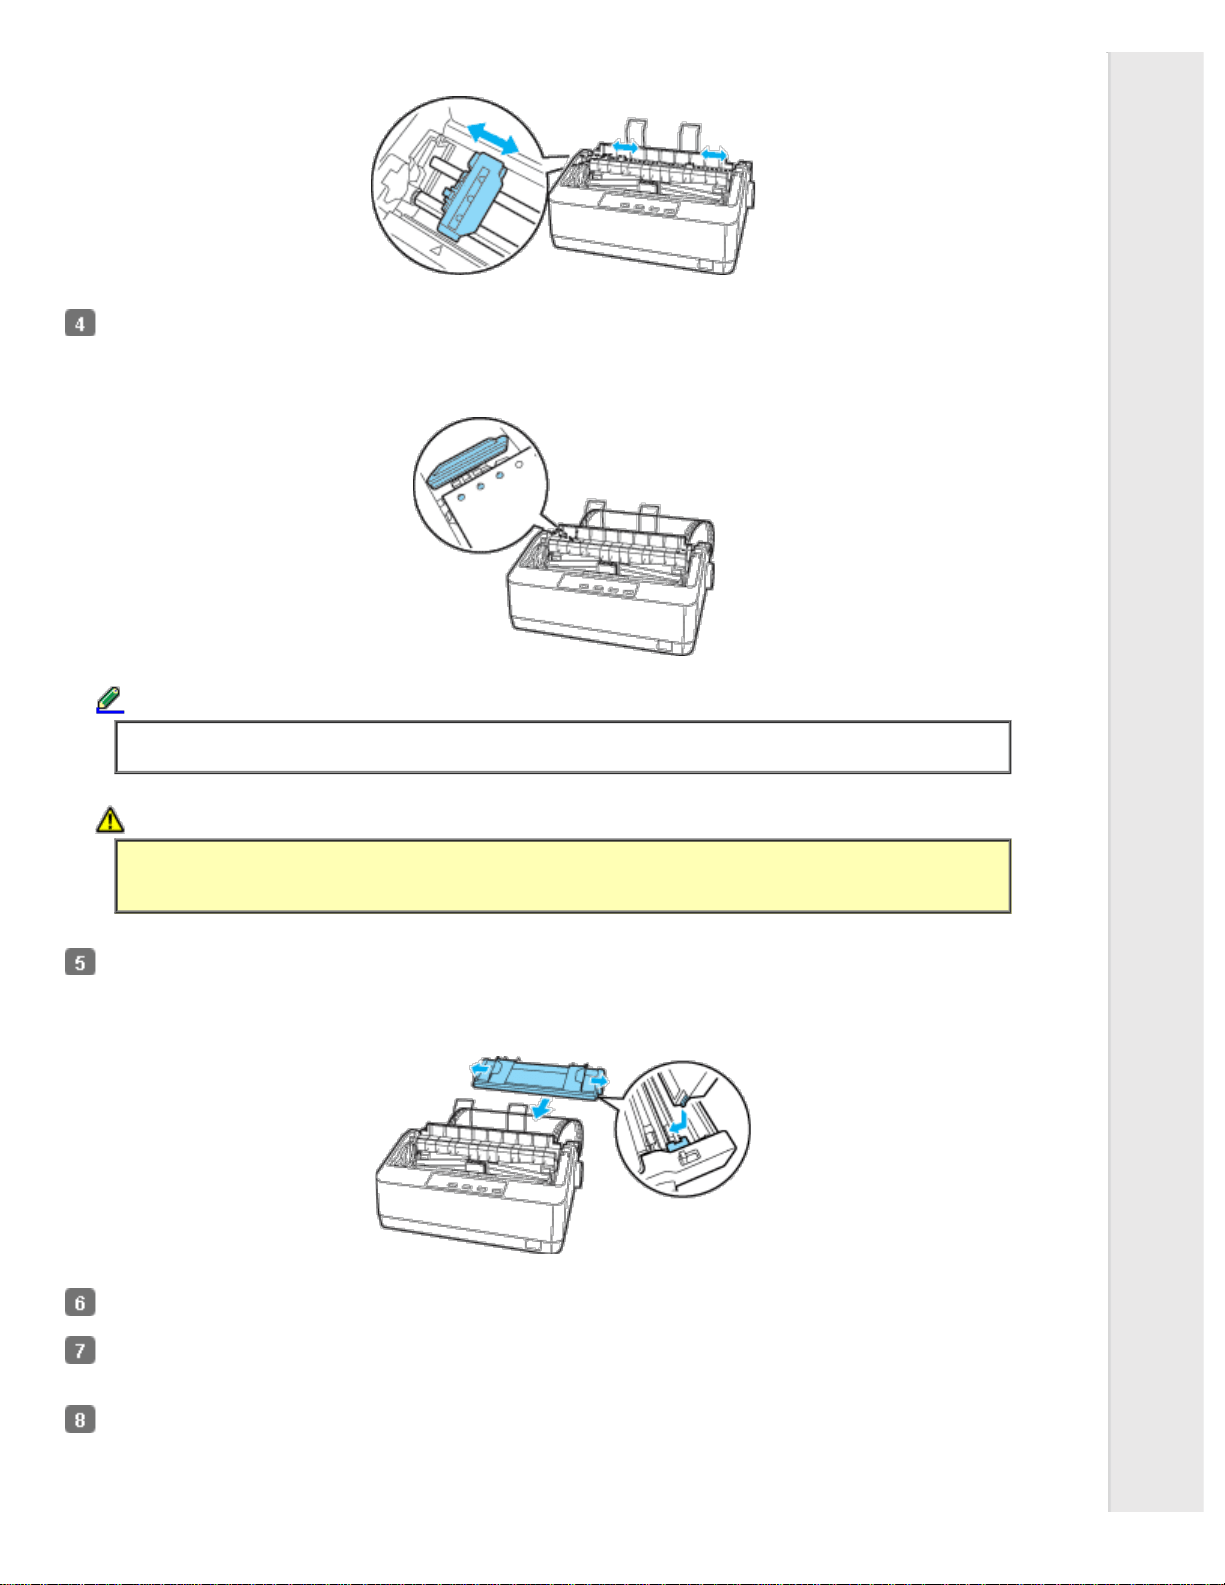
Make sure your paper has a clean, straight leading edge. Open the sprocket covers. Fit the first holes of the paper over
the sprocket pins and then close the sprocket covers. Slide the right sprocket unit to remove any slack in the paper and
lock it in place. Now the paper is in the paper-park position.
Note:
If continuous paper becomes saggy or too tense, adjust the position of the right sprocket.
Caution:
Use the paper feed knob on the right side of the printer only to clear paper jams and only when the printer is
turned off. Otherwise, you may damage the printer or cause it to lose the top-of-form position.
To prevent printed paper from getting caught, attach the paper guide by fitting its notches over the printer’s mounting
posts as shown below. Then slide the paper guide toward the front of the printer until you feel it click and move the
edge guides to the sides.
Turn on the printer.
Make sure the printer cover is closed. Press the Load/Eject button to feed the paper to the loading position. When the
printer receives data, it begins printing automatically.
After you finish printing, follow the steps in the next section to tear off your printed document. If the first printed line on
your page appears too high or low, you can change its position by using the Micro Adjust feature. See Adjusting the top-
of-form position.
Loading ...
Loading ...
Loading ...