Loading ...
Loading ...
Loading ...
22
Making Brioche Dough
142, 3
Turn to P. 43 for
dough recipes
n
To cancel/stop once
started
(hold for more than
1 second)
Preparation
(P. 12)
1
Cut the butter for adding later into 1–2 cm cubes and keep them in fridge.
2
Put the kneading blade into the bread pan.
3
Place the ingredients in the bread pan in the order listed in the recipe.
4
Set the bread pan into the main unit, and plug the machine into the socket. (Make sure the start light is off.)
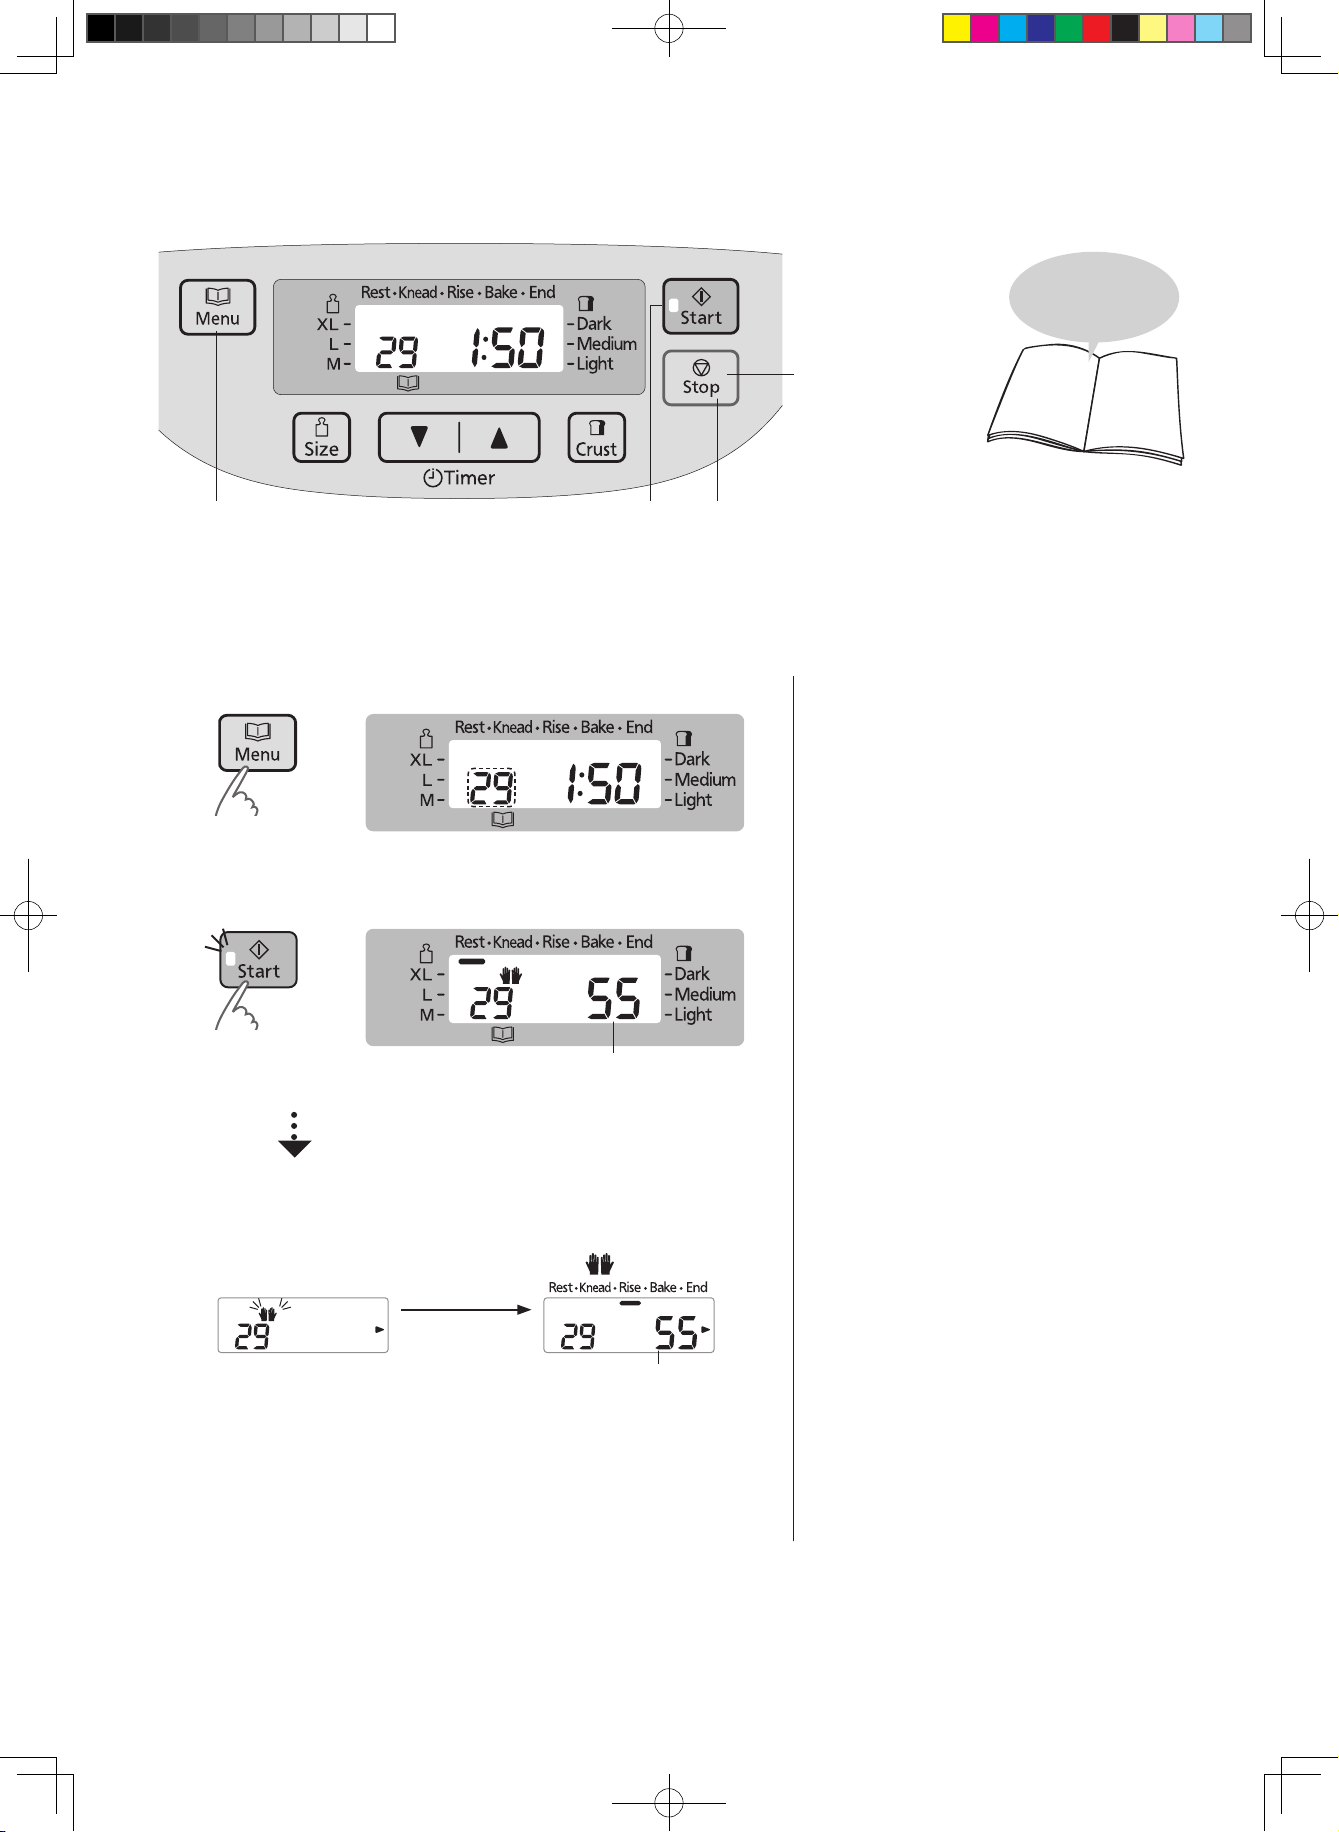
1 Select menu ‘29’
l
Timer is not available on Dough menus
(except menu 28).
[Simple way to make brioche]
Add butter with other ingredients at the
beginning.
Cut the butter into 2 cm cubes and place them
into the bread pan at the same time as the other
ingredients.
Follow the steps shown on the left. However,
when the machine beeps on step 3 to add extra
butter, please leave as it is.
Time required for completion is 1 hr 50 minutes.
* When butter is added at the beginning, flavour,
texture and rising of bread are a little different from
the time bread is baked with extra butter added in
later.
2 Press Start pad to start the machine
Time displayed indicating minutes until butter is added
l
The start light will come on.
3 Add additional butter when the beep
sounds, then press Start pad again
Complete placing the additional cubed butter while ‘ ’ is flashing.
After the Start
pad is pressed
Display indicates remaining time until completion of the program
l
When adding extra ingredients such as raisins,
add them with the butter. (Use max. 150 g for
ingredients)
l
Even without pressing the Start pad, kneading
will continue after 5 min. It does not continue
kneading immediately, even if the Start pad is
pressed after adding butter or ingredients.
l
Do not add butter after display shows remaining
time. (P. 54)
4 Press Stop pad and remove dough
when machine beeps 8 times and the bar at ‘End’ flashes
l
The flashing start light will go off.
l
Shape the finished dough and allow it to prove
until doubled in size.
Then bake in the oven according to recipe.
SD-2511_UK.indd 22 2015/01/09 15:29:29
Loading ...
Loading ...
Loading ...