Loading ...
Loading ...
Loading ...
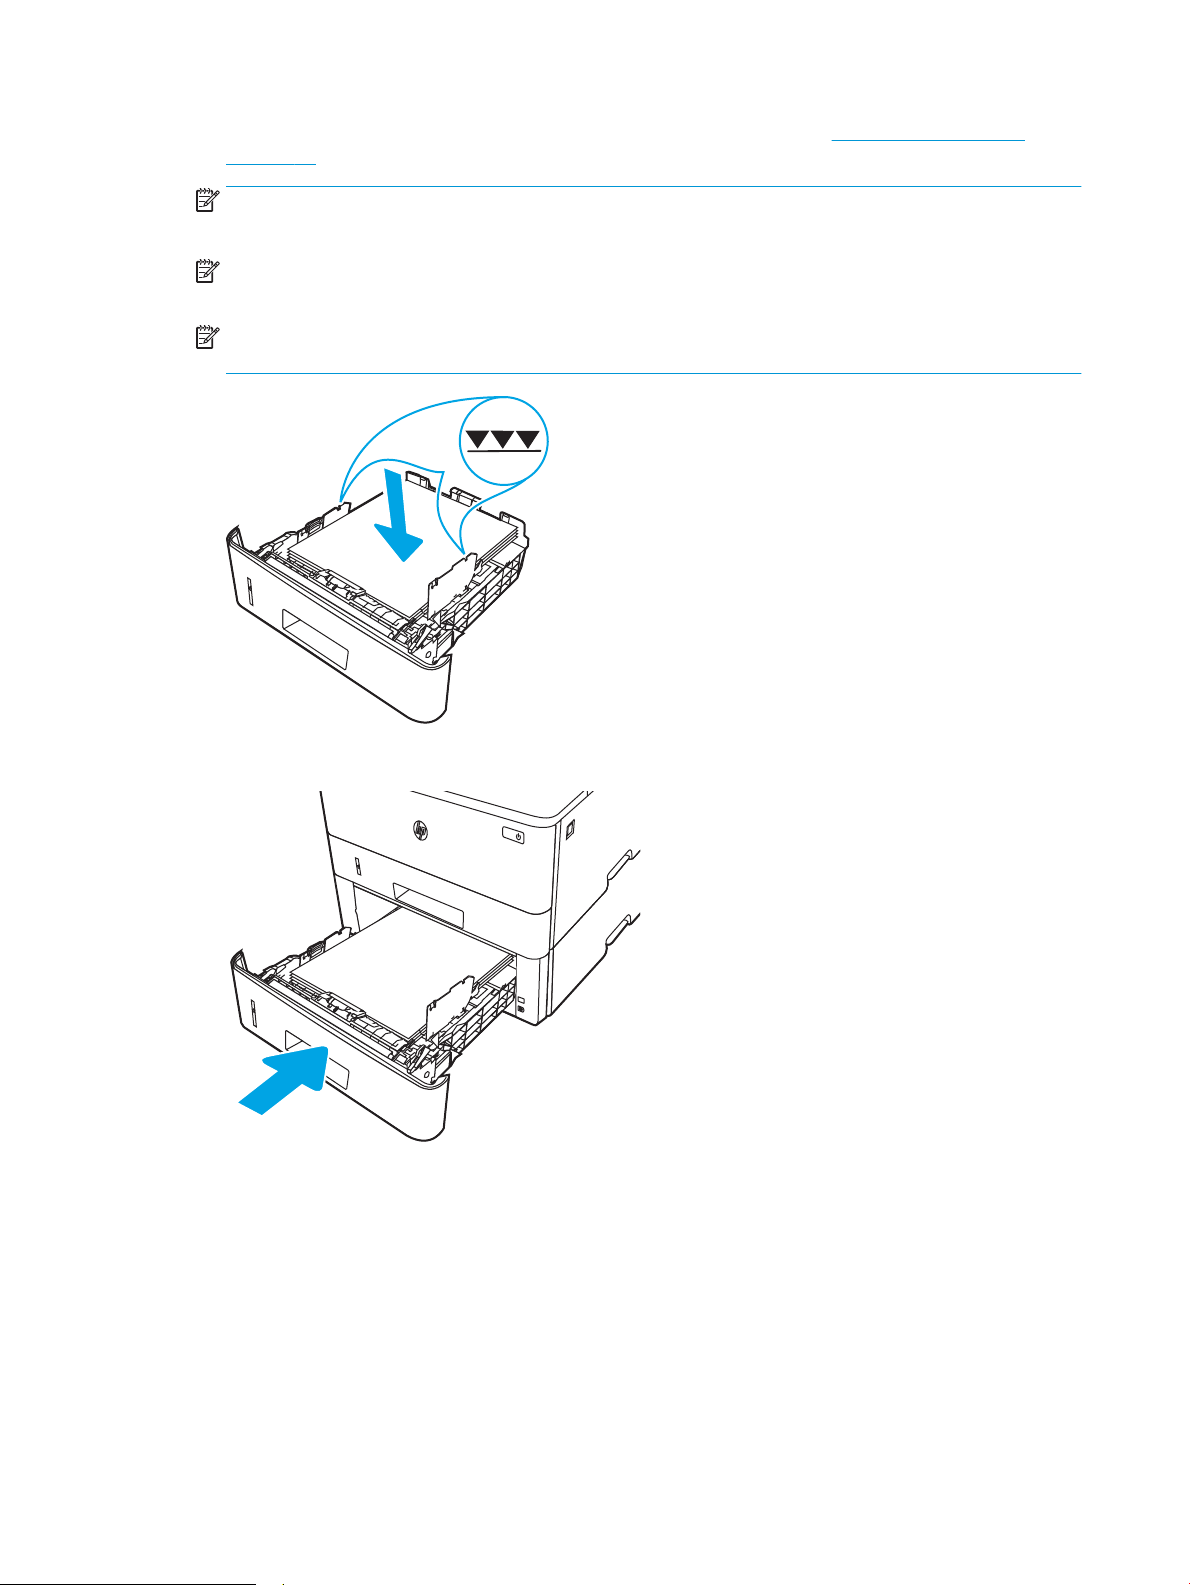
4. Load paper into the tray. For information about how to orient the paper, see Tray 3 paper orientation
on page 24.
NOTE: Do not adjust the paper guides tightly against the paper stack. Adjust them to the indentations or
markings in the tray.
NOTE: To prevent jams, adjust the paper guides to the correct size and do not overll the tray. Be sure
that the top of the stack is below the tray full indicator, as shown in the enlargement in the illustration.
NOTE: If the tray is not adjusted correctly, an error message might display during printing or the paper
might jam.
3
5. Slide the tray completely into the printer.
3
3
2
1
6. At the computer, begin the printing process from the software application. Make sure that the driver is set
to the correct paper type and size for the paper being printed from the tray.
Tray 3 paper orientation
When using paper that requires a specic orientation, load it according to the information in the following table.
24 Chapter 2 Paper trays ENWW
Loading ...
Loading ...
Loading ...