Loading ...
Loading ...
Loading ...

Black plate (487,1)
北米Model "A2490BE-B" EDITED: 2012/ 7/ 6
Replacement of wiper blades
Grease, wax, insects, or other materials
on the windshield or the wiper blade
results in jerky wiper operation and streak-
ing on the glass. If you cannot remove the
streaks after operating the windshield
washer or if the wiper operation is jerky,
clean the outer surface of the windshield
(or rear window) and the wiper blades
using a sponge or soft cloth with a neutral
detergent or mild abrasive cleaner. After
cleaning, rinse the windshield and wiper
blades with clean water. The windshield is
clean if beads do not form when you rinse
the windshield with water.
CAUTION
. Do not clean the wiper blades
with gasoline or a solvent, such
as paint thinner or benzine. This
will cause d eterioration of th e
wiper blades.
. Whenyouwishtoraisethe
passenger-side wiper arm, first
raise the driver-side wiper arm.
Otherwise, the passenger-side
wiper assembly and driver-side
wiper assembly will touch each
other, possibly resulting in
scratches.
. Return the passenger-side wiper
arm to its original position before
returning the driver-side wiper
arm to its ori ginal position.
Otherwise, the passenger-side
wiper assembly and driver-side
wiper assembly will touch each
other, possibly resulting in
scratches.
. When returning the raised wipers
to the original positions, return
the wipers slowly on the wind-
shield by hand. Returning the
wipers from the detached posi-
tions by the spring operation
might change the shape of the
wiper arm or scratch the wind-
shield.
If you cannot eliminate the streaking even
after following this method, replace the
wiper blades using the following proce-
dures.
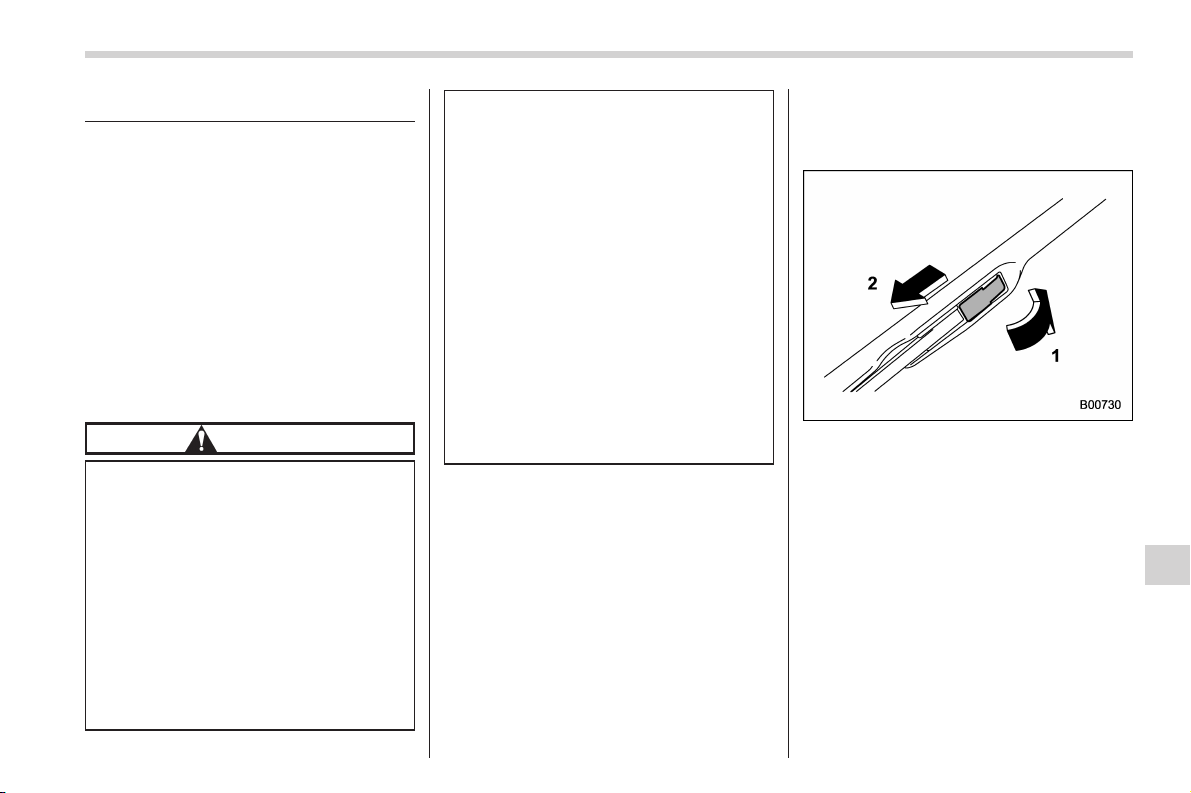
& Windshield wiper blade as-
sembly
1. Raise the wiper arm off the windshield.
1) Open the cover
2) Pull down the wiper blade
2. Remove the wiper blade assembly by
opening the cover and pulling it down in
the direction shown in the illustration.
3. Install the wiper blade assembly to the
wiper arm. Make sure that it locks in place.
4. Hold the wiper arm by hand and slowly
lower it in position.
Maintenance and service 11-37
– CONTINUED –
11
Loading ...
Loading ...
Loading ...