Loading ...
Loading ...
Loading ...
5
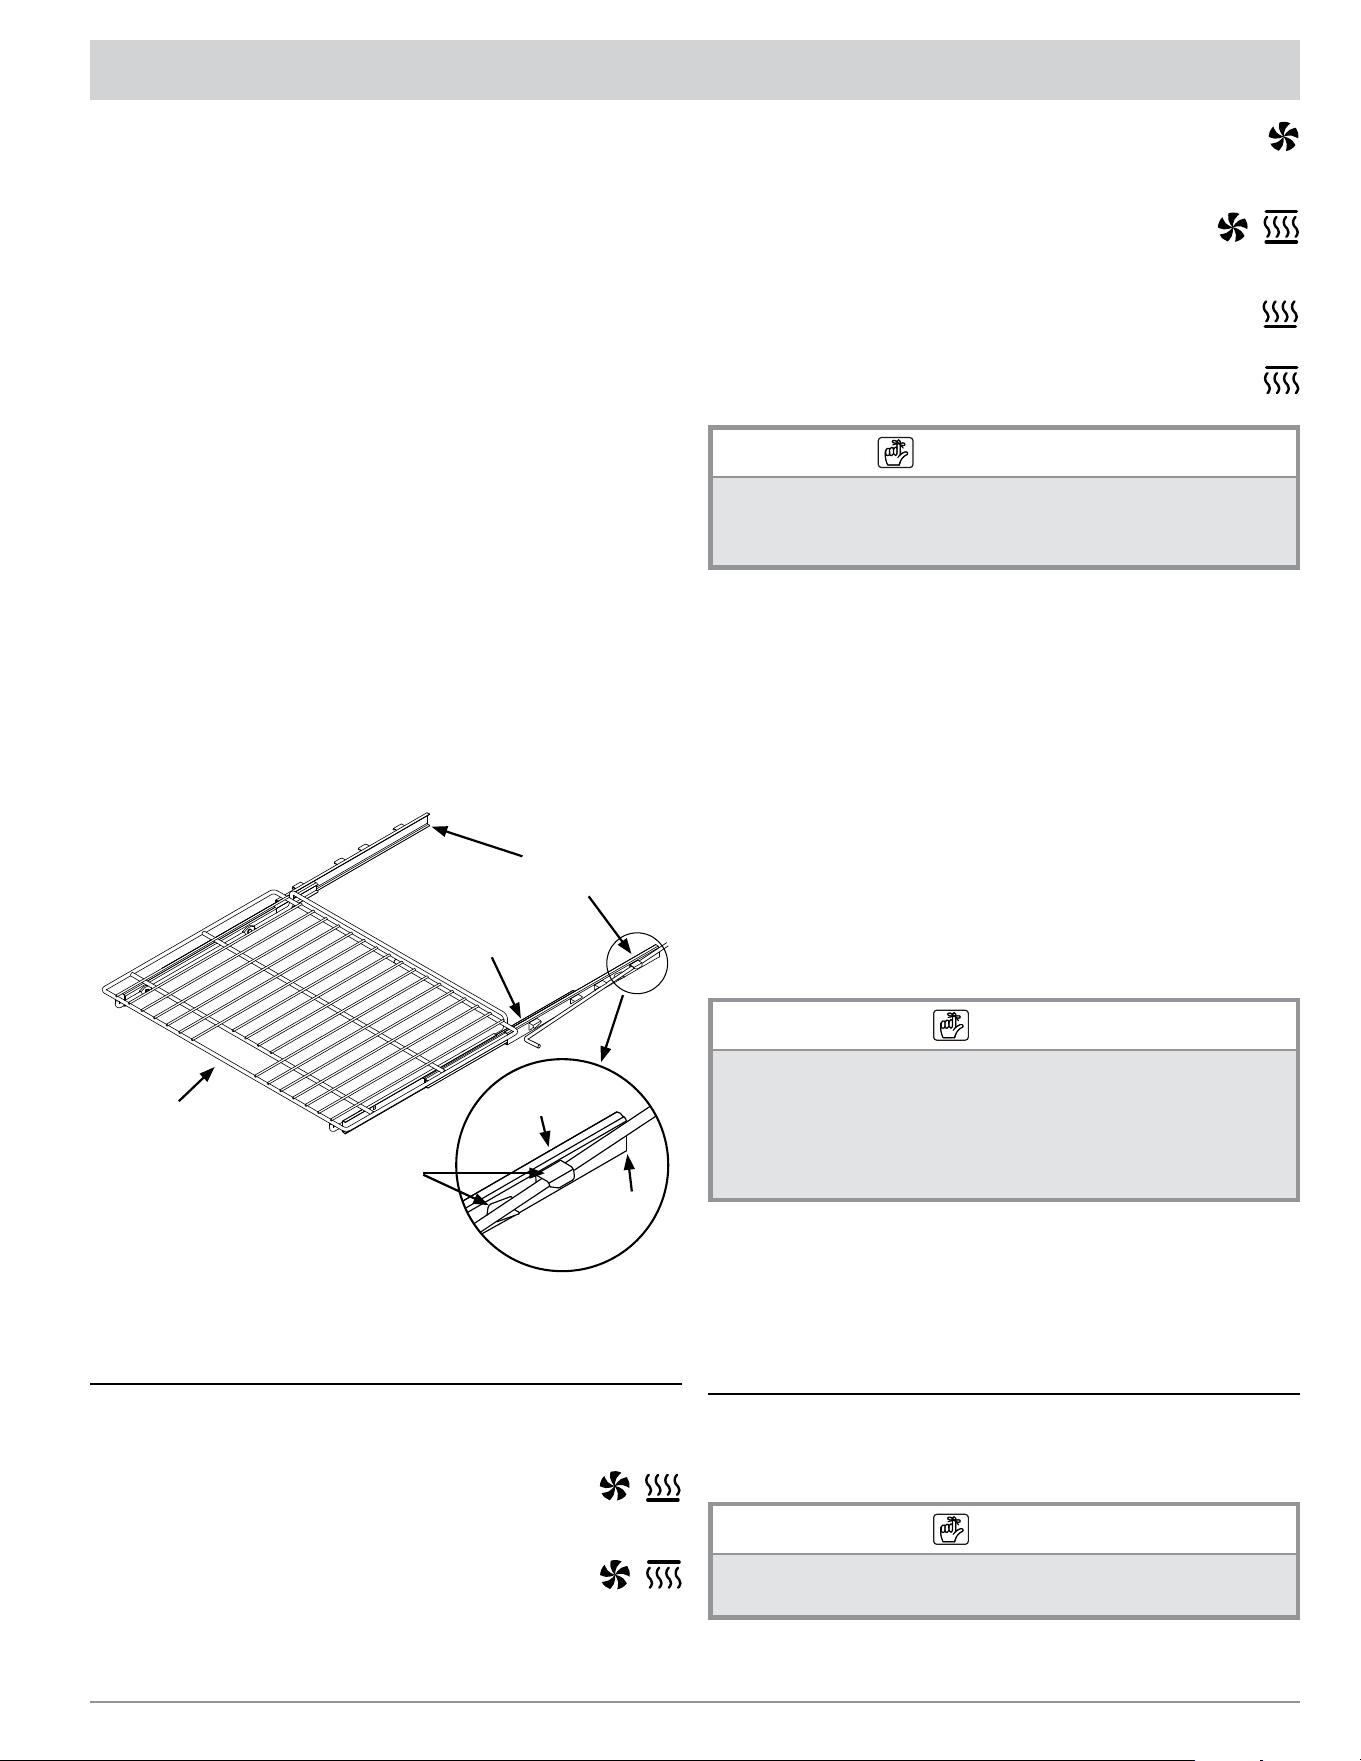
Slide rack supports between
back safety clips
Back of
guide
Rack
guides
Front
Lift front safety
clips over rack
supports
Rack
support
OPERATING THE OVEN
Inserting a GlideRack™ Oven Rack
The oven comes with a set of Dacor GlideRack oven racks.
These racks can be pulled out further than a standard rack
and still support pots and pans full of food or an optional
Dacor baking stone.
1. Align the left and right safety clips on the back of the rack
guides with the rack supports as shown below.
NOTE: The graphic shows installation with the rack
guides extended, but the rack may be installed with the
guides retracted.
2. Begin sliding the rack in, lifting the front safety clips over
the front of the oven rack supports.
3. Push the rack all the way in.
4. Grasp the rack by the center-front hand-hold, and pull.
The rack slides forward; the guides remain in place.
Removing a GlideRack™ Oven Rack
1. Grasp the front of the rack with both hands, and pull it
gently outward you until it stops.
2. Lift until the front safety clips just clear the front of the
rack supports, and continue pulling.
NOTE: Jiggling the rack side to side slightly as you pull
makes it easier to remove.
Turning On the Oven
After adjusting the racks as needed for the cooking task,
select the best cooking mode.
• CONVECTION BAKE - Uses the convection fan
and a bottom heat source (for single-rack items
in a deep pan).
• CONVECTION BROIL - Uses the convection
fan and a top heat source (for items that do not
need turning: e.g., sh, garlic bread, thinner cuts
of meat).
• PURE CONVECTION™ - Uses only convection cook-
ing for even heat (for baked goods, multi-rack cook-
ing).
• CONVECTION ROAST - Uses top and bottom
heat sources with the convection fan (for rib
roasts, turkeys, chickens, etc).
• BAKE - Uses a bottom heat source (common for
basic recipes).
• BROIL - Uses a top heat source (for grilling smaller
cuts of meat or toasting bread).
IMPORTANT
• Keep the oven door closed as much as possible when cooking.
• The oven door must stay closed, and the meat probe must
be disconnected for all broiling modes.
See Pg. 6 for detailed about the various cooking modes.
1. Touch the key for the desired cooking mode.
The preset temperature appears on the display with
the icon(s) for the selected cooking mode (see above).
Double ovens: Select the desired oven by touching the
cooking mode key under UPPER OVEN or LOWER
OVEN on the control panel.
2. To cook at the preset temperature, touch START; other-
wise, enter the temperature (ex. 4-2-5) on the number
pad, then touch START.
You can enter any temperature from 100°F (37°C) to
555°F (291°C). The suggested broil temperature is
555°F. Double ovens have one START key (control
panel, left side) that starts both ovens.
NOTE
When using Pure Convection or a bake or roast mode:
“PRE-” (preheating) and the current oven temperature
appear on the display until the oven reaches the set tem-
perature (usually 15-20 min), then it beeps, and “PRE-”
disappears.
3. When the preheat chime sounds, carefully place your
food in the oven.
Placing the food in the oven during preheating will over-
cook the food.
Turning Off the Oven
To turn the oven off, touch CANCEL/SECURE. Double
ovens: Touch CANCEL/SECURE under UPPER OVEN or
LOWER OVEN, whichever is in use.
NOTE
After you turn off the oven, the cooling fans may continue to run until the
oven’s internal parts have cooled down.
1 2
1 2
1 2
1 2
1 2
1 2
1 2
1 2
1 2
Loading ...
Loading ...
Loading ...