Loading ...
Loading ...
Loading ...
En-7
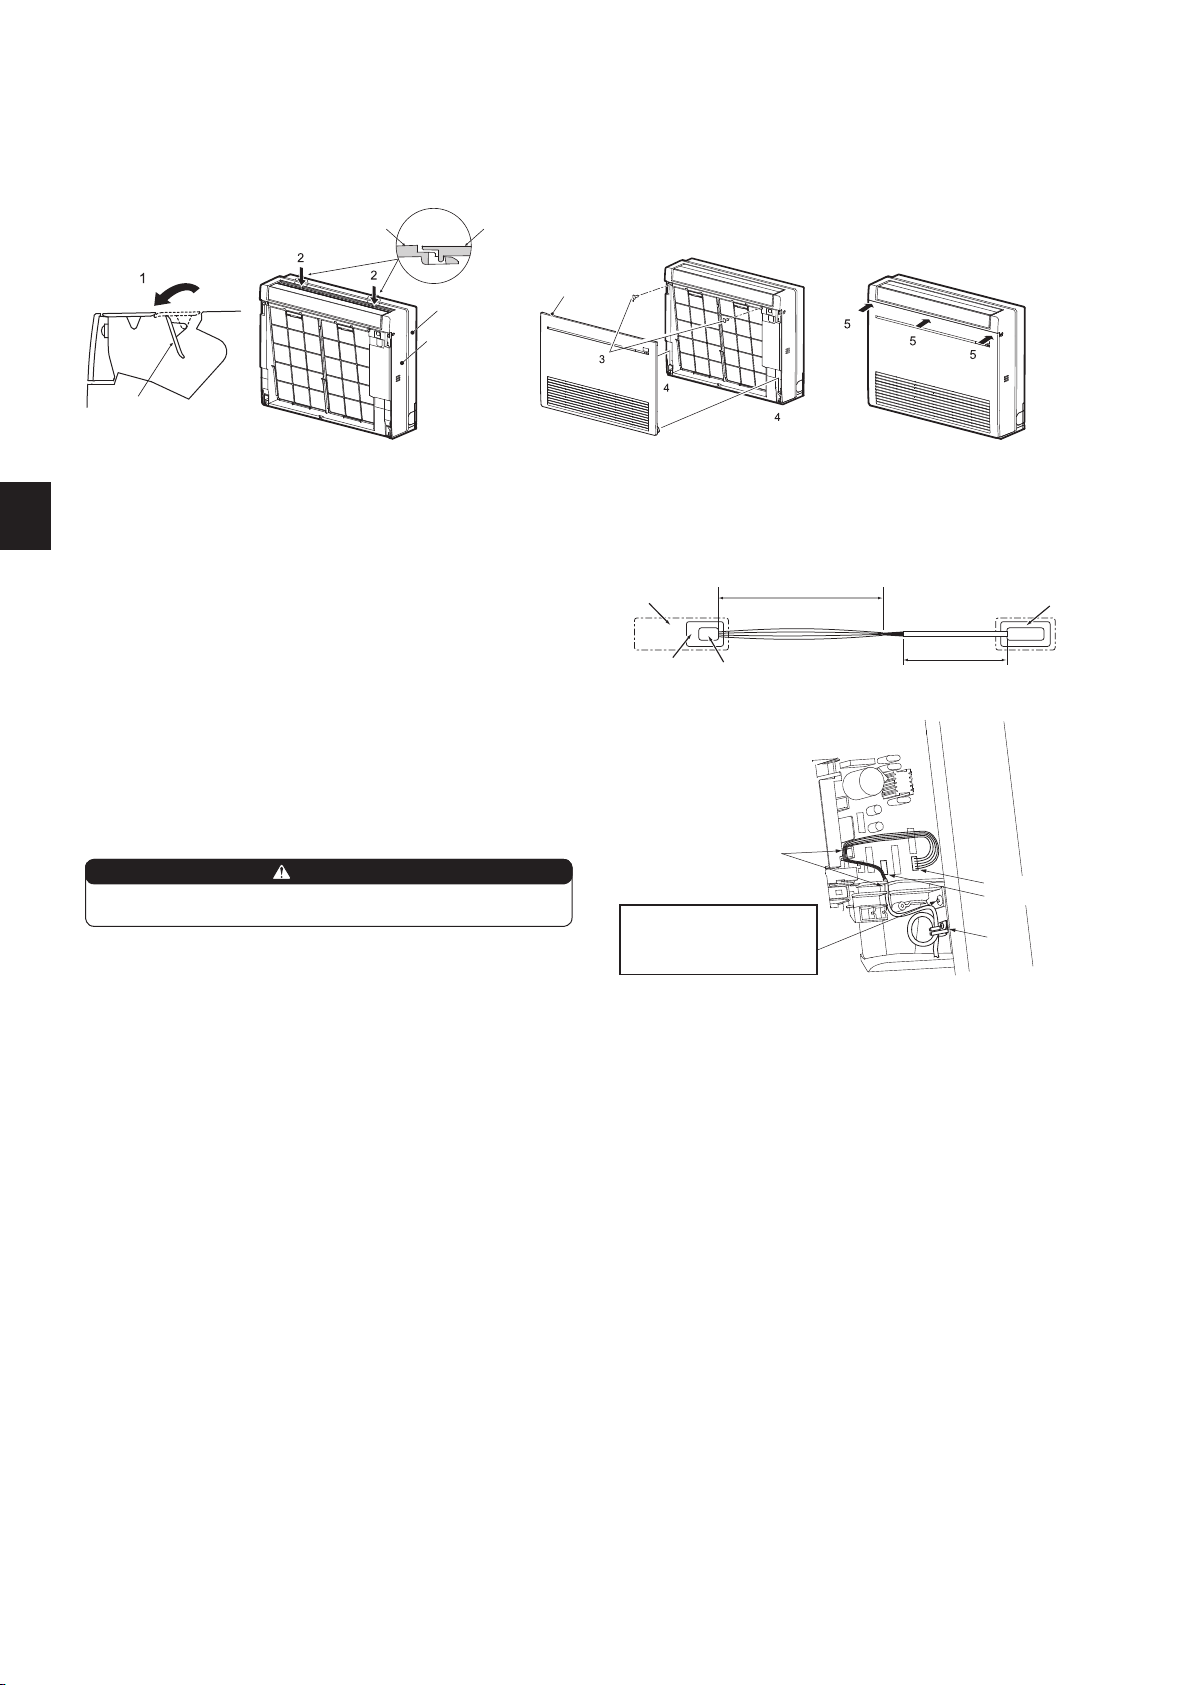
1)Removethepanel.
2)OpenthecoveroftheindoorcontrolP.C.board.
3)JointheconnectingcabletoCN105and/orCN24ontheindoorcontrolP.C.
board.
4)Routetheconnectingcablethroughthispointinthegure.
5)Attachthecableclampprovidedwithinterface/connectorcabletothethick
partoftheconnectingcablewithascrew4×16asshowninthegure.
6)ClosethecoveroftheindoorcontrolP.C.board.Becarefulnottocatchthe
thinpartoftheconnectingcableinthecover.Reinstallthepanel.
5)
4)
3)CN105
WARNING
Fix the connecting cable at the prescribed position securely.
Incorrectinstallationmaycauseelectricshock,re,and/ormalfunction.
Whenmountingtheinterface
andtheconnectorcable,use
thisscrewtoxtheconnect-
ingcable.
3)CN24
2-9.CONNECTING AN INTERFACE (option)/CONNECTOR CABLE (option) TO THE AIR CONDITIONER
Thinpartoftheconnectingcable.
Placethispartwherecustomers
cannottouchit.
Roomair
conditioner
Mainbodyofaninterface
Thickpartoftheconnecting
cable
Indoorcontrol
P.C.board
CN105forinterface
CN24forconnectorcable
• Connectaninterface/connectorcabletotheindoorcontrolP.C.boardof
anairconditionerwithaconnectingcable.
• Cuttingorextendingtheconnectingcableoftheinterface/connectorca-
bleresultsindefectsinconnecting.Donotbundletheconnectingcable
togetherwithpowersupplycord,indoor/outdoorconnectingwire,and/or
earthwire.Keepasmuchdistanceaspossiblebetweentheconnecting
cableandthosewires.
• Thethinpartoftheconnectingcableshouldbestoredandplaced
wherecustomerscannottouchit.
2-8. FRONT PANEL INSTALLATION
1)Opentherearhorizontalvane.
2)Attachthepanel.Makesurethatthecatchesareengaged.
3)Fixthepanelwithscrews.
4)Insertthebottompartofthefrontpanel.
5)Push3placesontheupperpartofthefrontpaneltocloseit.
Frontpanel
Indoorunit
Indoorunit
Panel
Panel
Rearhorizontal
vane
JG79Y071H02_en.indd 7 2016/01/21 13:20:06
Loading ...
Loading ...
Loading ...