Loading ...
Loading ...
Loading ...
En-5
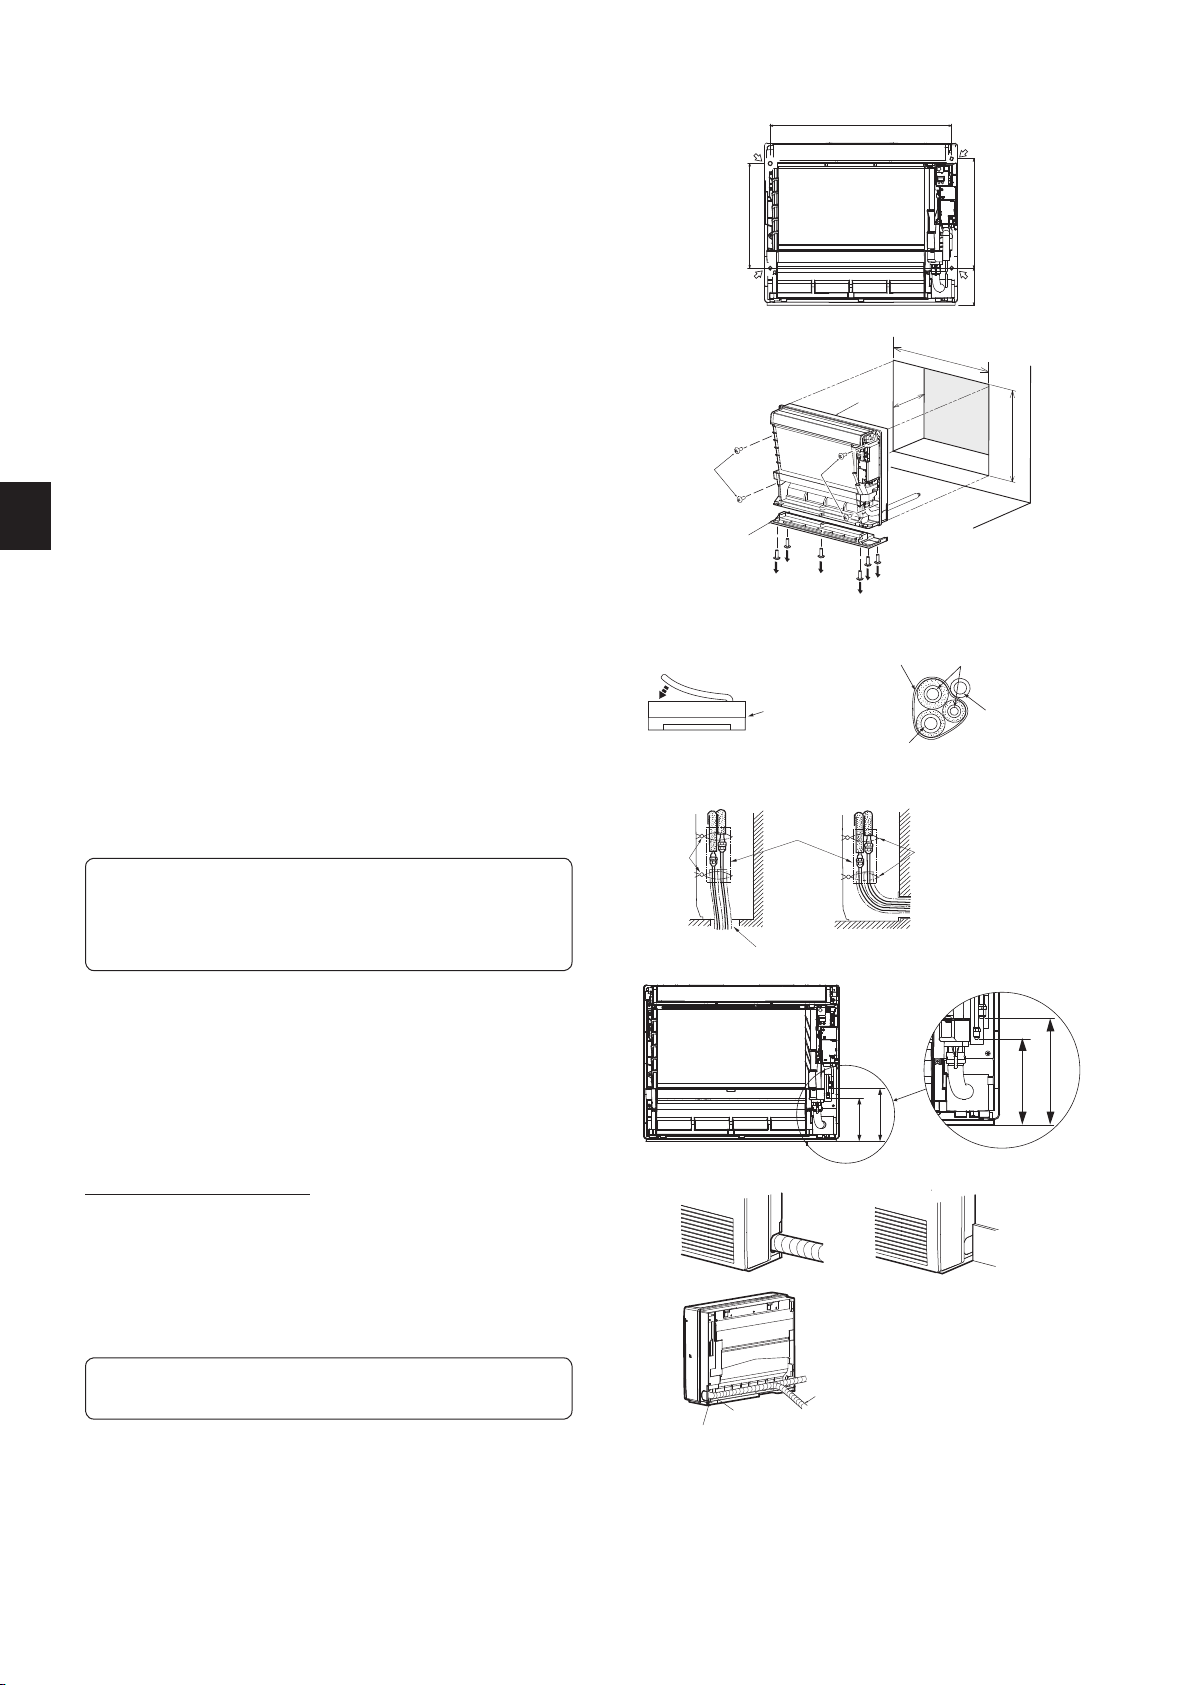
2-4-3.EMBEDDINGTHEINDOORUNITINAWALL
1.Makeaholeinthewall.
2.Usingreinforcementmaterial,adjustthedepth.
3.Remove6screwsthatxthebasetotheunit.Removethebasefromtheunit.
4.Fixtheindoorunitat4pointswiththeincludedwoodscrews(9)andwashers
(10).Tightenthescrewssecurely.
3
3
3
3
3
3
4
22-41/64 (575)
29-9/64 (740)
2-3/4
(
70
)
4
27-3/4(705)
2-4.INDOORUNITINSTALLATION
2-4-1.INSTALLINGTHEINDOORUNITONTHEFLOOR
1.Placetheindoorunitontheatoor.
2.Fixtheindoorunitat4pointswiththeincludedwoodscrews(9)andwashers
(10).Tightenthescrewssecurely.
2-4-2.MOUNTINGTHEINDOORUNITONTHEWALL
1.Hookthetopoftheindoorunitontheindoorunitmountingbracket(7).
2.Fixtheindoorunitat4pointswiththeincludedwoodscrews(9)andwashers
(10).Tightenthescrewssecurely.
15-15/16(405)
5-25/64
(137)
15-15/64(387)
Reinforcement
material
Unit
Base
Wrapthefelttape(11)tightlyaroundthepipesandhosestartingnearwhere
thepipesandhoseareroutedfromtheindoorunit.(Theoverlapwidthofthe
felttape(11)shouldnotbemorethan1/2ofthetapewidth.)
Felttape(11)
Startwrappingthepipingtape(G)around
thepipesandhose25/64in.(10mm)
insidetheindoorunit.
Fastentheendofthefelttape(11)with
abandagestopper.
Makesurethatthedrainhose
isnotroutedupward.
FORLEFTORLEFT-REARPIPING
Bundletheconnectingpipesanddrainhosetogether,andthenwrapthemin
felttape(11).
Cutandusethelowersidepanelsontheleftandrightsidesoftheindoorunit
asshownbelow.
Smooththecutedgesofthesidepanelssothattheywillnotdamagetheinsula-
tioncoating.
• Forleftorrightpiping
• Installingushagainstawallwithmolding
Molding
Cutthelowersidepanelsto
matchtheheightofthemolding.
Piping
tape
Drainhose
Refrigerantpiping
Indoorunit
Push
Pipingbentoutward
• Besuretoinsulatetheconnectingpipessothattheydonotcontactthe
panel.
• Becarefulnottocrushtheconnectingpipeswhenbendingthem.
(Useatubebendersforleftorrightpiping.)
• Thepipecovercannotbeattachedwithoutconnectingtheconduitpipe
afterconnectingthepipes.
Removethecover.
RIGHTDOWNWARDPIPING OTHERPIPING
Band(5)
Pipecover(4)
Band(5)
Conduitpipe
8-5/64(205)
6-1/2(165)
inch(mm)
2-5. PIPE FORMING AND INSTALLATION
Note: Referto4.FLARECONNECTION,PIPECONNECTION.
Pipe Forming
• Routethedrainhosediagonallybelowtheconnectingpipes.
• Makesurethatthedrainhoseisnotroutedupwardandthatthereareno
wavesinthehose.
• Donotpullthehosewhenapplyingthetape.
• Routethepipingsothatitdoesnotprojectpasttherearoftheindoorunit.
(Refertotheguretotheright.)
Connecting Pipe Installation
• Installtheconnectingpipessothatthepipingcanmoveslightlytothe
front,back,left,andright.
JG79Y071H02_en.indd 5 2016/01/21 13:20:03
Loading ...
Loading ...
Loading ...