Loading ...
Loading ...
Loading ...
27
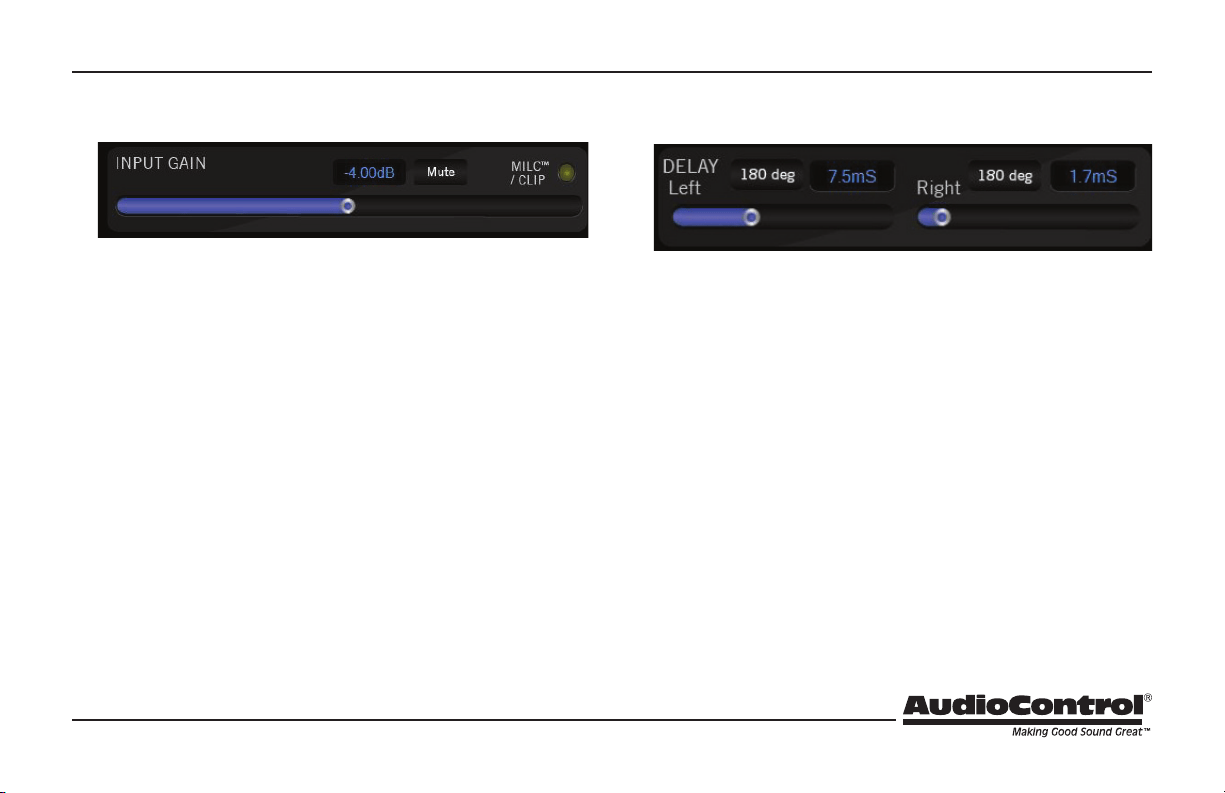
Input Gain
1. The input gain control is a slider that can be adjusted with the
mouse, arrow keys, or by numerically entering the level in dB. The
slider will move in 1 dB increments with left and right arrow key
strokes. This includes any typed-in a value, such as “-2.3” dB, then
an arrow key left will be “-3.3” dB.
2. The input signals can be quickly muted with the MUTE button.
3. Inputs 1-2 have the MILC™ circuit (see page 15) and show a yellow
CLIP light at the right side of this area. This comes on if the input
signals 1-2 are at too high a level, and the MILC™ circuit has
fullled its destiny. Turn down the input levels 1-2 to prevent this
CLIP light from coming on.
4. The input RTA is quite useful to visually conrm when each input
pair is matched in level with the others. When the source is at
maximum with pink noise, the input RTA should t the signal
nicely on the 80 dB scale.
Delay
1. The delay of each input channel can be adjusted with these sliders
and the numeric display.
2. The 180 degree phase button is a very useful feature for a quick
polarity check, and to impress your friends.
3. TIP: use the head unit’s balance control to move the signal left and
right: If the RTA gets bigger when the balance is in the middle,
then the left and right have the same polarity. If the RTA gets
smaller when the balance control is centered, then the left and
right inputs have opposite polarity. So, rather than go back to the
trunk and try to sort out the wiring harness, simply use the 180
deg buttons to determine which is the interloper. The Input RTA
will also show you which channels arriving are limited bandwidth
(high pass / low pass), this will help you determine which inputs
to use for Output Summing for a full range output.
Chapter 8: The Display: Input View
Loading ...
Loading ...
Loading ...