Loading ...
Loading ...
Loading ...
18
ENGLISH
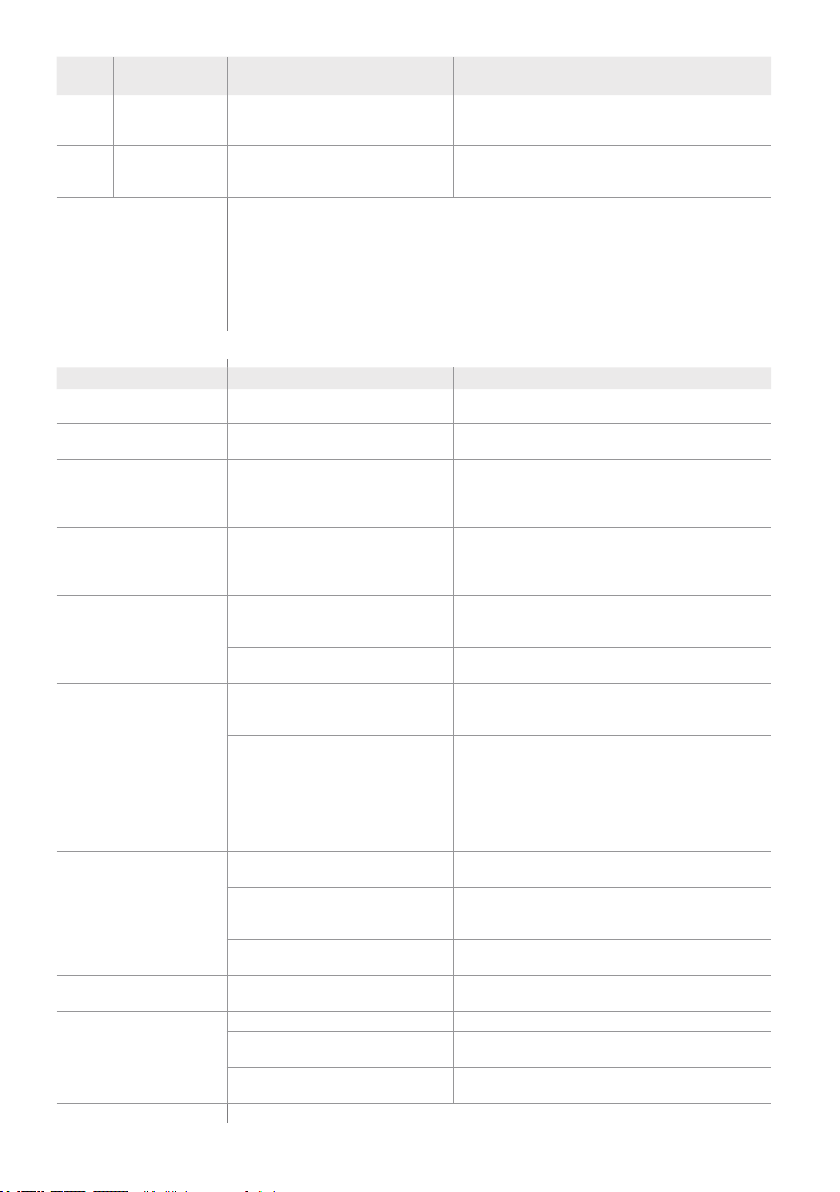
Error
code
Behaviour Cause Action
3 - 4
Brew group
locked, cannot be
taken out
The brew group is incorrectly
positioned.
Close the service door. Turn the machine off and
back on again. Wait for the ‘Ready for brewing’ signal
and then remove the brew group.
5
Water circuit
error
Air in the water circuit
Remove and restore the water tank a couple of
times, making sure to position it correctly. Check
that the water tank seat is clean.
For any other error code:
>
Turn the machine off and then back on again after 30 seconds.
>
Try 2 or 3 times.
If the machine does not start, contact the Gaggia hotline and mention the error
code shown on the display. Contacts are included in the warranty booklet supplied
separately or can be found at www.gaggia.com.
9.4 Troubleshooting table
Behaviour Cause Action
The machine does not turn
on.
The machine is disconnected or the
main switch is in the OFF position.
Plug in the machine and place the main switch in the
ON position.
The machine is in simulated
working mode.
The STAND-BY button has been
pressed for more than 8 seconds.
Turn the machine OFF and ON using the main switch.
The drip tray lls up quickly. To guarantee a perfect coffee at
every brewing, the machine rinses
and warms itself by ushing water in
the drip tray.
Empty the drip tray. To avoid that rinsing water ends
in the drip tray, place a cup below the dispensing
spouts.
The ‘Coffee grounds drawer
full’ signal is still on, even if
it’s emptied or with only
few coffee grounds in it.
The coffee grounds drawer has been
emptied while the machine was off.
After emptying drip tray and coffee grounds drawer,
wait for the ‘Close service door’ signal to be displayed.
Place the components back.
It is impossible to remove
the brew group.
The brew group is incorrectly
positioned.
Close the service door. Turn the machine off and back
on again. Wait for the ‘Ready for brewing’ signal and
then remove the brew group.
The coffee grounds drawer is in place. Remove the coffee grounds drawer before removing
the brew group.
It is impossible to insert the
brew group.
The brew group is not in the idle
position.
Make sure that the brew group is in the idle position
as described in the “7.2.1 Weekly brew group cleaning
cycle” chapter, “Reassembly phase”.
The gearbox is incorrectly positioned. Place the drip tray and coffee grounds drawer in
their proper seats. Close the service door. Turn the
machine on without the brew group. The gearbox
goes back to the correct position. Turn the machine
off and put the brew group in place following the
instructions in the “7.2.1 Weekly brew group cleaning
cycle” chapter, “Reassembly phase”.
Coffee has too little cream
or is watery.
Grinders are set to a coarse position. Adjust the grinding neness as described in the “5.3.3
Ceramic coffee grinder adjustment” chapter.
The blend is not right, coffee is not
freshly roasted or is ground too
coarse.
Change coffee blend or adjust the grinding neness
as described in the “5.3.3 Ceramic coffee grinder
adjustment” chapter.
The machine must perform the self-
adjustment.
Brew a few cups of coffee.
Coffee is leaking from the
coffee dispensing spout.
The coffee dispensing spout is
clogged.
Clean the coffee dispensing spout and its holes using
a toothpick.
Coffee is not hot enough. Cups are cold. Warm the cups with hot water.
The temperature is incorrectly
regulated.
Adjust the temperature as described in the “5.3.4
Brewing temperature adjustment” chapter.
The machine circuit is clogged by
limescale.
Descale the machine as described in the “7.5
Descaling cycle” chapter.
Loading ...
Loading ...
Loading ...