Loading ...
Loading ...
Loading ...
16
ENGLISH
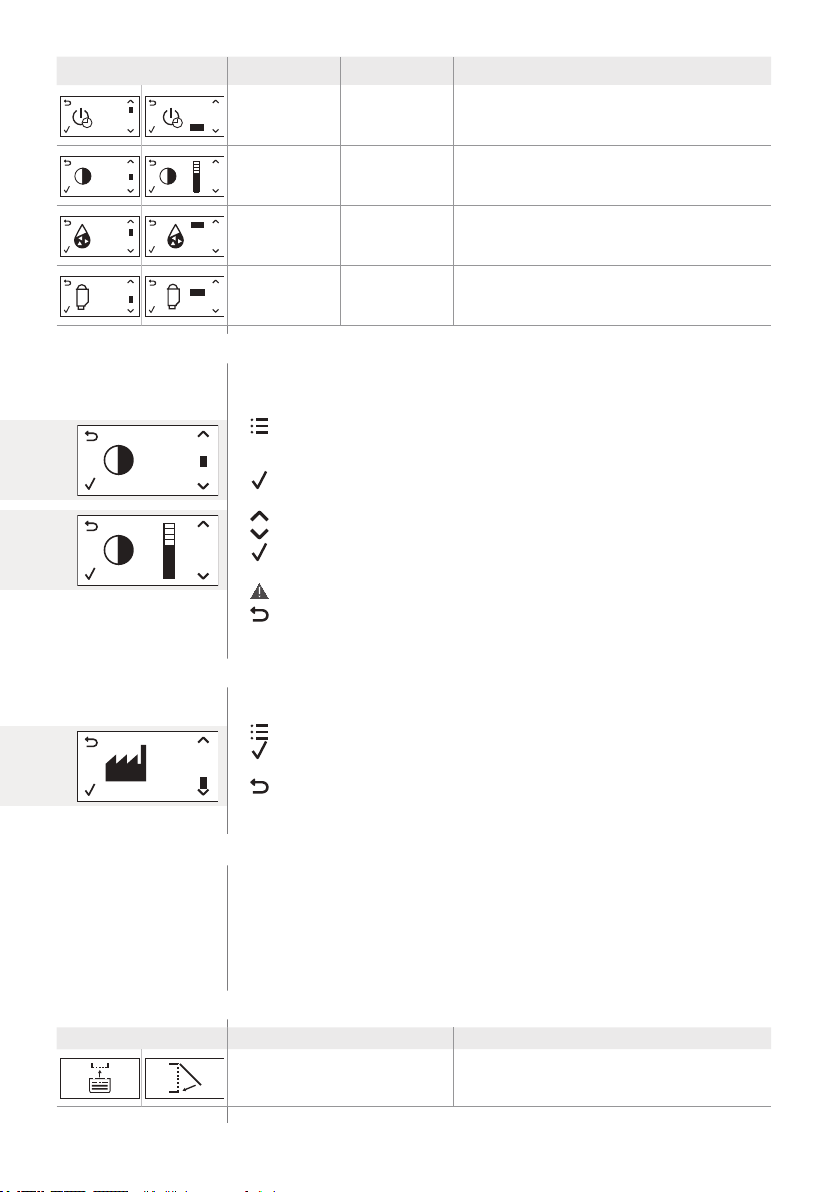
Display Setting Value Description
STANDBY
180’
60’
30’
15’
Stand-by time 15 minutes Stand-by time setting.
DISPLAY
CONTRAST
Contrast average Display contrast setting.
WATER
HARDNESS
4
3
2
1
Water hardness
4 (very hard
water)
Water hardness setting. For further details, please
refer to the “5.3.1 Water hardness measurement and
setting” chapter.
FILTER
WATER
FILTER
ON
OFF
FILTER
INTENZA+
water lter
OFF (not
installed)
INTENZA+ settings. For further details, please refer
to the “10.2 INTENZA+ water lter” chapter.
8.2 Changing the default settings
It is possible to customise the machine functions through the programming menu. The
machine must be turned on and ready to work.
If necessary, refer to the “8.1 List of default settings” chapter.
>
Press the MENU button and scroll through functions list to select the function whose
settings are to be modied.
Note: the images at the side refer to a sample function.
>
Press the OK button to select the desired function.
Once selected:
>
Press the UP button to increase the value.
>
Press the DOWN button to decrease the value.
>
Press the OK button to conrm the change.
When the change has been implemented, the OK message will be displayed.
The modied but unconrmed values will not be stored.
>
Press the ESC button to exit the programming function.
The machine automatically exits the programming mode if no button is pressed for
3 minutes.
8.3 Reset to the default settings
It is possible to restore the default settings through the programming menu. The
machine must be turned on and ready to work.
>
Press the MENU button and scroll through functions list to select the RESET function.
>
Press the OK button to select the function.
When the change has been implemented, the OK message will be displayed.
>
Press the ESC button to exit the programming function.
The machine automatically exits the programming mode if no button is pressed for
3 minutes.
9. Troubleshooting
This chapter summarises the most common issues that might concern your machine.
If the following information is insufcient to solve the problem, please refer to the
FAQ page of the www.gaggia.com website, or contact the Gaggia hotline. Contacts
are included in the warranty booklet supplied separately or can be found at www.
gaggia.com.
The machine is colour coded for easier interpretation of the display signals. The colour
code of the symbols is based on the trafc light concept.
9.1 Alarm signals summary: red display
Display Description Action
Put back the drip tray and coffee
grounds drawer; close the service
door.
Read the “7.1.1 Machine cleaning when needed”
chapter to restore the components to their proper
places.
DISPLAY
CONTRAST
RESET
Loading ...
Loading ...
Loading ...