Loading ...
Loading ...
Loading ...
12
ENGLISH
>
Clean the coffee outlet duct thoroughly with the appropriate cleaning tool, supplied
together with the machine.
>
Remove the coffee residues drawer and wash it thoroughly.
> Wash the brew group accurately with lukewarm water and clean the upper lter
accurately.
Do not use detergents or soap to clean the brew group.
>
Let the brew group air dry completely.
>
Clean the inside of the machine accurately with a wet soft cloth.
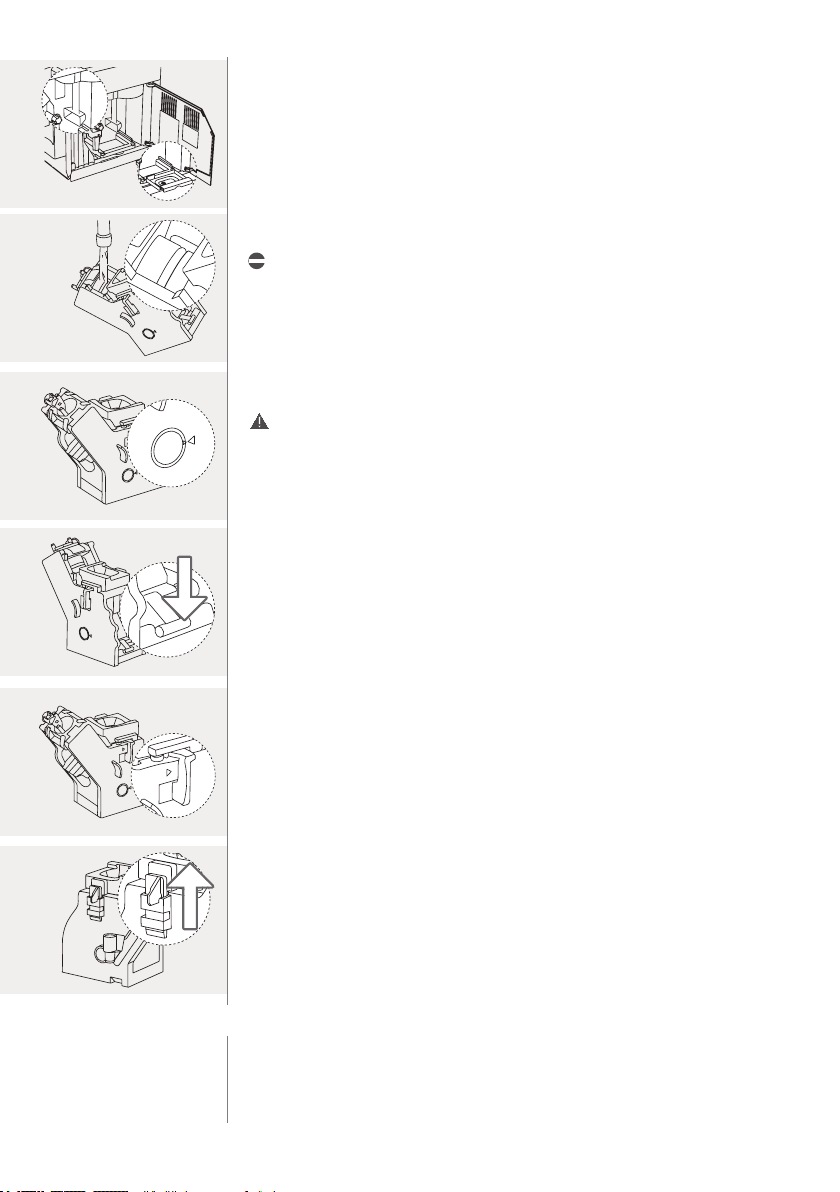
Reassembly phase
> Insert the coffee residues drawer in its seat and check that it is placed correctly.
If the coffee residues drawer is not placed correctly, it might be impossible to place
the brew group in the machine.
>
Make sure that the brew group is in the idle position: the two reference marks on the
side of the brew group must match.
> If they do not match, press the lever slightly downwards until it touches the base of
the brew group, so that the two check reference marks match.
>
Press the PUSH button hard.
> Make sure that the brew group lock is in the correct position.
>
If it is still lowered, raise it until it locks in place.
>
Put the brew group back in place until it locks, without pressing the PUSH button.
>
Put back the coffee grounds drawer with the drip tray inside the machine and close
the service door.
7.2.2 Monthly lubrication of the brewing unit (one cleaning cycle using a lubricant)
Lubricate the brew group after about 500 coffee cups brewed or at least once a month.
The lubricating grease for the brew group can be bought separately. For further details
please refer to the “10.1 Maintenance products” chapter. Perform the “Disassembly and
cleaning phase” of the “7.2.1 Weekly brew group cleaning cycle” procedure.
PUSH
N
PUSH
N
N
PUSH
N
PUSH
N
PUSH
Loading ...
Loading ...
Loading ...