Loading ...
Loading ...
Loading ...
8
OVEN USE
Odors and smoke are normal when the oven is used the rst few
times, or when it is heavily soiled.
During oven use, the heating elements will not remain on, but will
cycle on and off throughout oven operation.
IMPORTANT: The health of some birds is extremely sensitive to
the fumes given off. Exposure to the fumes may result in death
to certain birds. Always move birds to another closed and well
ventilated room.
Aluminum Foil
IMPORTANT: To avoid permanent damage to the oven bottom
nish, do not line the oven bottom with any type of foil or liner.
■ For best cooking results, do not cover entire wire shelf with
foil because air must be able to move freely.
■ To catch spills, use the baking/drip tray provided with your
oven.
Wire Shelf and Other Accessories,
Shelf Guides, Sliding Runners
IMPORTANT: To avoid permanent damage to the stainless steel
nish, do not place food or bakeware directly on the oven door
or bottom.
WIRE SHELF AND TRAYS
■ Position wire shelf and trays before turning on the oven.
■ Do not change rack positions of wire shelf and trays with
bakeware on them.
■ Make sure wire shelf and trays are level.
BAKEWARE
To cook food evenly, hot air must be able to circulate. Allow
2" (5 cm) of space around bakeware and oven walls.
Inserting the Wire Shelf and other Accessories
Insert the wire shelf horizontally by sliding it across the shelf
guides, making sure that the side with the raised edge is facing
upwards.
Other accessories, such as the drip tray and the baking tray, are
inserted horizontally in the same way as the wire shelf.
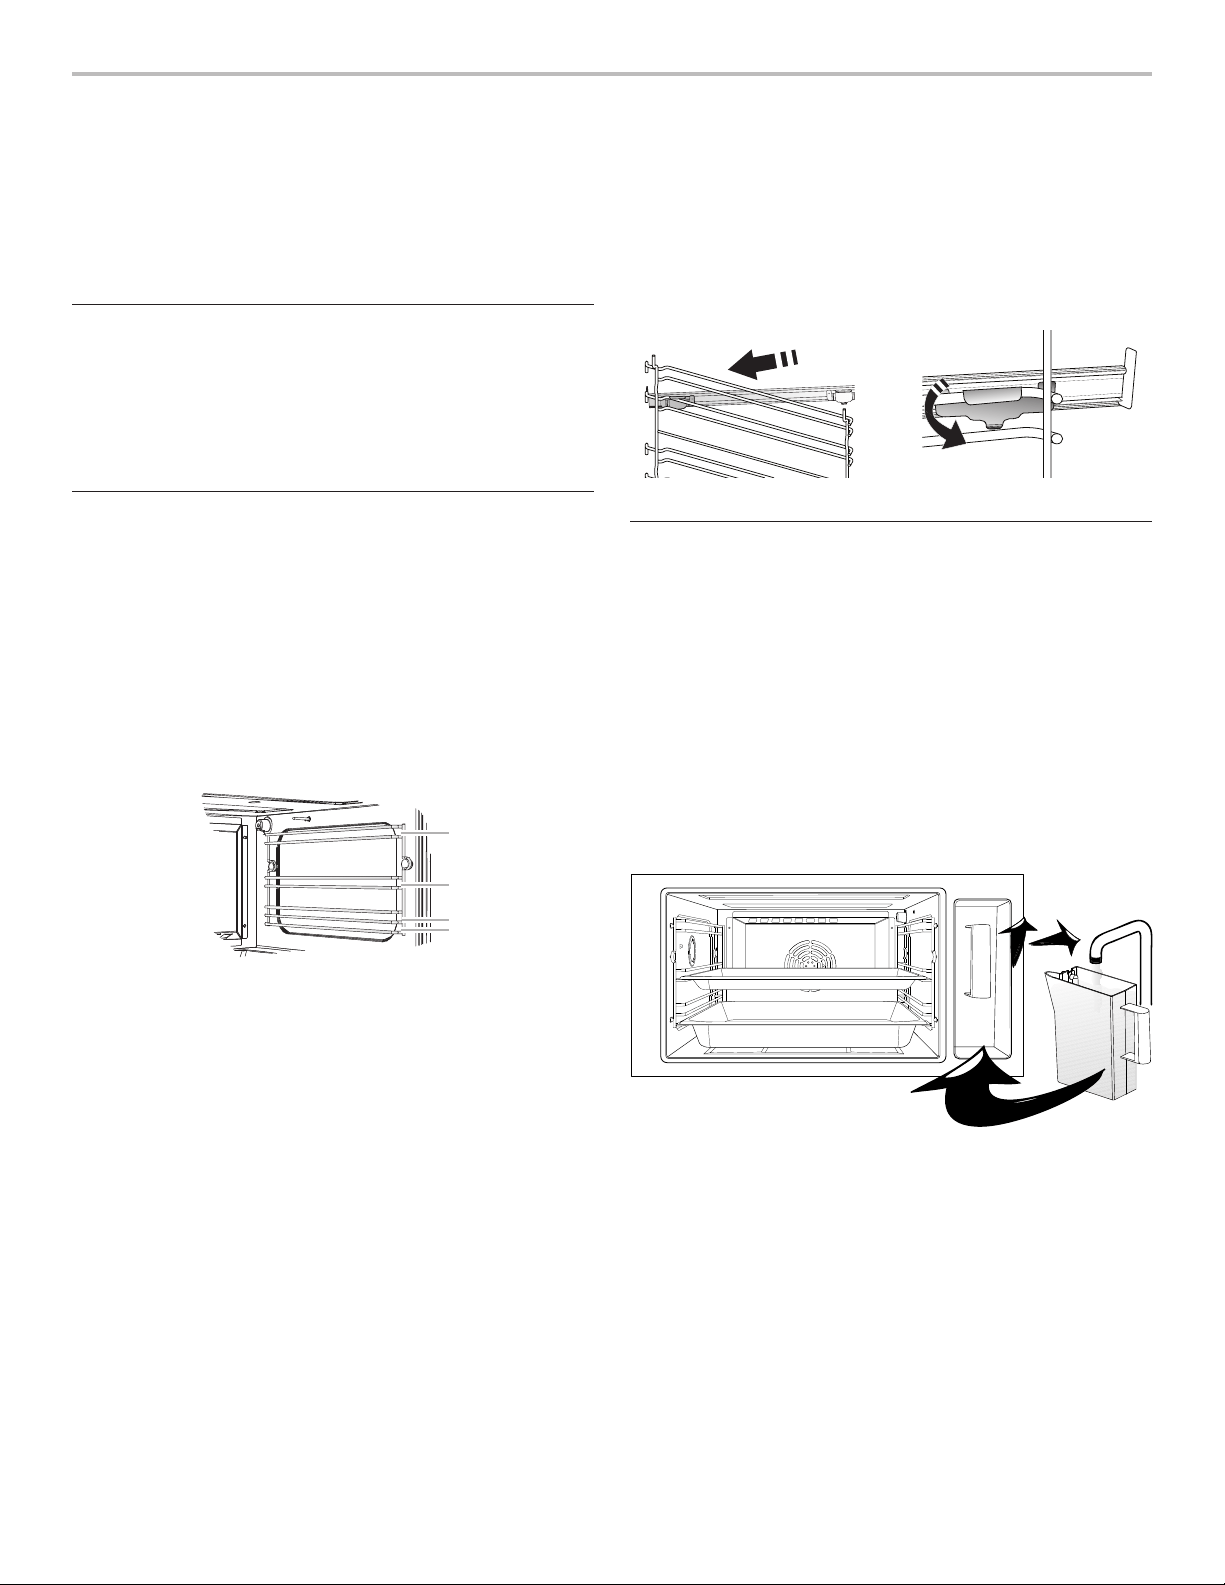
Removing and Refitting the Shelf Guides
■ To remove the shelf guides, lift the guides up and then gently
pull the lower part out of its seating. The shelf guides can
now be removed.
■ To ret the shelf guides, rst t them back into their upper
seating. Keeping them held up, slide them into the cooking
compartment, then lower them into position in the lower
seating.
Fitting the Sliding Runners (if present)
Remove the shelf guides from the oven and remove the
protective plastic from the sliding runners.
Fasten the upper clip of the runner to the shelf guide and slide
it along as far as it will go. Lower the other clip into position.
To secure the guide, press the lower portion of the clip rmly
against the shelf guide.
Make sure that the runners can move freely. Repeat these steps
on the other shelf guide on the same level.
NOTE: The sliding runners can be tted on any level.
Water Tank
The water tank is located behind the oven door and is accessible
once the oven door is opened.
IMPORTANT: Empty and replace the water tank after each use
to keep condensation from building up inside the oven. See
“Accessories” in the “General Cleaning” section for information
on cleaning the water tank.
Use only fresh tap water or still bottled water. Fill water tank with
tap water to the “MAX” mark.
IMPORTANT: Do not use distilled water, or other liquids, in the
water tank.
To Remove the Water Tank:
Slowly lift and pull the water tank out of its compartment toward
you, keeping it horizontal to allow the remaining water to drain
out of the valve seat.
To Replace the Water Tank:
With the water tank lled, position it in the water tank
compartment, then push toward the back of the oven until it
engages the contact point and is rmly seated in place.
1
2
3
4
Loading ...
Loading ...
Loading ...