Loading ...
Loading ...
Loading ...
installation & connection
28_ installation & connection
INSTALLATION (SNP-3120)
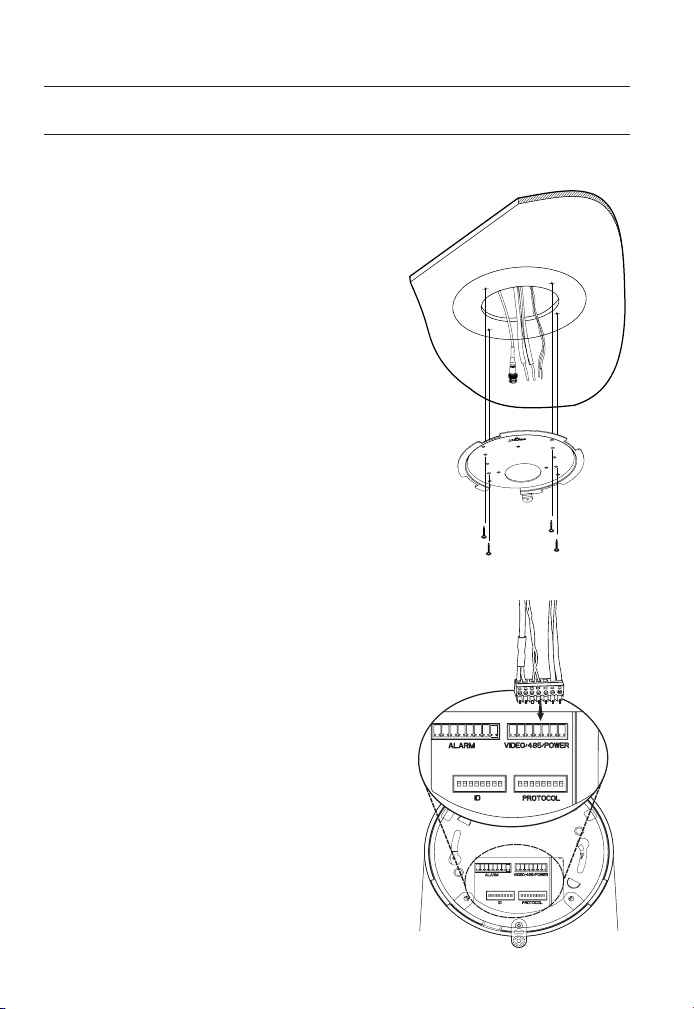
On-ceiling installation
Drill a hole of 60mm diameter on the ceiling
and run the wires down through it.
Install the Mount Bracket onto the hold and
fi x it using 4 screws.
Do not connect the camera to a power outlet
until the installation is complete. Supplying
power in the middle of the installation may cause
fi re or damage the product.
Connect each camera cable to the proper ter-
minals on the bottom of the camera. For more
detailed instructions, please refer to Page
16:
“Camera Wiring Interface Board”.
DIP switches for communication and ID setup
are located on the bottom of the camera. For
more instructions, please refer to Page
22.
1.
2.
J
3.
4.
Loading ...
Loading ...
Loading ...