Loading ...
Loading ...
Loading ...
62 electrolux.com.au
CLEANING THE ACCESSORIES
Removing the trays and shelves from the
appliance
1. Slide the tray and shelves towards you until they
reach the front stop.
2. Tilt them up at the front to clear the side supports,
taking care not to spill the contents.
3. Lift them clear.
4. Wash the tray and shelves in hot soapy water.
5. Reverse the above steps to put the tray and shelves
back again.
6. Ensure that they are placed between two
support wires.
7. To remove a shelf from slides:
- Pull shelf towards you until it stops.
- Lift the shelf clear.
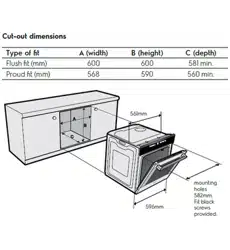
Removing the side racks
(Not required for models EVEP616 / EVEP619)
1. Grasp the middle wire at the front.
2. Pull firmly inwards while pushing back.
Slides (Telescopic runners)
• Do not subject slides to temperatures greater
than 300°C.
• Do not place slides in a dishwasher
• Do not use a knife or sharp object to clean slides.
• Do not add oil or any other lubricant to slides.
WARNING
Make sure the appliance is turned off before you
remove or replace parts to avoid the possibility of
electric shock.
Removing and replacing the oven back light and
side light (if fitted)
• Turn oven light glass anti-clockwise to remove it for
globe replacement.
• To remove side light, place a spoon under the light
glass and lever off. Replace globe and snap glass
cover back into position.
• A special high temperature resistant globe should
be used. This can be purchased from Electrolux
Customer Care Centres.
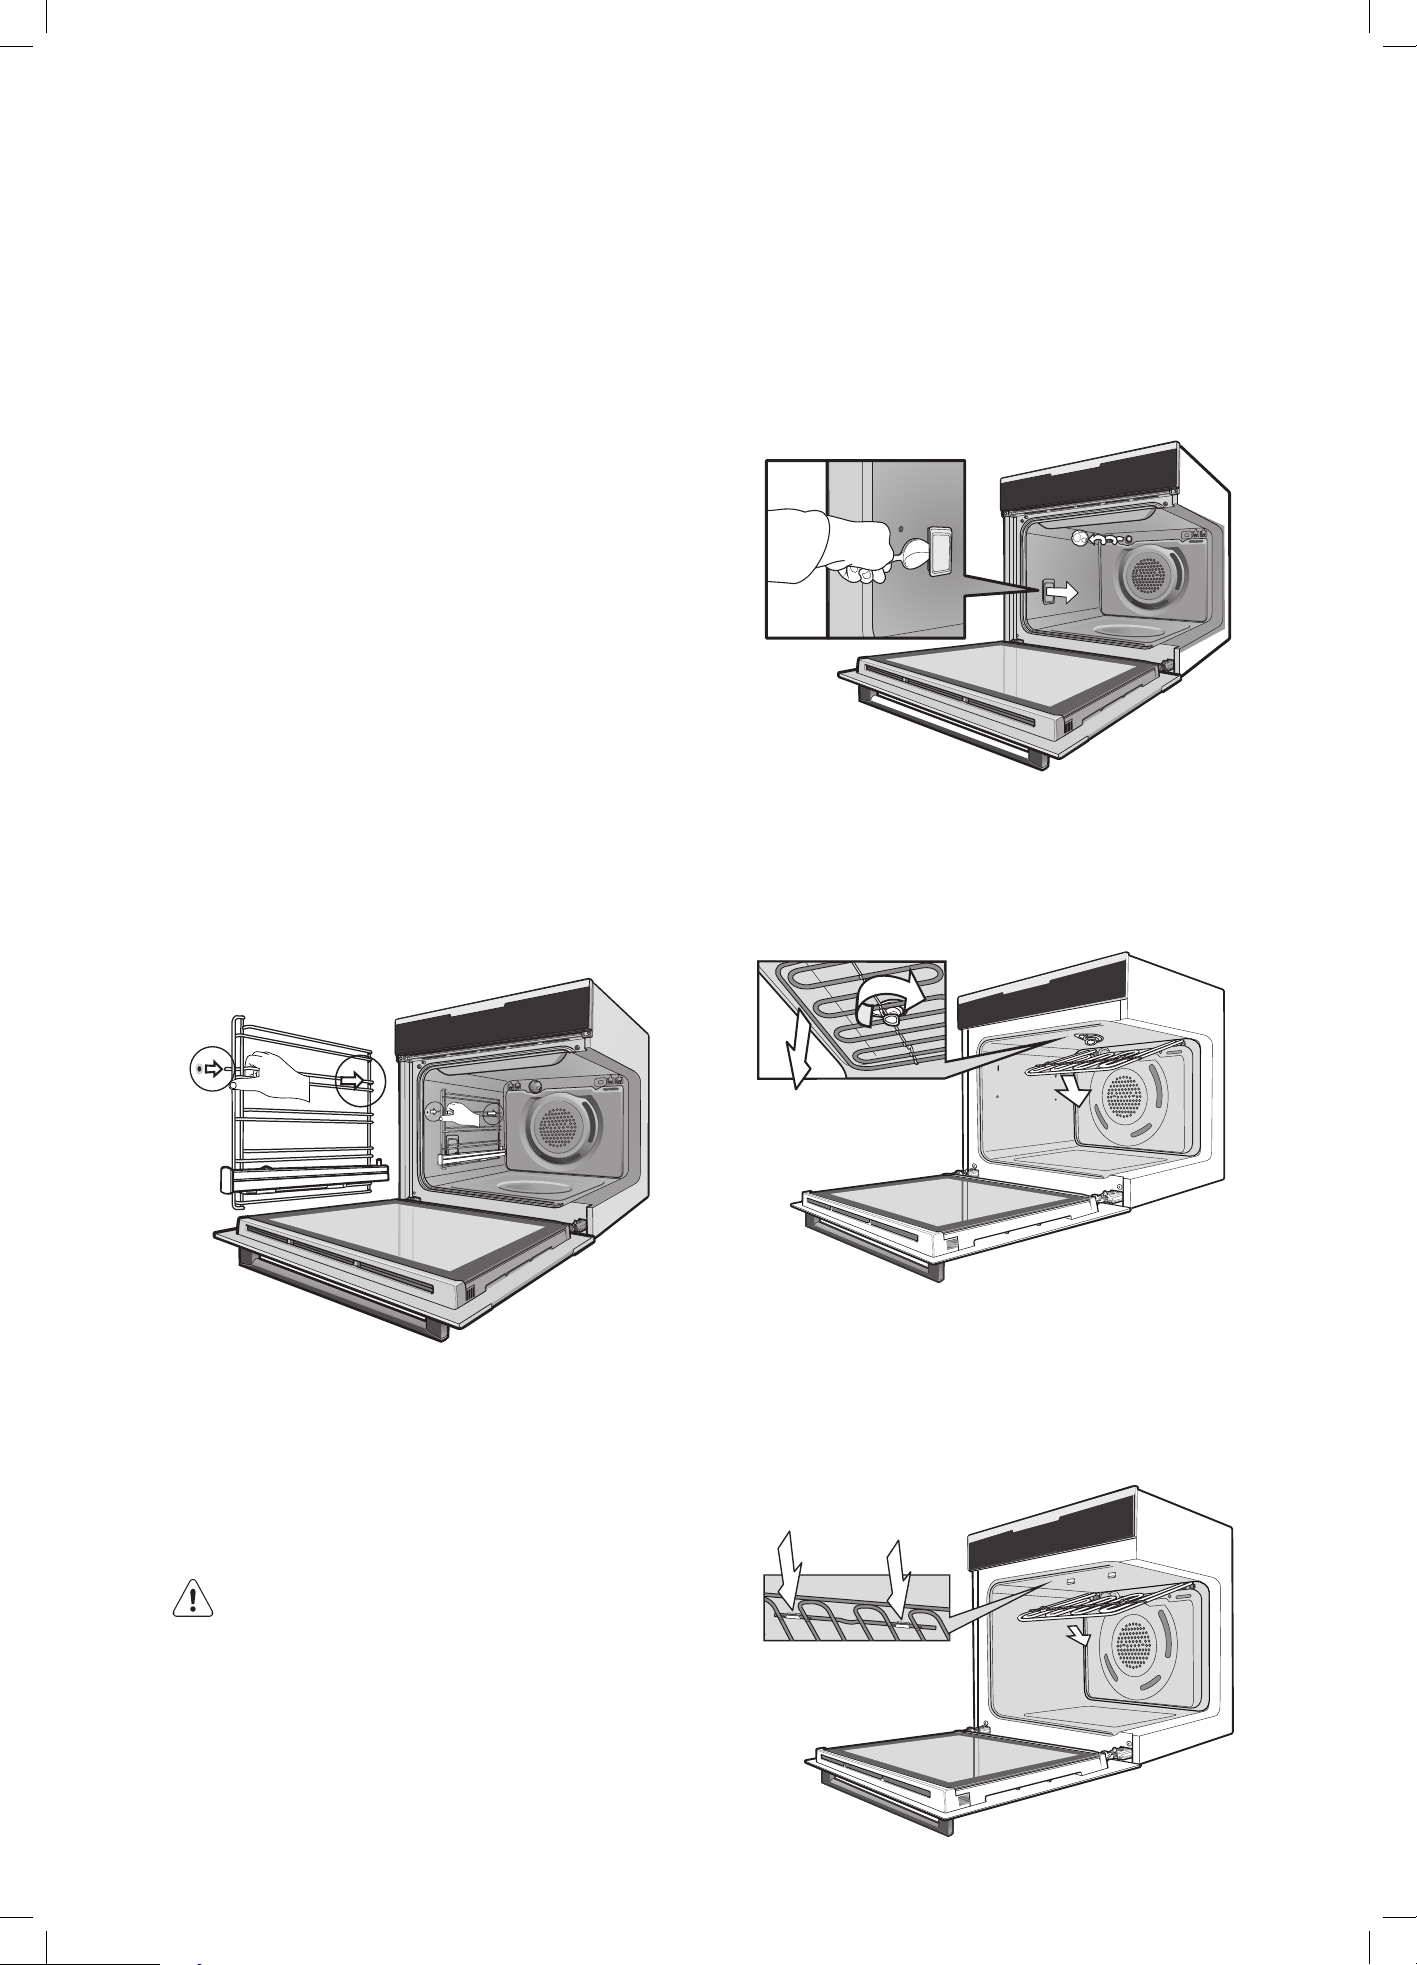
Releasing the grill element
Rotating latch models - rotate latch 180º and the grill
element will drop down freely. After cleaning, raise the grill
element and secure by rotating the latch back 180º.
Retaining clips models - The upper grill element is secured
with 2 clips which can be removed to help clean the oven
cavity ceiling. To disengage the clips, push the edge of
the clip towards back of the oven as shown below.
After cleaning raise the grill element and secure clips
back in position.
CLEANING THE APPLIANCE (CONTINUED)
Loading ...
Loading ...
Loading ...