Loading ...
Loading ...
Loading ...
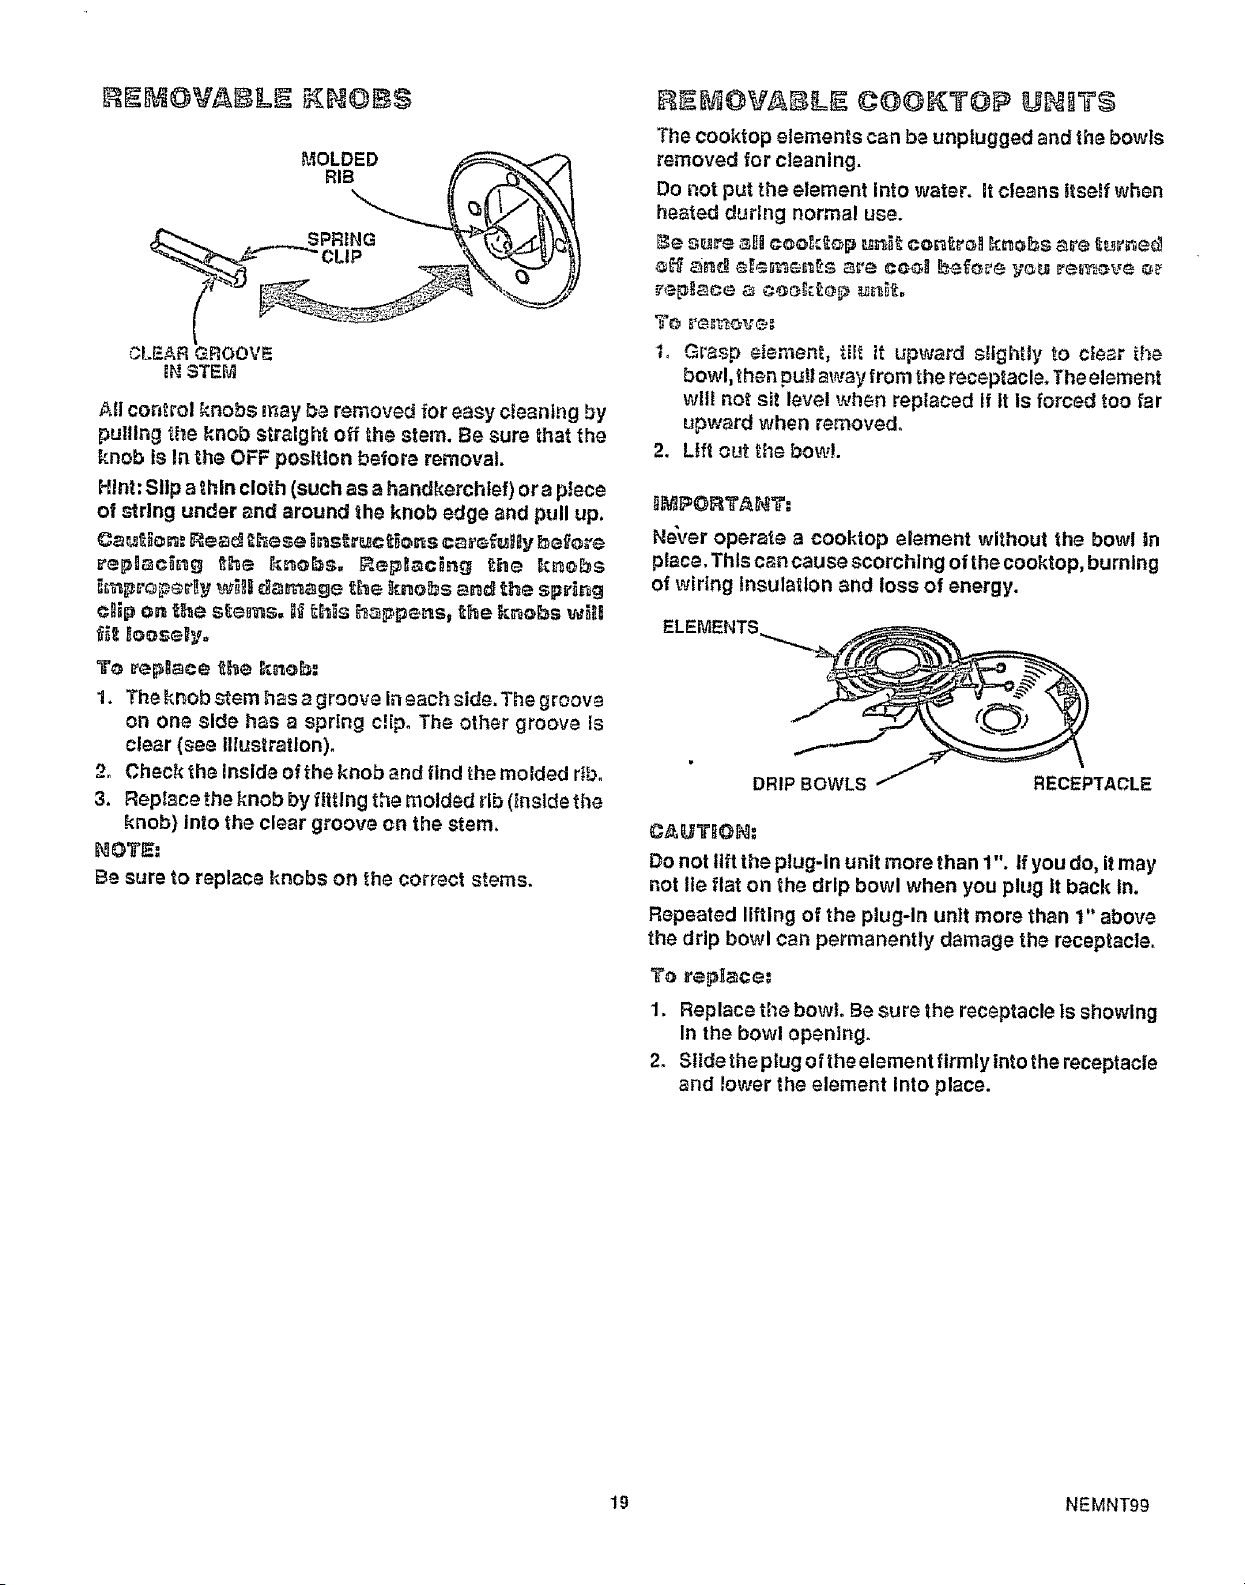
CLE_,RGROOVE
_NSTEFVt
Ali control knobs may b_ removed for easy cteantng by
pulling the knob straight off the stem. Be sure that the
knob is In _he OFF posltlon before removal
Hint: Slip a thin cloth (such as ahandkerchief) ora piece
of _rlng under and around the knob edge and pull up,
_epg_c_g _he h_o_s. _ep_cing _he _,_bs
clii_ e= _he s_e_s, _ _lh_s h_l_pe_s, _he k_e_s w_
_ I_ooseByo
To _ep_ce _he _ne_:
1. The knob _em has _groove In each _ide. The groove
on one side has a sprtng clipo The other groove Is
clear (see illustration)°
2= Check the Inside of the knob and find the molded rib.
3, Replace the knob by ftttlng the molded rib (inslde the
knob) into the clear groove cn the stem.
NOT_:
Be sure to replace knobs on the correct stems.
The cooktop elements can b_ unplugged and the bowls
removed for cleaning.
Do not put the element into water, it cleans _tsetf when
heated during normal use.
I, G='asp element, tilt it upward stightly to ciecr the
bowl, then pu_laway from the receptacle. The element
will not sit level when replaced If ft is forced too far
upw,_rd when removed,
2. Lift out the bowl
_i_PORT_.NT:
Ne\_er operate acooktop element without the bowl in
place, Thle can cause scorching of the cooktop, burning
of wiring insulation _nd loss of energy.
RECEPTACLE
C_T_OH!:
Do not lift the plug-in unit more than 1". If you do, it may
not lie flat on the drip bowl when you plug It back In.
Repeated lifting of the plug-In unit more than 1" above
the drip bowl can permanently damage the receptacle.
1. Replace the bowto Be sure the receptacle Is showing
In the bowl opening.
2. Stide the plug of the element firmly lnto the receptacle
and lower the element Into place.
19 NEMNT99
Loading ...
Loading ...
Loading ...