Loading ...
Loading ...
Loading ...
13
Left Side
In order to prevent the oven from tipping forward as shown on the previous
page, we need to make sure both chains provided with the oven are used.
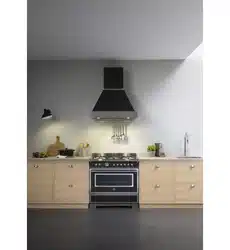
On the left side of the oven a 16mm drill bit was used to drill through the
cabinetry into the adjacent cabinet, as you can see the hole has not been
drilled hard up against the wall because there is a 16 mm board at the rear
of the cabinet. The heigt of the hole from the floor is level with where the
chain attaches to the oven.
The right side has been drilled much the same, a new hole has been
drilled below the gas and power supply hole
Once the holes have been drilled the chains can be fed trough and the
upright can be fitted into position.
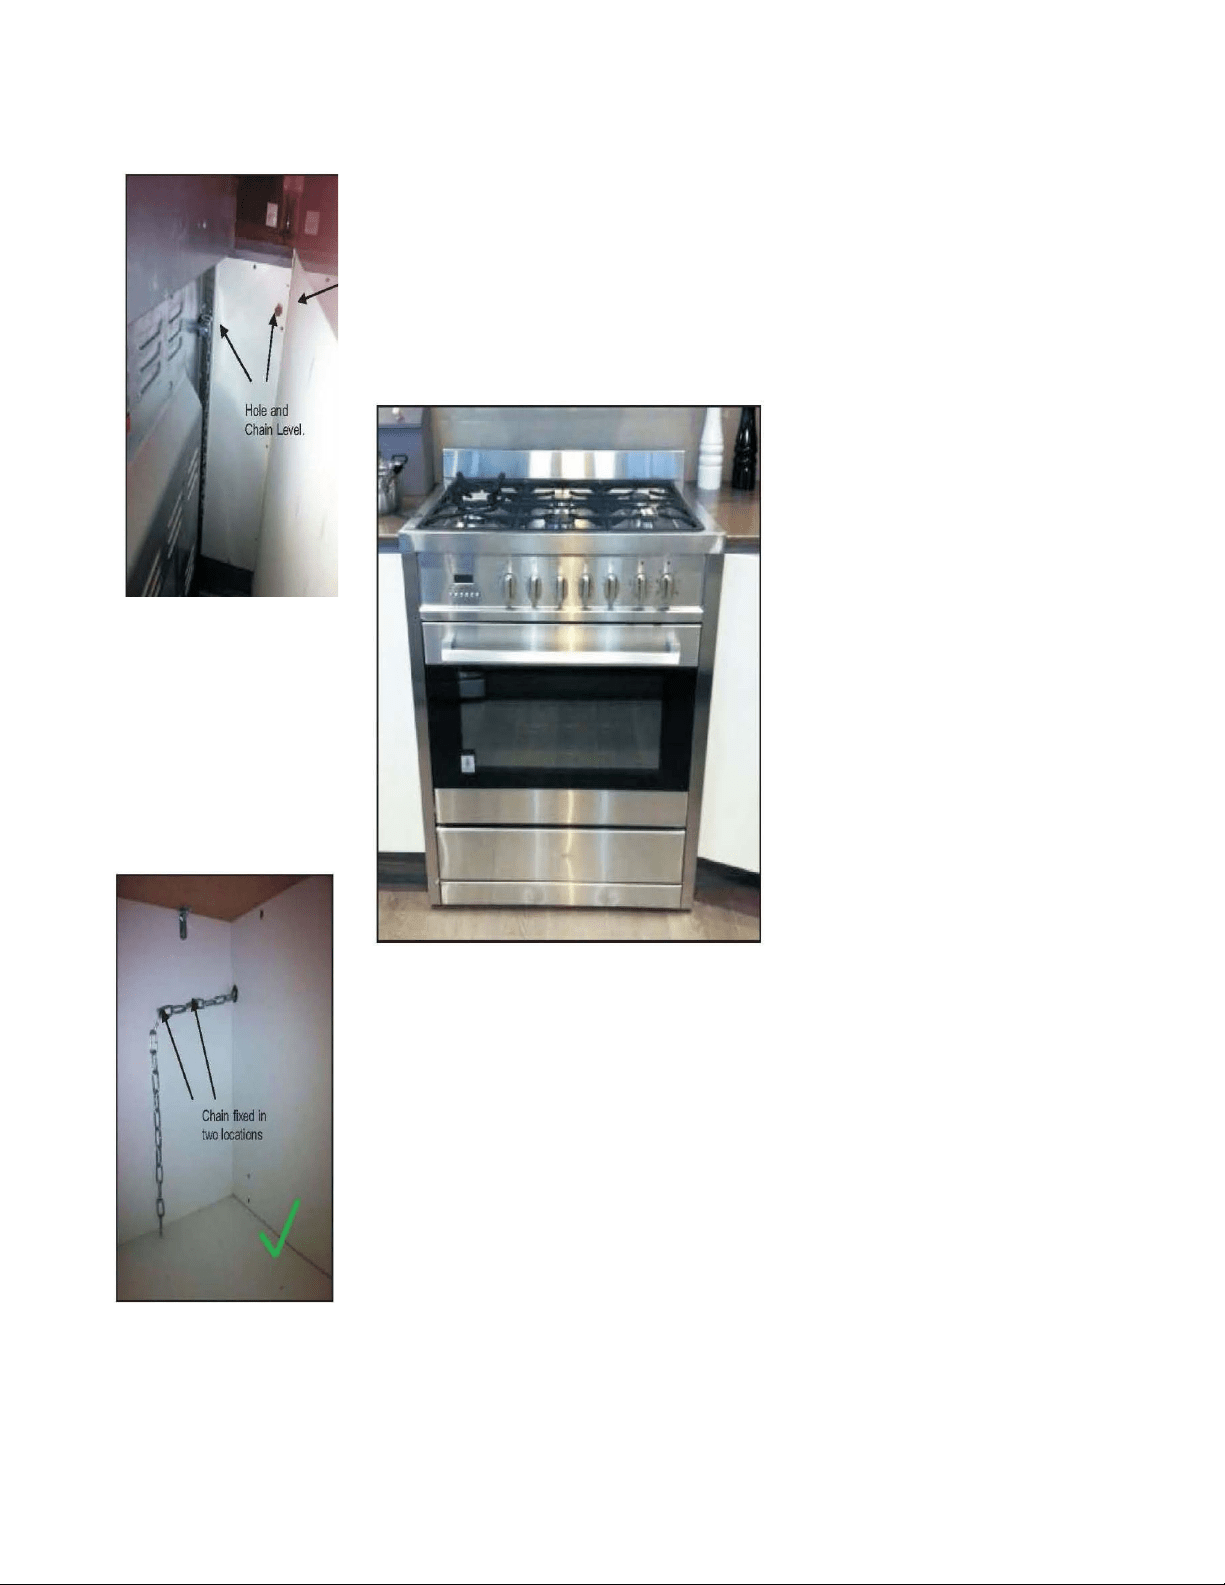
The chains then need to be pulled as tight as possible from inside the
cabinet using a self drilling wood screw. It is better to have the screw fixed
closer to the hole for better support. The left and right side examples shown
have two extra screws attached to the chain which makes the installation
neater by keeping the chain off the shelf away from the gas and electricity
supply, they will also provide added support.
At this point the oven will be secured in location and will not move forward
at all, it is recommended that all upright oven chains be fitted in this way.
Installation forms part of the installer compliance and that in line with AGA
regulations chains are designed to be installed to prevent cooker from
tilting. They are not designed to replace parental supervision when the
cooker is in use.
Loading ...
Loading ...
Loading ...