Loading ...
Loading ...
Loading ...
32
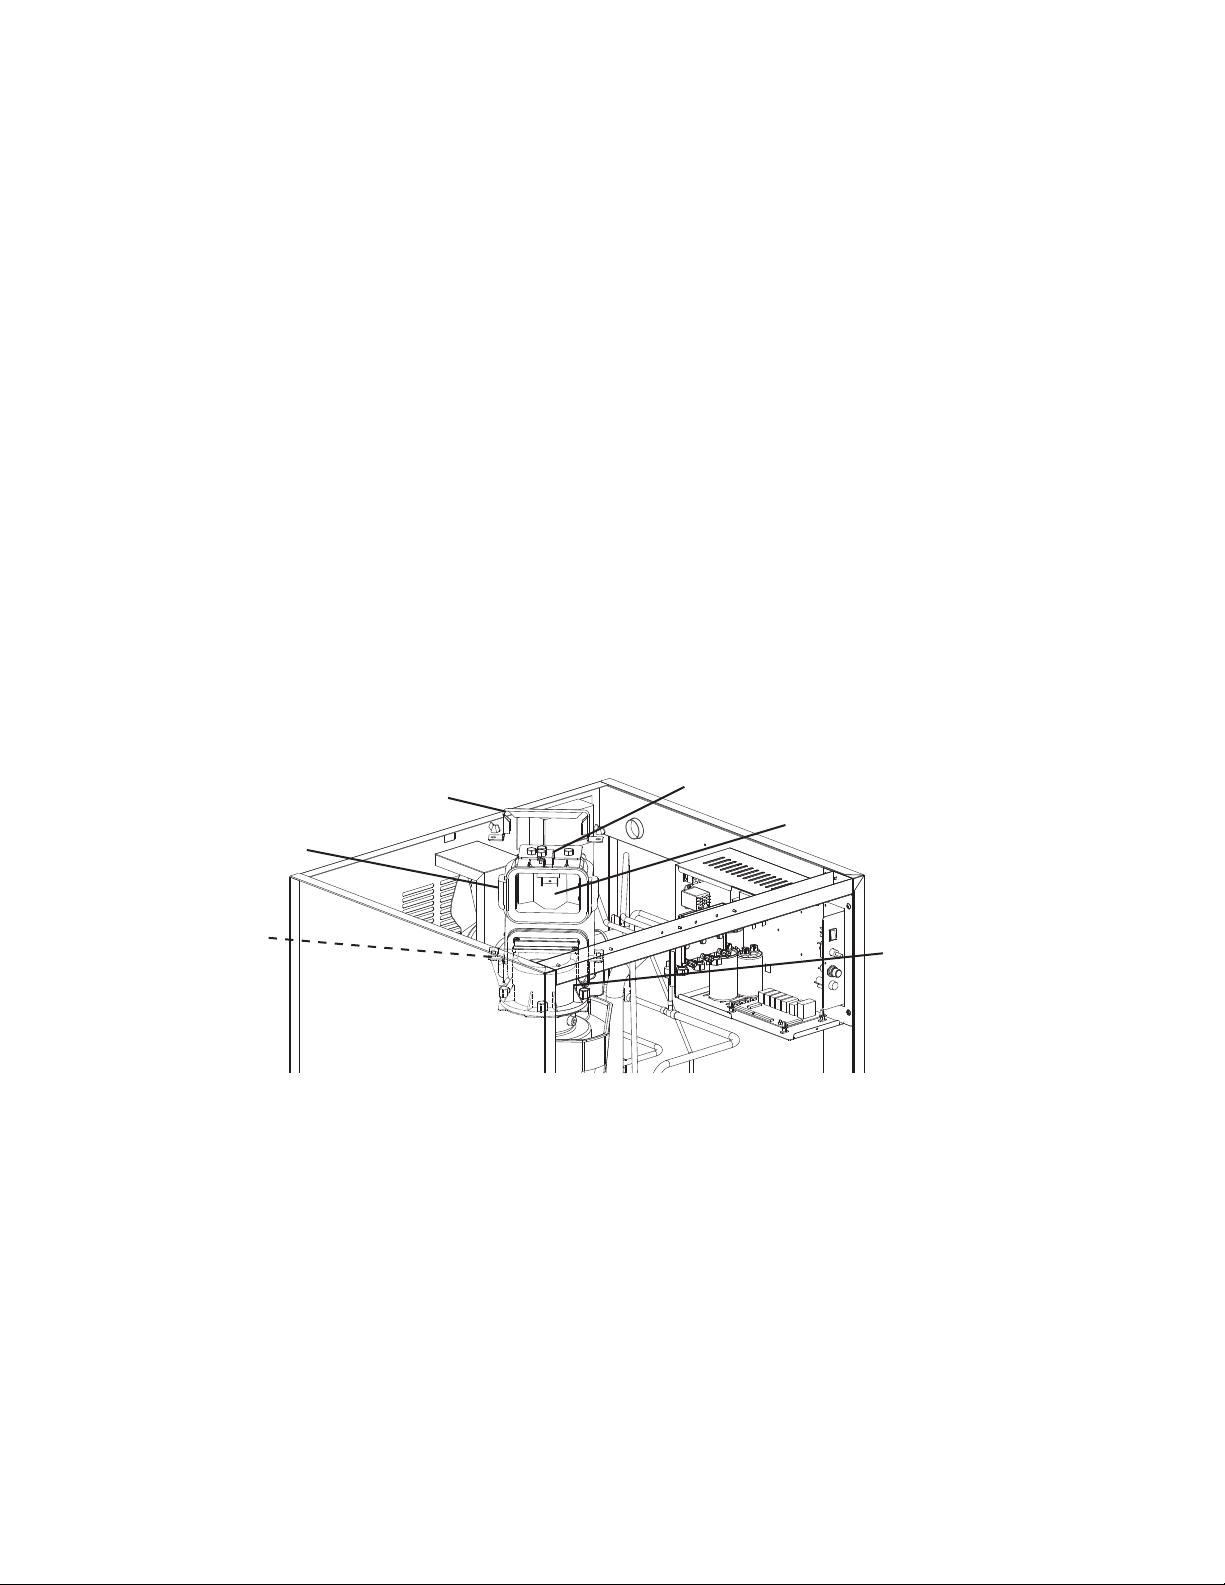
Fig. 5
Chute Assembly
Actuator Paddle
Spout
Strap
Proximity Switch
Strap
Model Shown: F-1501MRH-C
2. Bin Control (2) (mechanical stand-alone or backup) Check
When the actuator paddle is not engaged BC(2) is closed and the icemaker produces
ice.
a) Bin Control (Mechanical Stand-Alone): With CB S1 dip switch 7 placed in the
"OFF" position, BC is used as a stand-alone bin control. The stand-alone application
should only be used in standard ice storage bin applications.
WARNING! Do not place CB S1 dip switch 7 in the "OFF" position on
dispenser unit applications. This could lead to icemaker movement or ice
overow. When ice lls the chute and engages the actuator paddle, BC opens and
CB shuts down the icemaker within 10 sec.
b) Bin Control 2 (Mechanical Backup): With CB S1 dip switch 7 placed in the
"ON" position, BC2 is used as a backup bin control safety. When ice lls the chute
and engages the actuator paddle, BC2 opens and CB shuts down the icemaker
immediately and sounds a 9-beep alarm.
1) Make sure the power supply is off. Remove the front panel, top panel, and control box
cover.
2) Remove the strap connecting the spout to the chute assembly. See Fig. 5. Pull up the
chute assembly slightly so that you can access the actuator paddle located in the top of
the chute.
3) Move the power switch to the "ON" position.
4) Turn on the power supply to start the automatic icemaking process.
5) Make sure CB "GM" LED is on. There is a delay of at least 30 sec. before "GM" LED
turns on after power-up. After "GM" LED turns on, press CB "SERVICE" button to
bypass the 5-min. compressor delay. WARNING! Risk of electric shock. Care should
be taken not to touch live terminals. The "COMP" LED turns on.
Loading ...
Loading ...
Loading ...