Loading ...
Loading ...
Loading ...
Owner’s Manual 33
Operations
Foot Position / Pedal Strap Adjustment
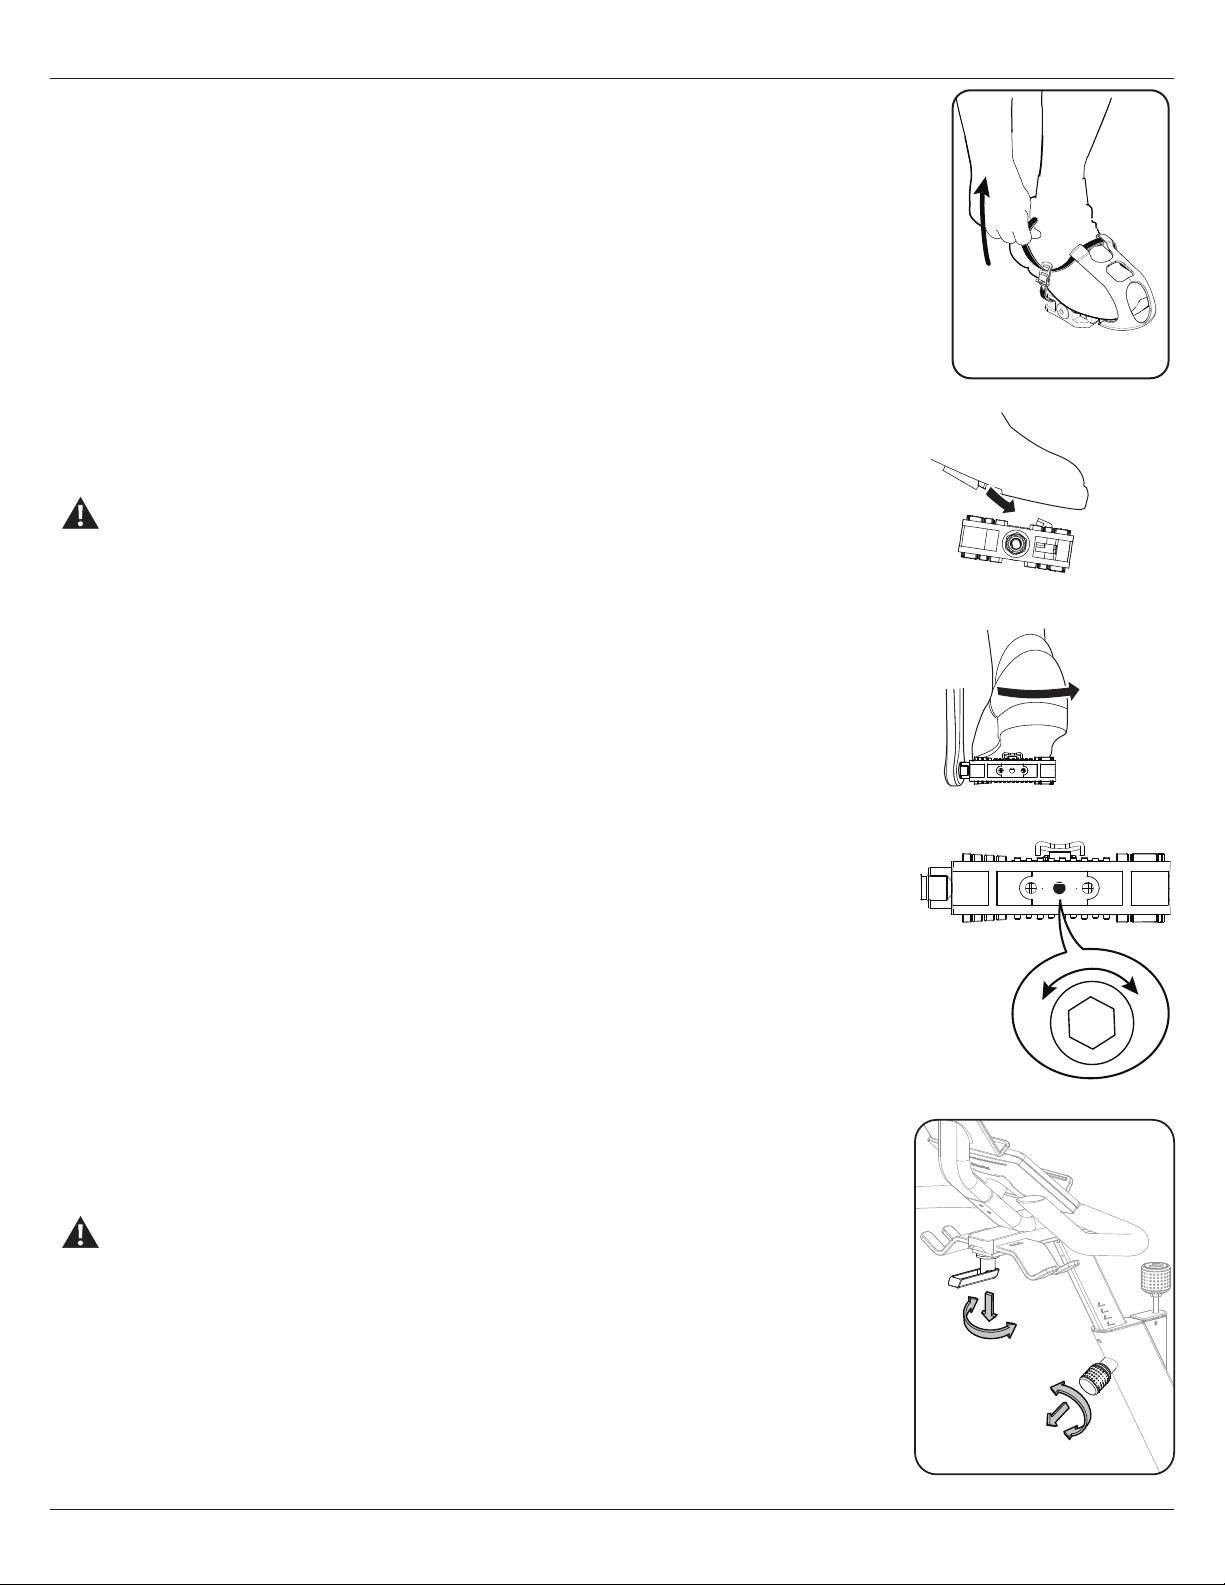
Foot pedals with straps provide secure footing to the exercise bike.
1. Put the ball of each foot in the Foot Restraint on the Pedals.
2. Fasten the strap over the shoe.
3. Repeat for the other foot..
Be sure toes and knees point directly forward to ensure maximum Pedal eiciency. Pedal straps can be
left in position for subsequent workouts.
Using the Shoe Clips (Cleats)
Foot pedals that are equipped for cycling shoes with cleats provide secure footing on the exercise bike.
Be sure to turn the Pedals so that the Foot Restraint is under the Pedal.
Prior to use, make sure you understand the operation of the engagement / release mechanism for
the pedals and cleats (shoes).
1. Be sure that the arrow on top of the Pedal points forward.
2. Push the cleat down and forward to engage the Pedal..
3. Repeat for the other foot.
4. Practice engaging and disengaging from the Pedals before starting your workout.
To disengage (release) the cleats from the pedals, push the heels outward and lift.
If the body weight of a user is very low, the user may have diiculty with operation of the engagement/
release mechanism in the Pedals. It may be necessary to decrease the retention force of the mechanism.
To adjust the retention:
1. Locate the opening in the rear of the Pedal for access to the adjustment bolt. It is between the 2 screws
that attach the Foot Restraint to the Pedal.
2. Use a 3mm hex wrench to turn the adjustment bolt. To decrease the retention, turn it left
(counterclockwise). To increase the retention, turn it right (clockwise).
Handlebar Adjustment
To adjust the handlebar position:
1. Loosen and pull the Handlebar Post Adjustment Knob on the Handlebar Post to disengage the pop pin
as you hold the post to prevent it from dropping. Adjust the Handlebar to the desired height.
Do not lift the Handlebar Post above the “STOP” mark on the Handlebar Post.
2. Release the Handlebar Post Adjustment Knob to lock the pop pin in the desired hole in the Handlebar
Post. Be sure that the pin is fully engaged and fully tighten the adjustment knob.
NOTICE: Do not cut or pinch the cables.
3. To move the Handlebar closer to, or away from the seat, loosen the Handlebar Slider Adjustment
Handle. Slide the Handlebar to the desired position and fully tighten the handle. Pull the handle down and
turn so that it is aligned with the Handlebar Track, then release.
Engage
Disengage (release)
-
+
Loading ...
Loading ...
Loading ...