Loading ...
Loading ...
Loading ...
68
31-1000600 Rev. 0
Installation Instructions - Custom Overlay Door Panel
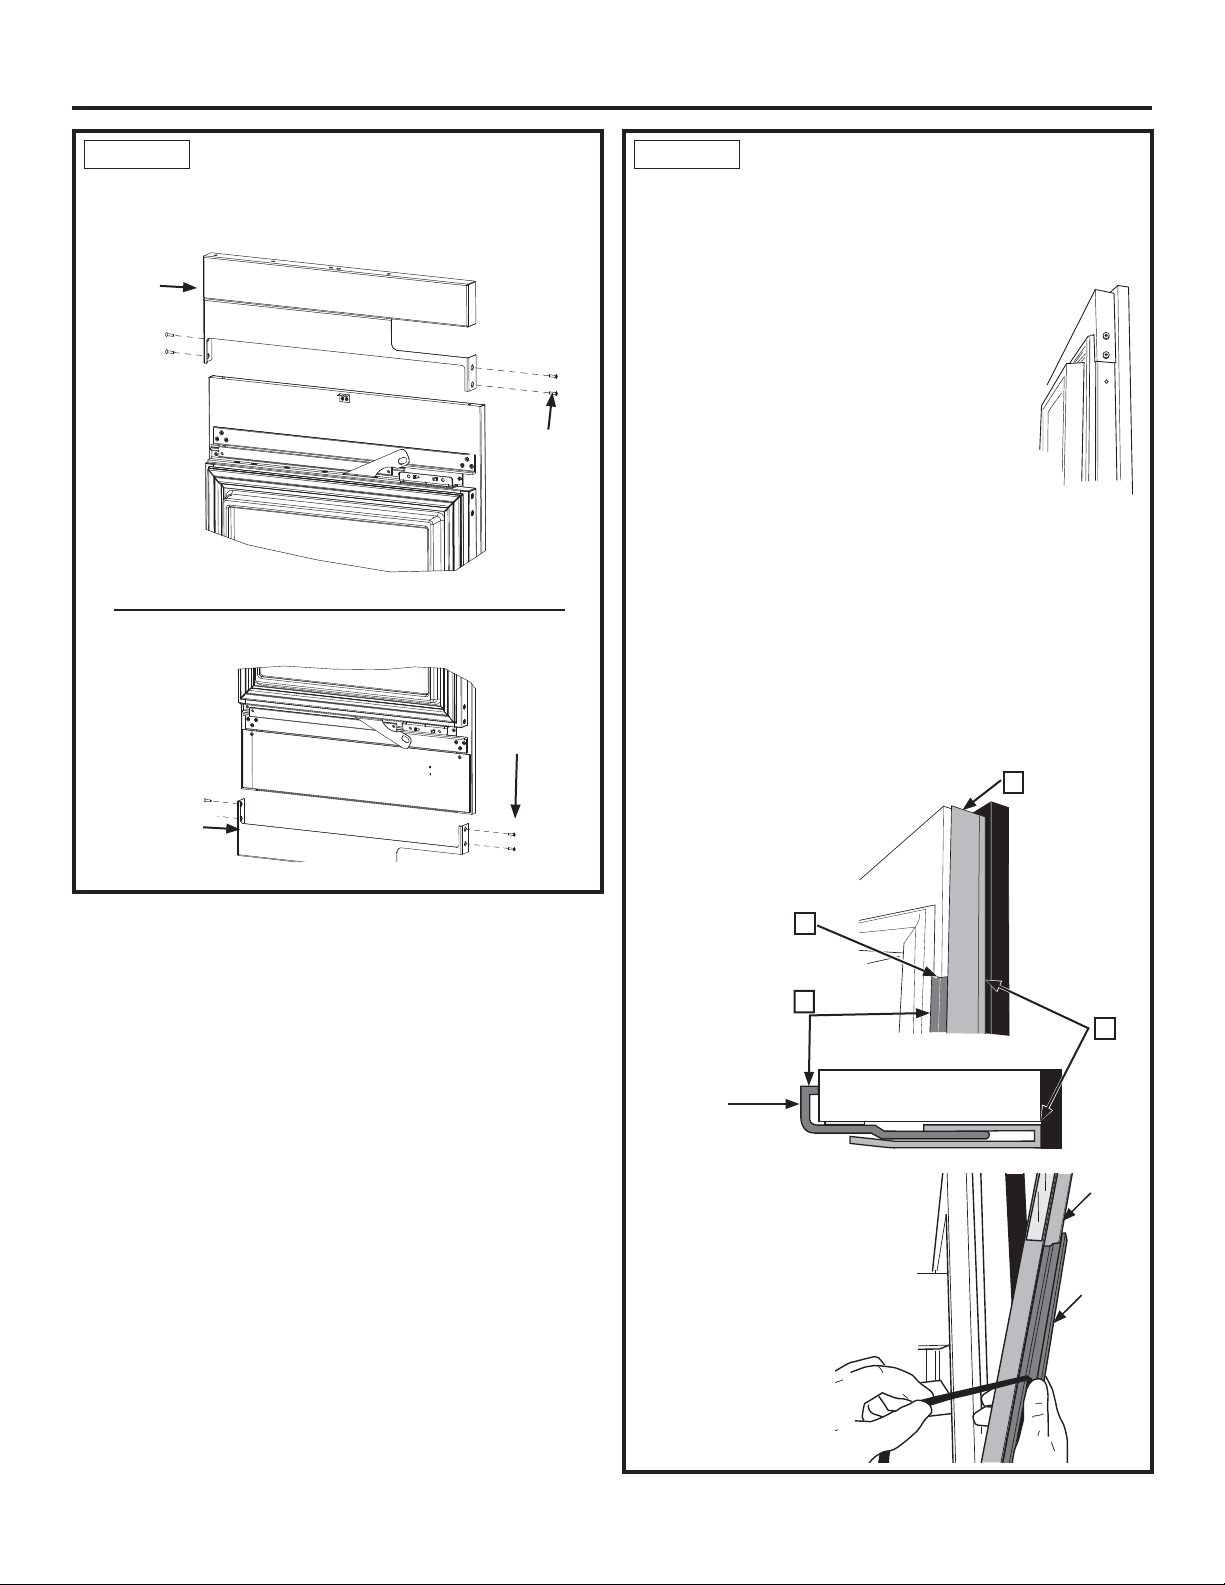
STEP 6 INSTALL DOOR TRIMS
There are 2 door trims to install. One for the handle
side and one for the hinge side. The long trim is for the
handle side and the shorter trim is for the hinge side.
Install the handle side trim first.
Ŷ Clean the side of the door, including the
side of the top and bottom hinge covers
with rubbing alcohol to improve trim
adhesion.
Ŷ The side trim is made up of an outer trim
and an inner trim. Adjustments need to be
made before adhering to the side of the
door. Without removing the backing to the
tape strips, test the fit of the trim to the
side of the door.
1. Align the top of the outer trim to the top of the door
panel
2. Inner trim should fit between the top and bottom
hinge covers
3. Make sure outer trim is setting flush against the
back of the door panel
4. Adjust the inner trim until it is flush against the
back of the door by pushing into the outer trim.
Ŷ Once the test fit is
complete, remove
the trim and peel
8-10” of backer off
of the top of the
inner trim tape.
STEP 5 INSTALL HINGE COVERS
Ŷ Replace the top and bottom hinge covers using
4-T30 screws per cover.
Inner
Trim
Outer
Trim
1
3
2
4
Door
Panel
P
a
n
e
l
Push to
adjust
Top Hinge
Cover
T30 Torx
Screws
Bottom
Hinge
Cover
T30 Torx
Screws
Loading ...
Loading ...
Loading ...