Loading ...
Loading ...
Loading ...
13
31-1000600 Rev. 0
Installation Instructions - Reversing the Door Swing
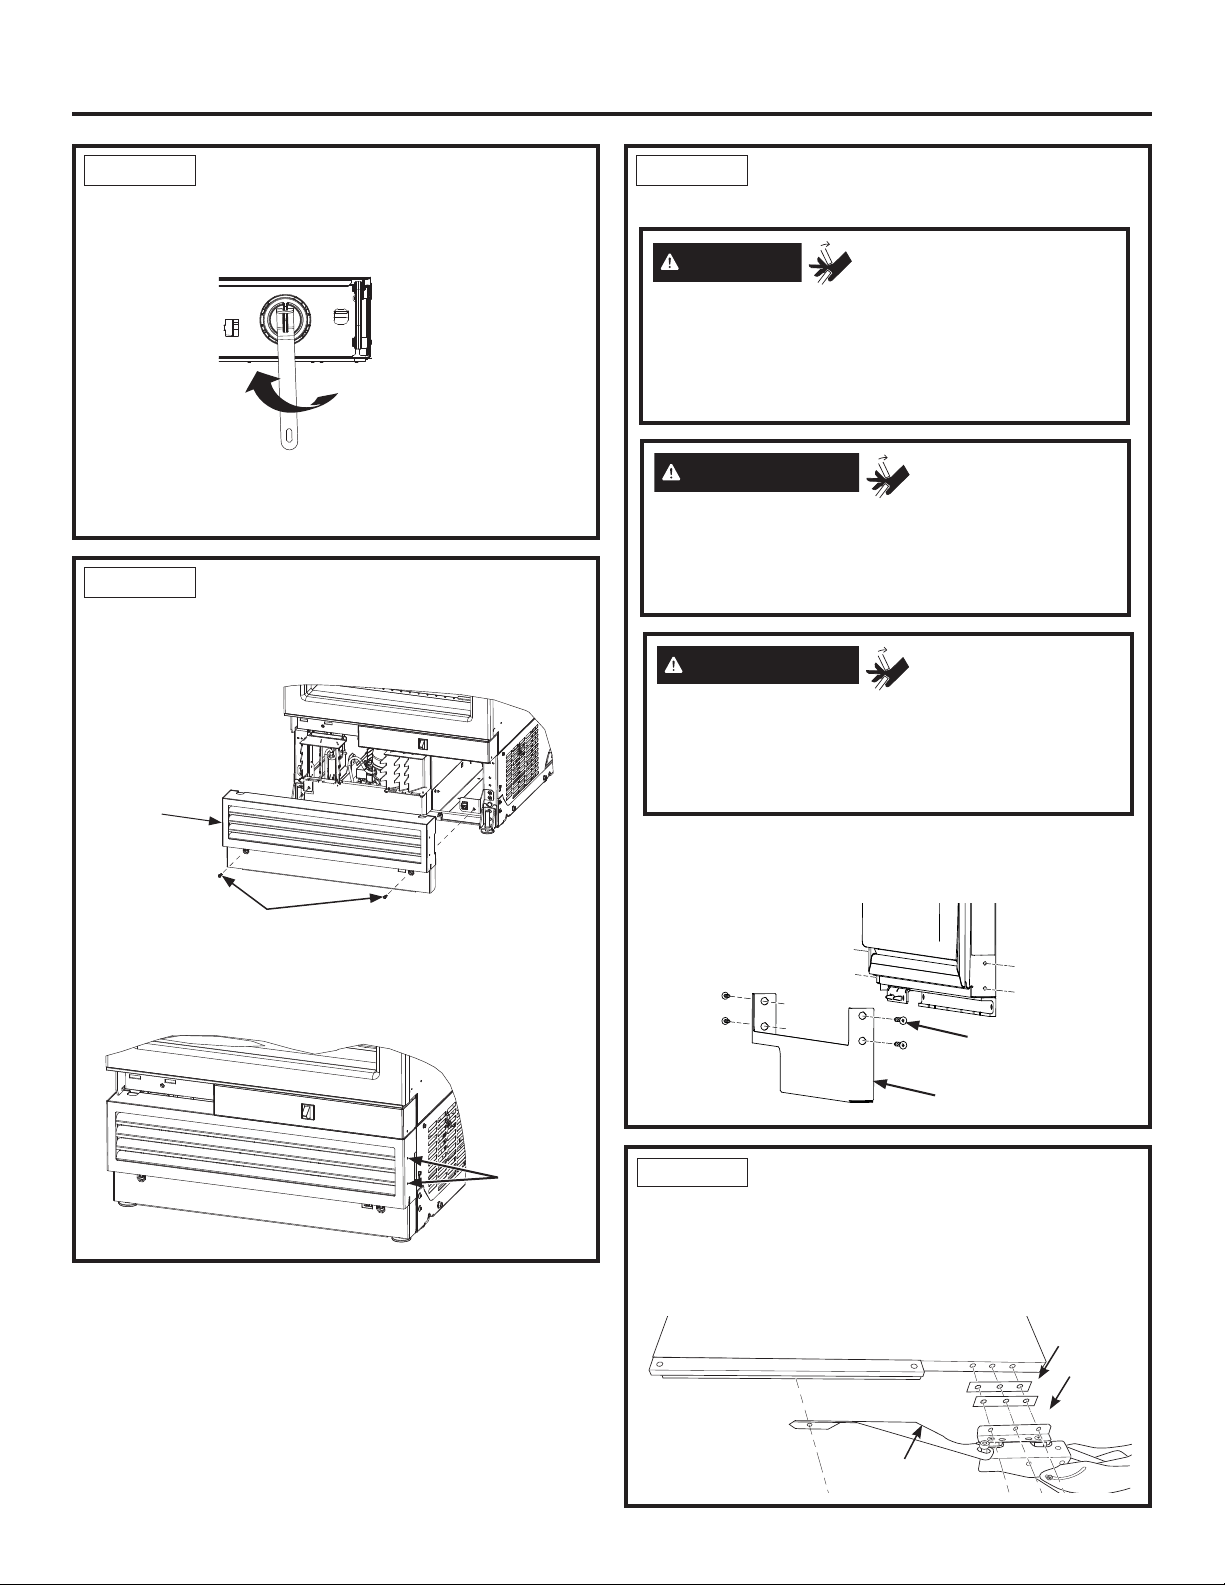
STEP 8 REMOVE HINGES Bottom
Hinge Cover
Ŷ Remove bottom hinge cover. Retain cover and
screws for reversing hinge covers during SS door or
custom overlay panel installation.
WARNING
Door Hinge Pinch
Point Hazard
Door hinges are under tension and should be left in
the open position throughout the reversal process.
Closing the hinge can lead to a finger pinch point
hazard.
STEP 6 REINSTALL THE
ENCLOSURE (Cont.)
Ŷ,QVHUW¿OWHULQWRSRVLWLRQDQGURWDWHóWXUQFORFNZLVH
XVH¿OWHUUHPRYDOWRROLIQHHGHG
Ŷ5HWXUQ¿OWHUUHPRYDOWRROWRPRXQWLQJKRRN
Ŷ
Close the compartment door.
STEP 7 REINSTALL THE FRONT
ACCESS COVER
Ŷ Put the access cover back onto the unit and secure
with two 1/4” hex head screws.
Ŷ Verify the two 1/4” hex head screws are assembled
to handle side of the products for both freezer and
fresh food columns.
1/4” Hex Screws
Access
Cover
1/4” Hex
Screws
Bottom
hinge
cover
T30 Torx
screws
AVERTISSEMENT
Risque de
pincement de doigts
Les charnières de porte sont sous tension et doivent être
laissées en position ouverte durant toute la procédure
d’inversion. La fermeture de la charnière peut poser un
risque de coincement de doigts.
ADVERTENCIA
Riesgo de
Lastimadura con la Bisagra de la Puerta
Las bisagras de la puerta se encuentran bajo tensión
y se deberán dejar en la posición abierta, a través del
proceso de inversión. Cerrar la bisagra podrá producir un
riesgo de lastimadura de dedos.
STEP 9 REMOVE HINGES FROM
DOOR
Ŷ Remove 3 screws securing each hinge from the top
and bottom of the door and one screw securing the
support bracket to the door (T-30 Torx)
Hinge
Support
Bracket
Shims
Loading ...
Loading ...
Loading ...